SeaX Bulk Send/Call with SeaChat
SeaX Bulk Send/Call with SeaChat
SeaX bulk messaging offers a powerful way to manage communications across multiple business channels from a single platform. With SeaX, you can not only send messages to different customers but also automate these conversations by integrating with SeaChat.
This guide will walk you through the process of sending bulk messages and calls using SeaX and SeaChat, helping you streamline your business communication.
Set Up Workspace
To integrate SeaX with SeaChat, you’ll need a phone number to send messages and an AI agent to handle the conversations. You can find phone numbers in the Numbers section under Workspace on SeaX and AI agents in the Agents section under Workspace on SeaChat.
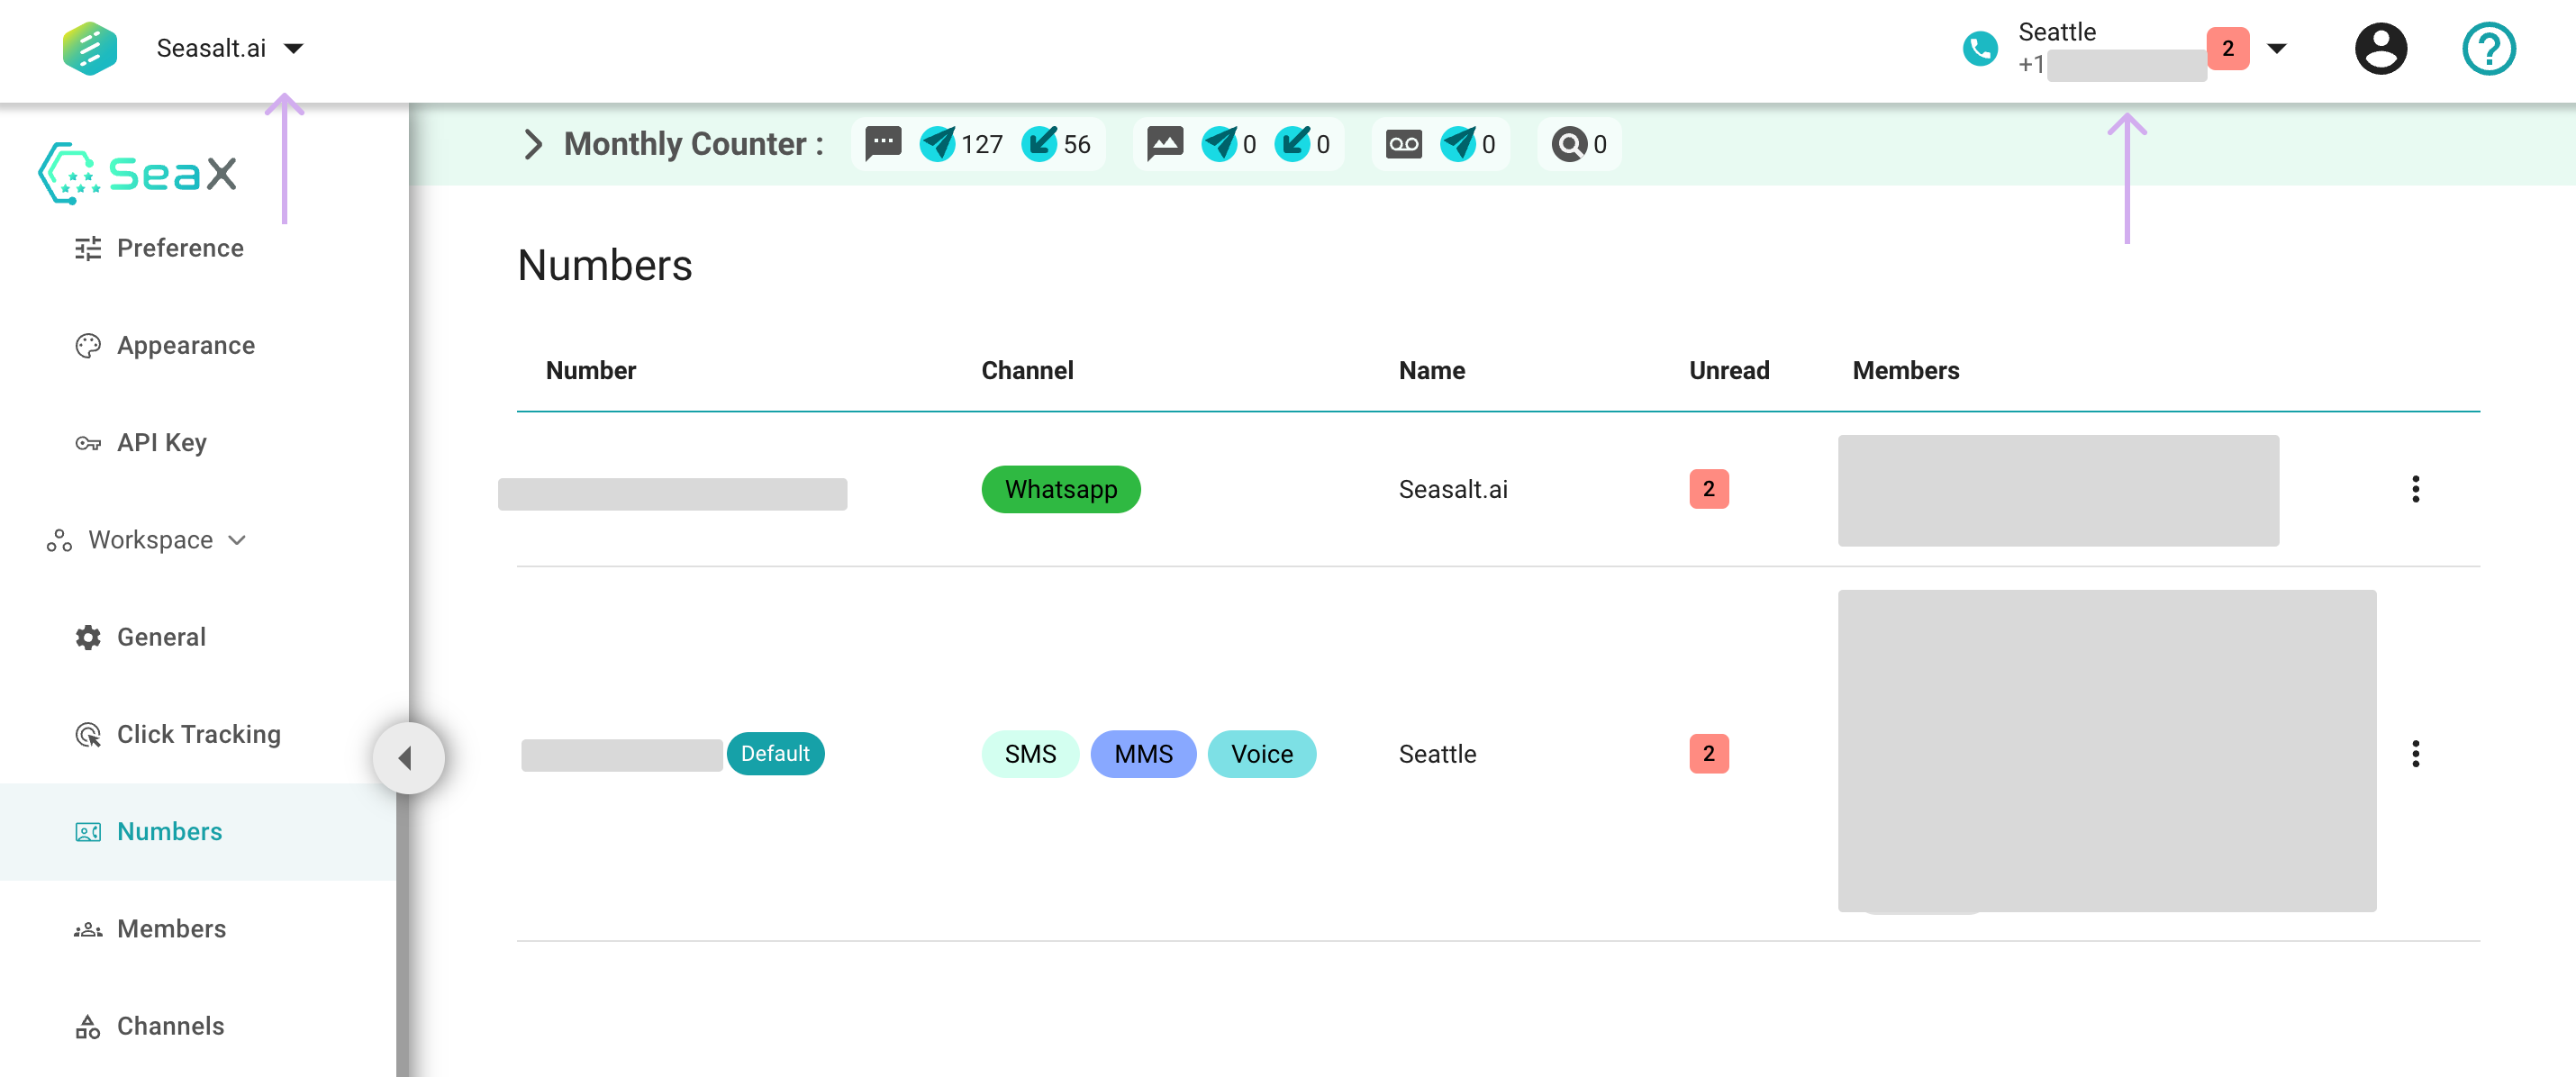
SeaX Numbers
🚨 Attention 🚨
Ensure you operate in the same workspace on both SeaChat and SeaX for proper integration. The AI agent and phone number must be within the same workspace.
Create an AI Agent on SeaChat
First, deploy a functional AI agent on SeaChat and set up the SeaX integration. As SeaX is primarily a messaging platform, you will need to navigate to SeaChat to configure the AI agent.
For more information, see the SeaX integration on SeaChat.
Bulk Send with SeaX
Once the integration is set up, you can start sending bulk messages with SeaX. There are various features available with SeaX integration on SeaChat. Let’s first ensure SeaX is properly configured before starting.
Recipients
In the initial step of sending a bulk message, select the recipients. With potentially thousands of contacts, use the labels feature in SeaX to simplify this process. Create labels for different contact groups and select these labels to choose the recipients. When adding new contacts, simply assign the appropriate labels.
All labels can be seen in the Recipients section under bulk messages, allowing you to select the label for bulk messaging.
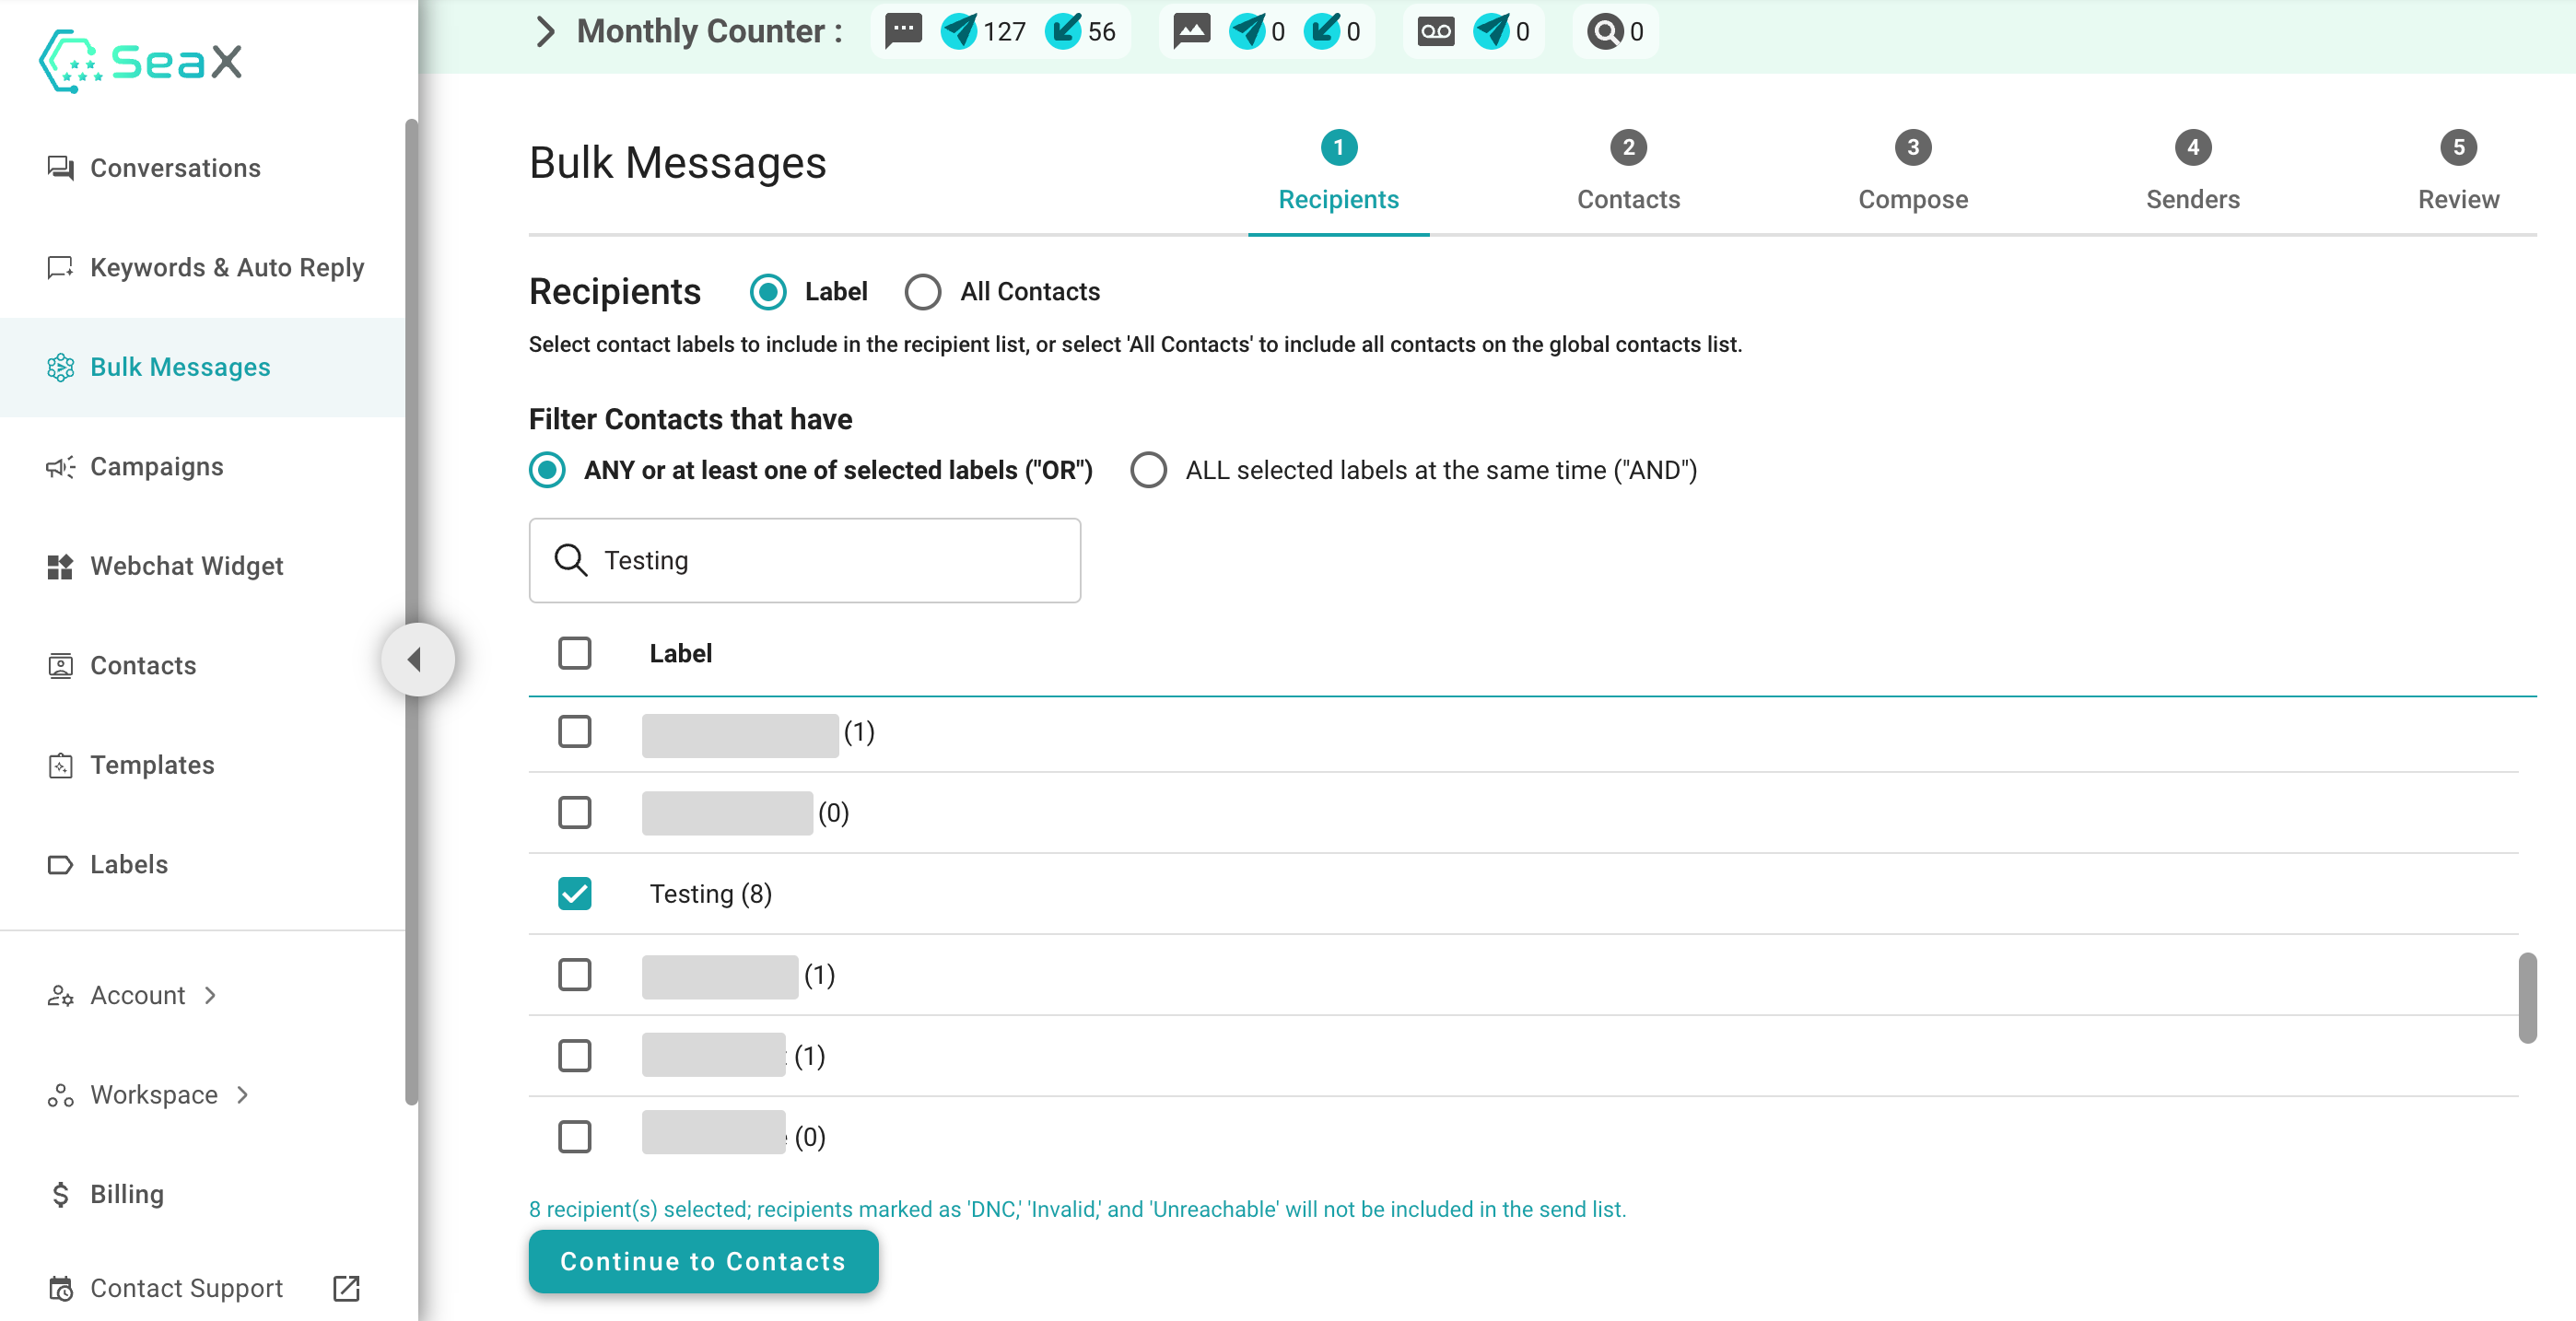
Labels of Recipients
Contacts
After selecting recipient labels, you’ll be directed to the Contacts section. Here, you can view contact names, phone numbers, and their associated labels. Uncheck any contacts you do not wish to include in the message, and proceed to the Compose section.
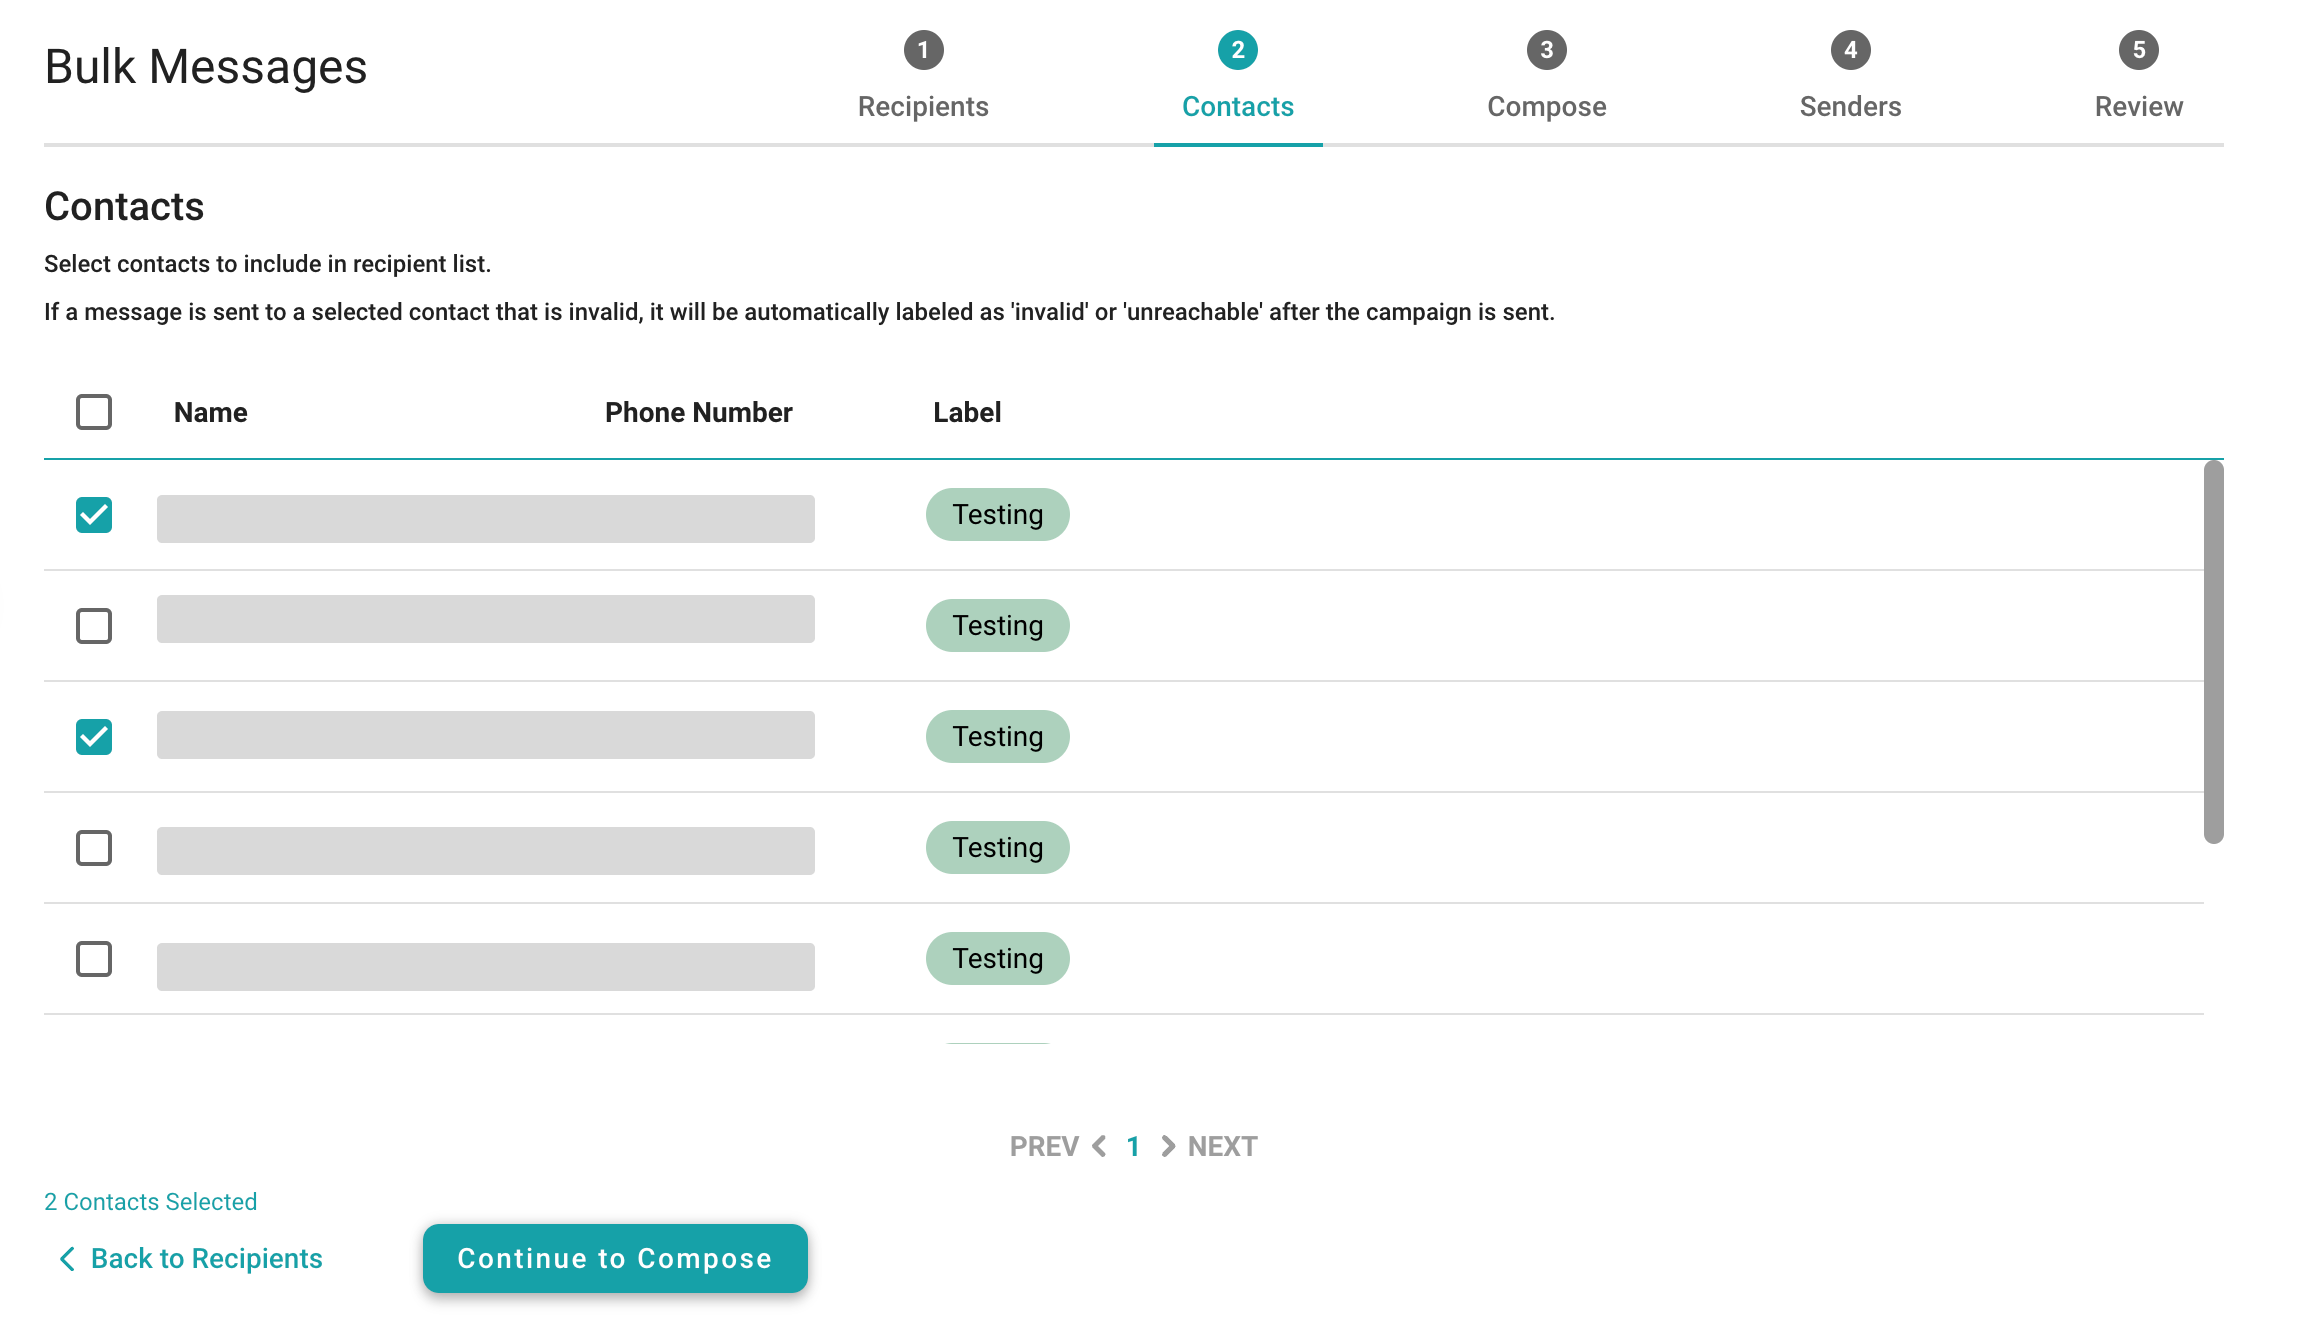
Manage Contacts
Compose a Campaign for Outbound SMS and Calls
A campaign is the unit for sending bulk messages. Configure the campaign’s name, associated contact labels, execution method, and timing here.
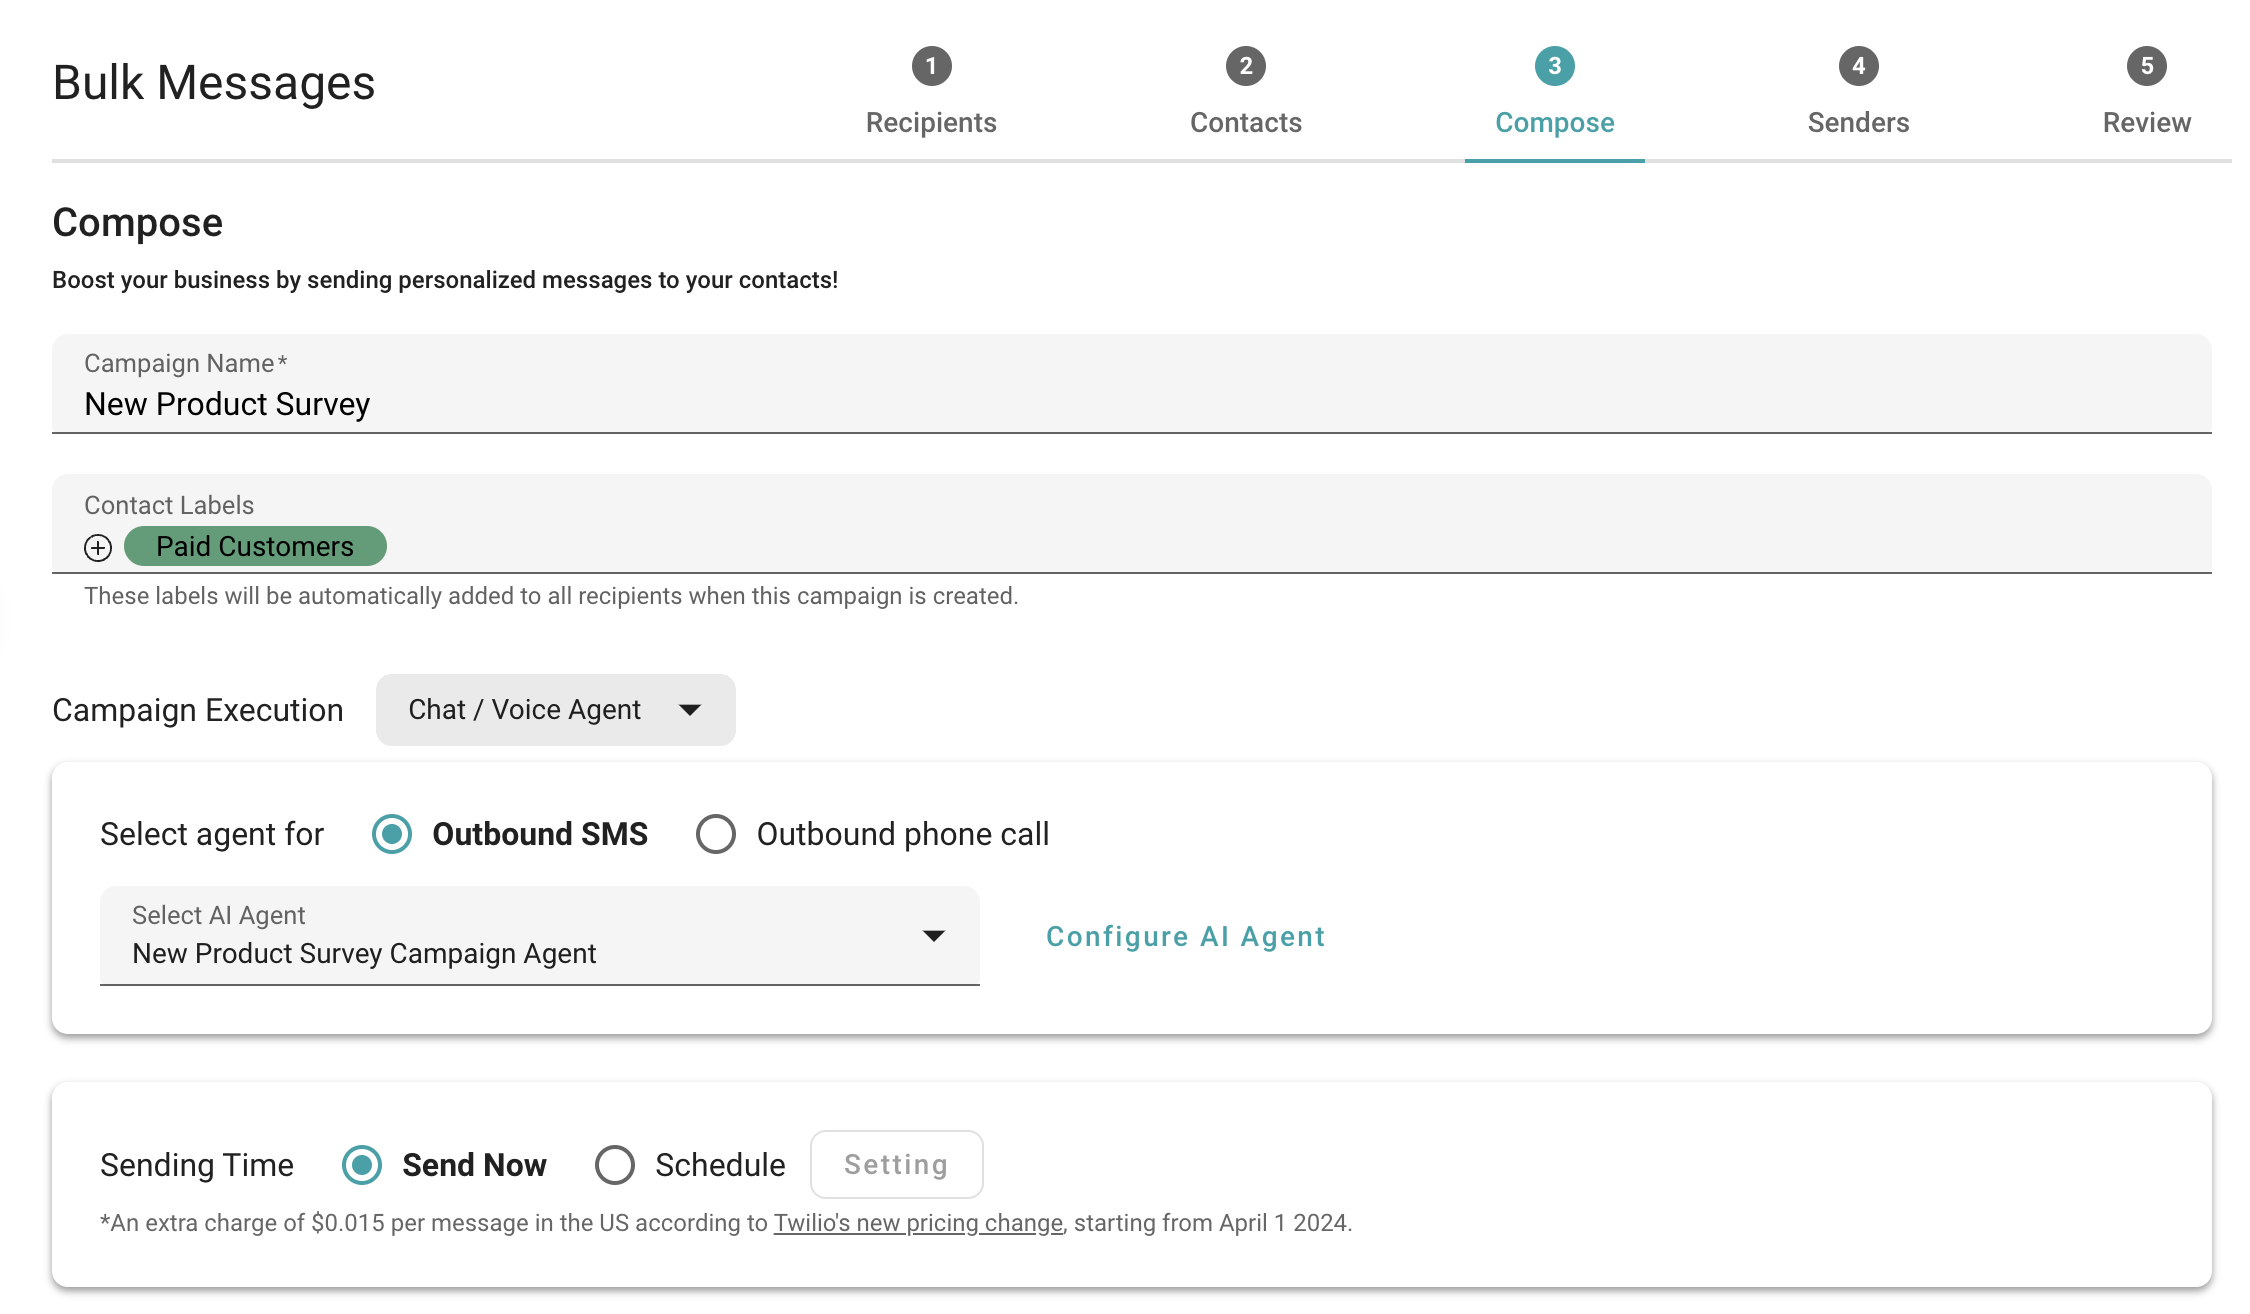
Compose a Campaign
Campaign Name and Labels
When creating a campaign, provide a name and select the labels it will be associated with. Note that the labels on the Compose page are intended to be added to the selected contacts after this campaign was initiated. If you wish to send messages to specific contacts, you need to select the labels in the Recipients section and do so in the Contacts section.
Outbound SMS and Calls
After setting the campaign name and labels, choose the execution method. Select Chat/Voice Agent to allow the AI agent to handle outbound messages.
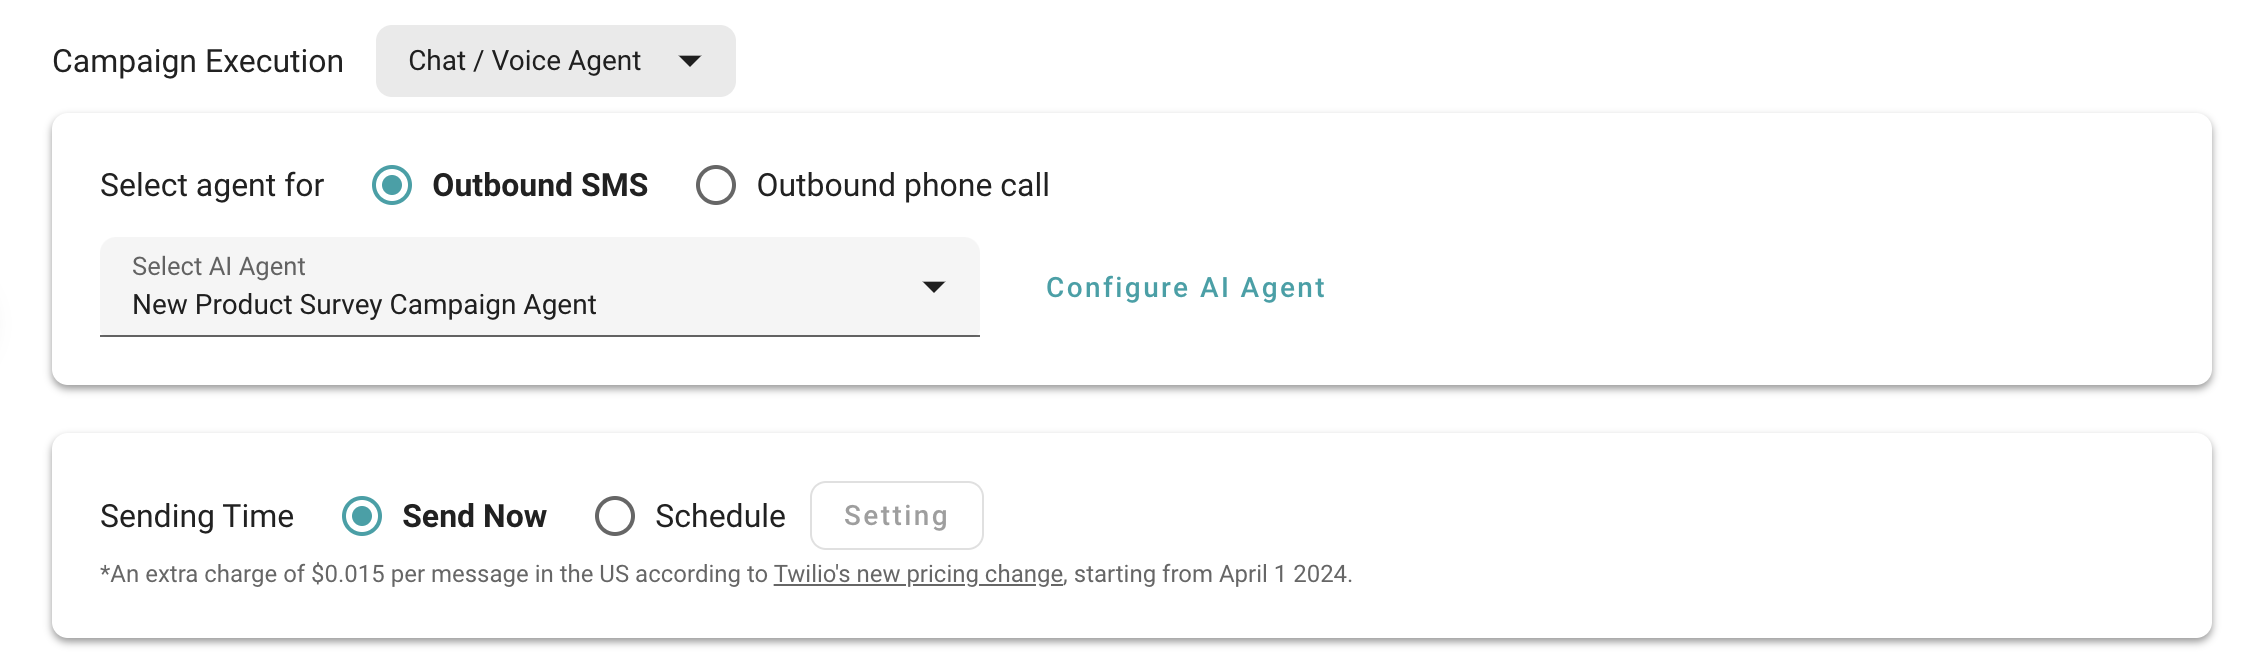
Campaign Execution
🔖 NOTE
Ensure the AI agent is set up on SeaChat to handle outbound/ inbound messages. Since SeaX is a messaging platform, configure the AI agent’s starting message, voice, and other settings on SeaChat.
Click Configure AI Agent next to your selected agent on SeaX to configure the agent on the SeaChat platform.
If your agents are not visible, it means the AI agent is not set up on SeaChat. Click on Configure AI Agent to set up the AI agent and remember to save your configuration.
Sending Time
Set up the sending time for scheduled campaigns. You can choose to send the campaign immediately or schedule it for a later time. For outbound calls, set a cut-off time to avoid disturbing customers late at night.
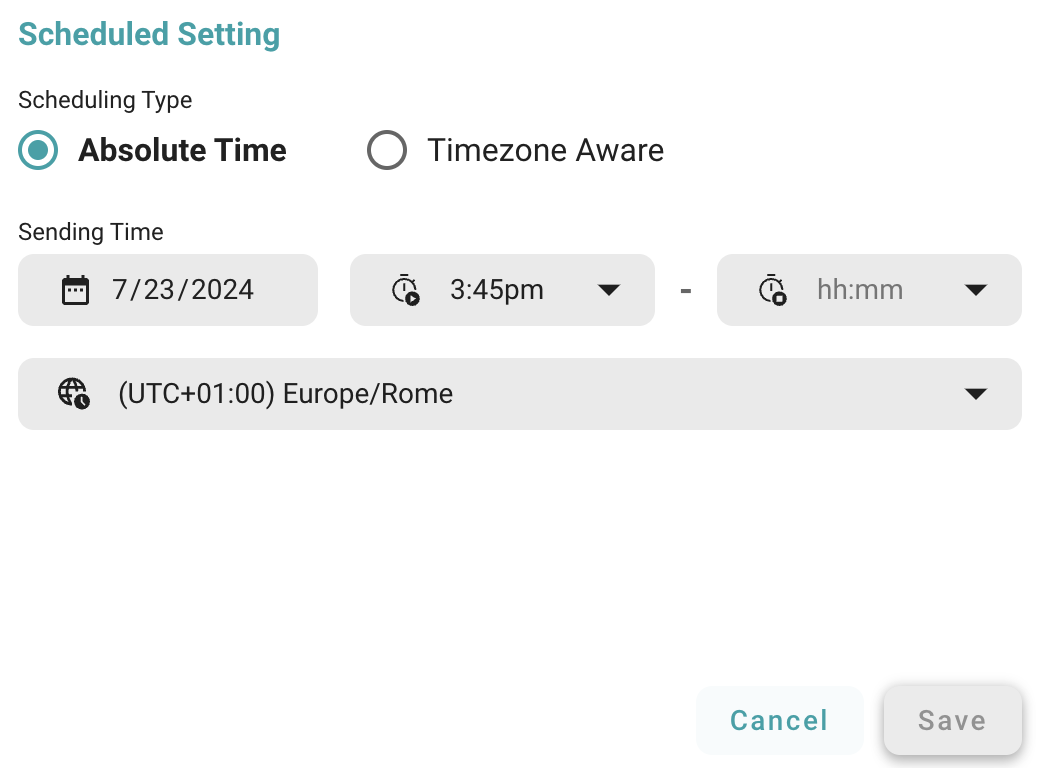
Scheduled Setting
Additional Setting - Capture Recipients' Key Presses (Outbound Calls) and Click Tracking (Outbound SMS)
SeaX tracks interactions between recipients and the AI agent. Enable Capture Recipients' Key Presses to record key presses during calls, useful for surveys.
Enable Click Tracking to monitor clicks on SMS messages, such as tracking link clicks.
Senders
Select the sender for the campaign and choose the phone number to send messages from.
To add a new phone number, click Quote for a New Number, and Seasalt will provide a quote.
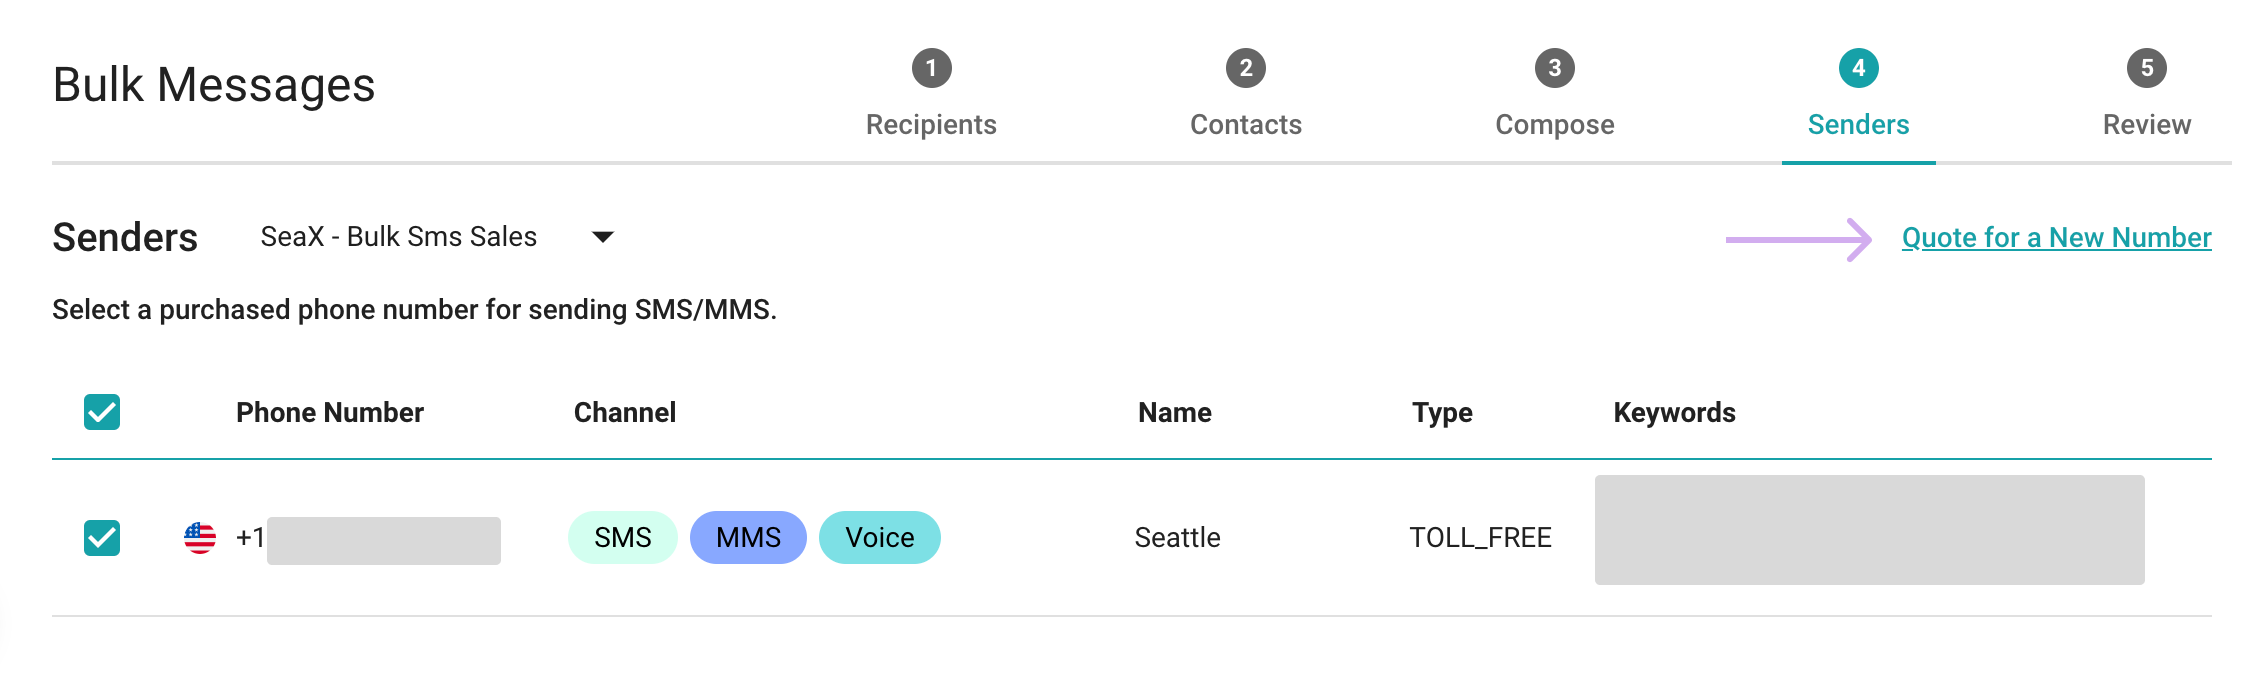
Senders Setting
Review
Before sending the campaign, review the settings to ensure everything is configured correctly. Check the campaign name, SeaChat message setup for the AI agent, and the sender details.
Update Inbound Agent
For SMS and call campaigns, update the inbound agent to handle incoming messages. Choose the agent set up on SeaChat for this purpose.
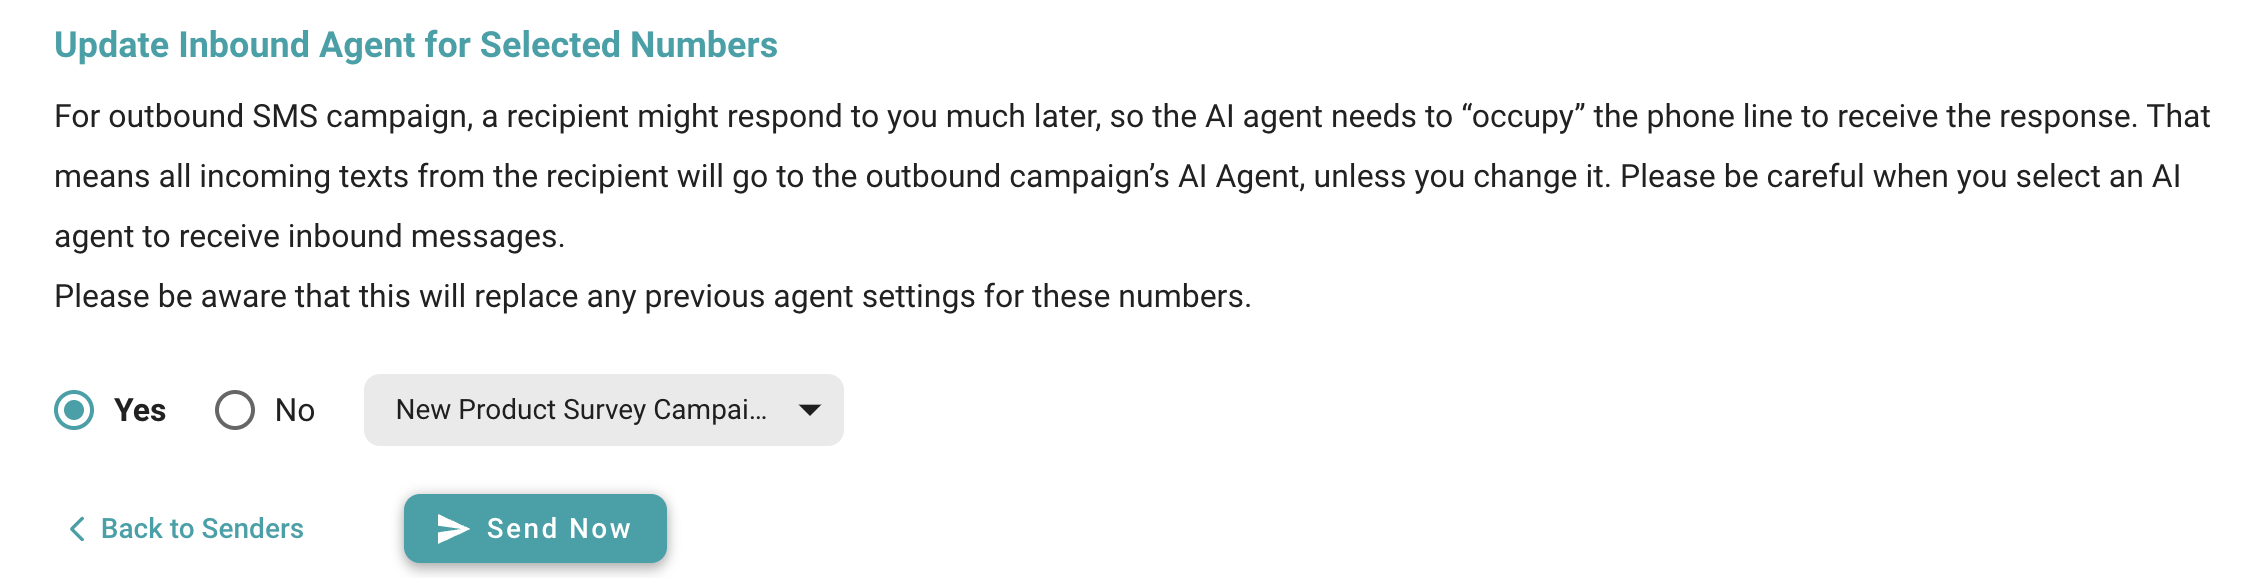
Inbound Agent Setting
Send Out the Campaign
Click Send Now to activate the campaign and start sending messages through SeaX. Monitor the progress of your campaigns in the Campaigns section in the sidebar.
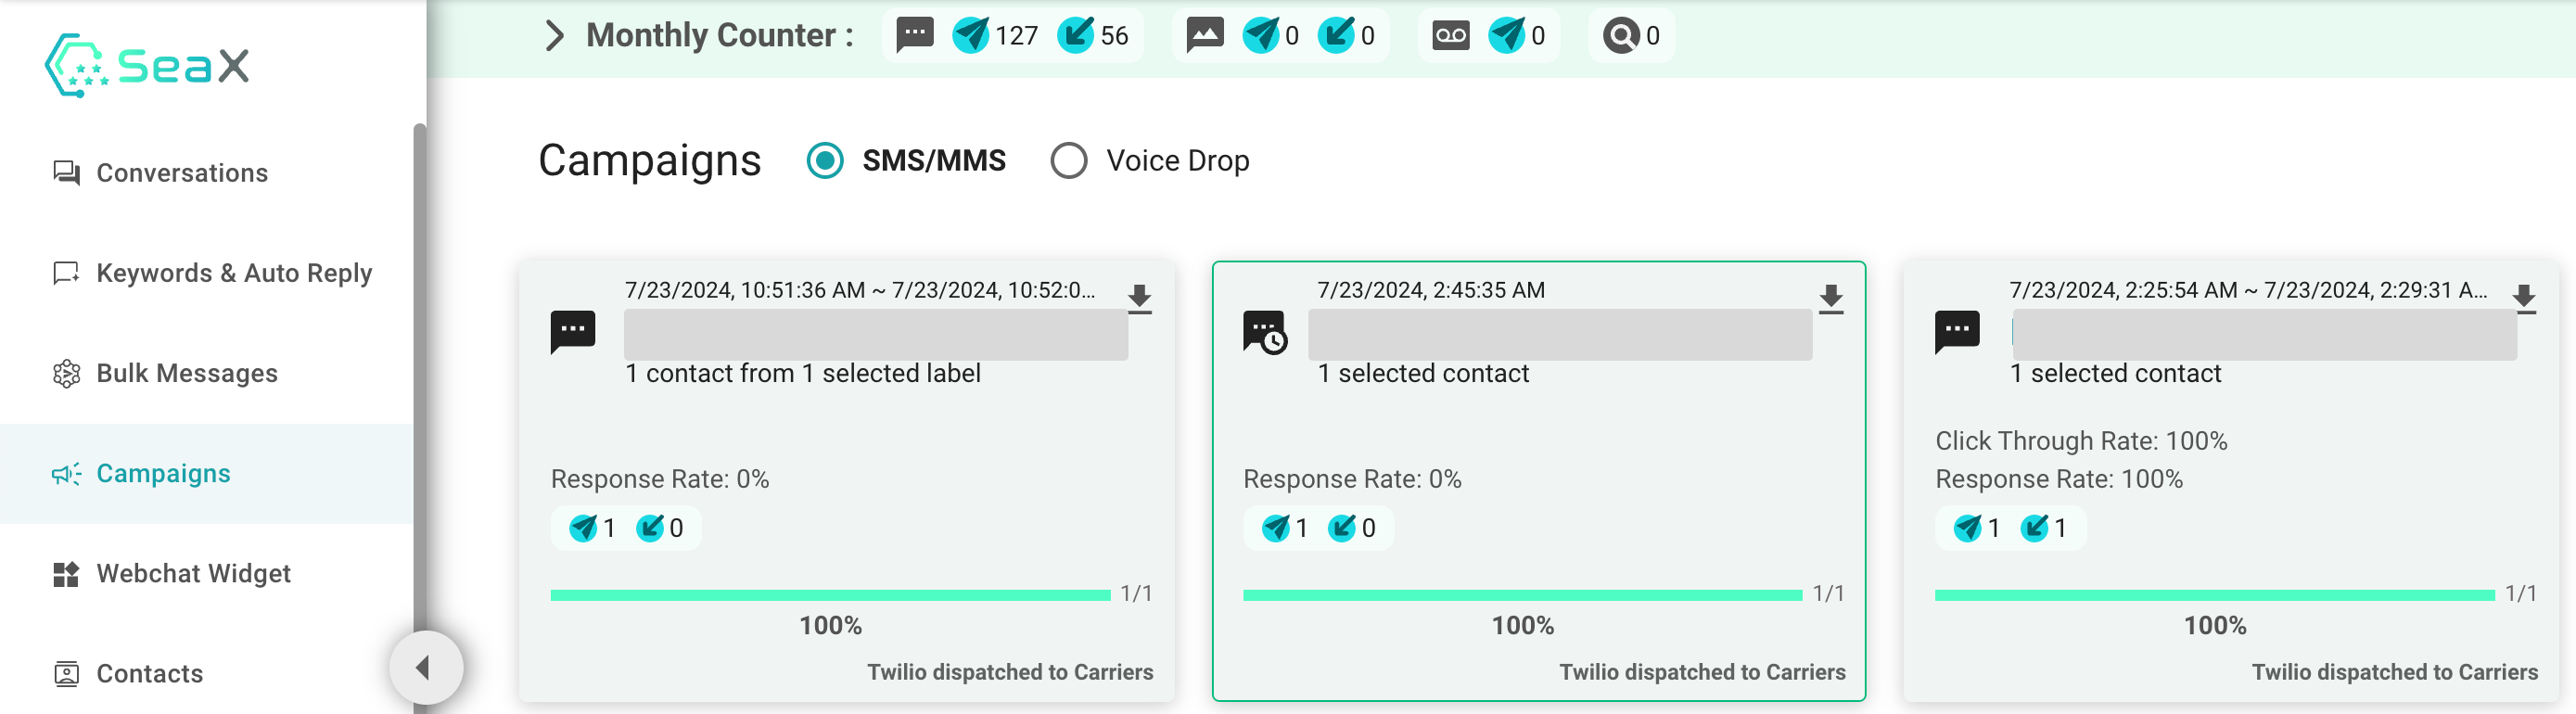
Campaign Dashboard
Conversation synchronized between SeaX and SeaChat
SeaX + SeaChat is a powerful combination for managing bulk messaging and calls. With SeaX, you can send messages to thousands of customers and automate conversations with the help of AI agents on SeaChat. The two conversations, one on SeaX and the other on SeaChat, are synchronized for a seamless experience. Yet, there are the following differences:
-
All the outbound calls initiated by SeaX through SeaChat agents are listed in both the Conversations section on SeaChat and SeaX. However, if a call is received from on SeaChat, then it will not sync to SeaX.
-
If the user replies to a SMS from SeaX, it will not be synced to SeaChat unless that same number in SeaX is a recipient of an active AI Agent Campaign.