Forward Inbound Calls to Voice Agents - Video Tutorial
The following is a video tutorial of the above walkthrough to deploy an AI voice agent in 18 minutes with no coding skills required:
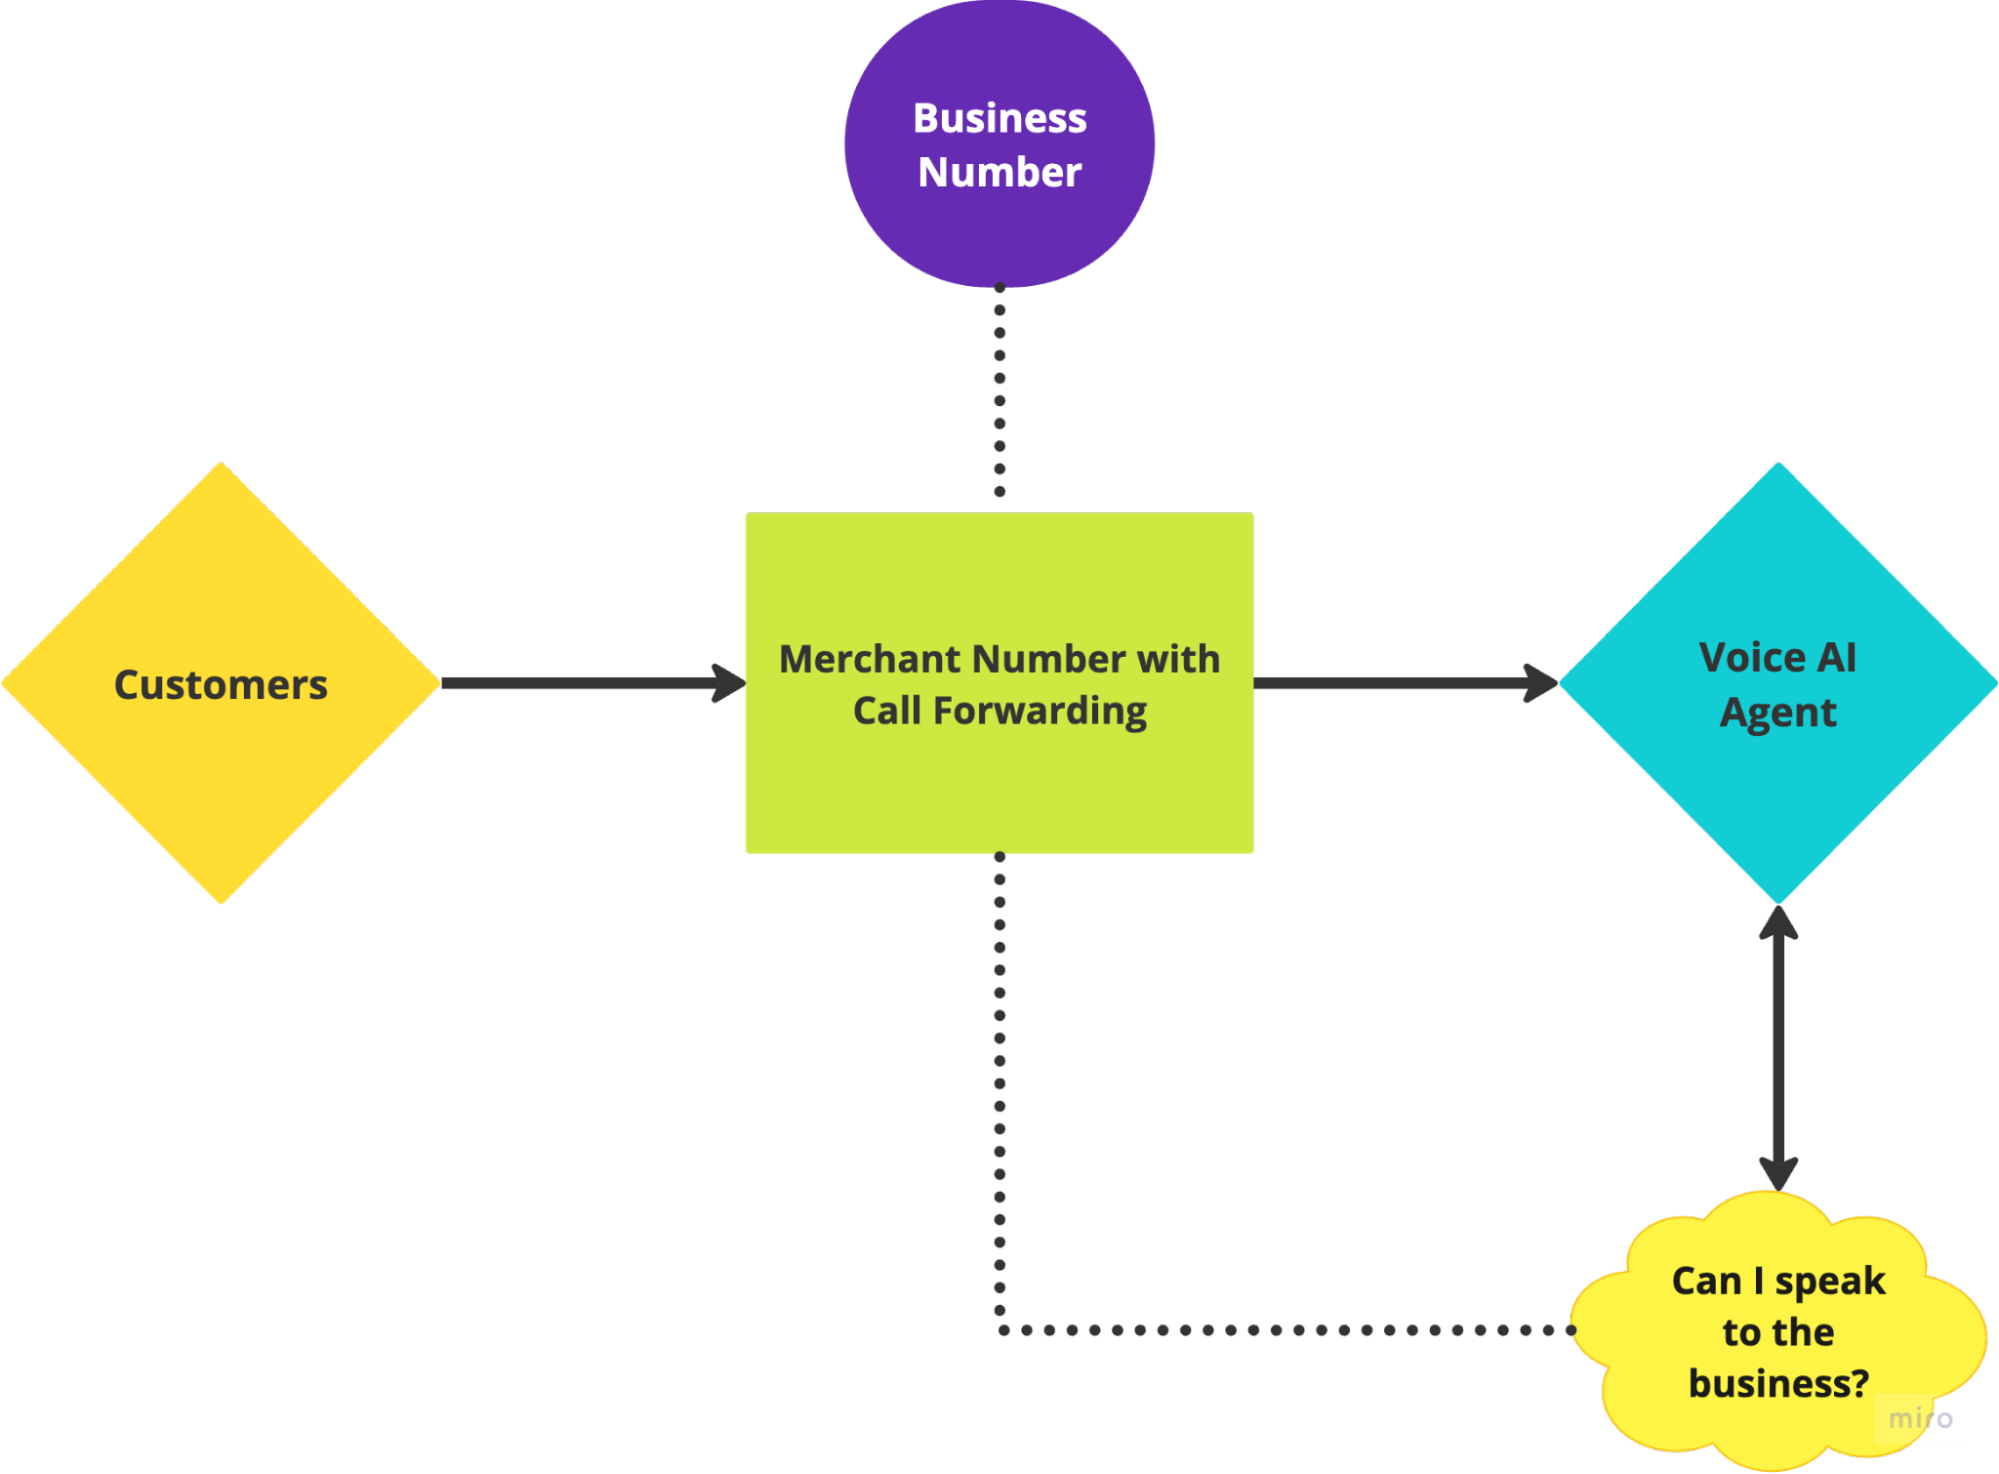
Introduction to Call Forwarding and How It Works
Call Forwarding
Call forwarding is a telecommunication feature that allows users to redirect incoming calls from one number to another. This ensures that important calls are not missed, even when you’re unable to answer your primary phone. There are two main types of call forwarding: Unconditional Call Forwarding, which redirects all incoming calls, and Conditional Call Forwarding, which only forwards calls under specific conditions, such as when the line is busy or when there’s no answer.
In most cases, businesses and individuals prefer Conditional Call Forwarding to ensure that calls are forwarded only when necessary, rather than every time a call comes in. Setting up this feature is usually straightforward, and different telecom providers and VoIP services offer simple ways to configure call forwarding through settings or dialing specific codes on your phone.
Redirect Calls to AI Agent
Once you’ve configured your call forwarding with your telecom provider, you can streamline your answering services by directing calls to your SeaChat Voice Agent. Your SeaChat agent can help manage appointments and generate call summaries during busy times or when you’re unavailable.
The following tutorial will walk you through all the necessary steps to set up your phone number for call forwarding to your SeaChat agents. Once you have successfully set up a call forwarding pipeline, you can visit our wiki or check out our tutorial videos on Seasalt.ai’s YouTube channel to further implement different features of SeaChat into your production.
Preparation Step
Before moving onto the calling forwarding setup, let’s make sure the AI agent is ready for taking the calls.
- Step 1 – Create a SeaChat Agent:
- If this is your first time logging into SeaChat, you will need to set a new agent first to continue the following steps. You are welcome to visit our wiki for a more detailed instruction on how to do so.
- Step 2 – Deploy the Voice AI agent:
- We need to assign a phone to the voice AI agent, so we can deploy it into production for call answering. Follow the instructions below to complete the step or you can check out our wiki for a more comprehensive guide – Calls Channel Configuration.
- Step 2.1 – Navigate to the configuration page of Calls.
- Go to Channel -> Calls under the Agent Configuration section in the sidebar on the left.
- Step 2.2 – Buy a toll-free number and deploy the AI agent to the number.
- Follow the steps on SeaChat UI to purchase a toll-free number that the Ai agent will be deployed to.
- Configure the AI agent and set up the correct behavior that you want the agent to have.
- Step 2.3 – Test your AI Agent.
- You should always test your AI agent before you deploy it to production. Fine-tune and adjust agent’s configuration to achieve the optimal performance that you need.
- Step 2.1 – Navigate to the configuration page of Calls.
- We need to assign a phone to the voice AI agent, so we can deploy it into production for call answering. Follow the instructions below to complete the step or you can check out our wiki for a more comprehensive guide – Calls Channel Configuration.