Build Your First Agent
- In just under 10 minutes, you’ll have your own customized AI agent set up and ready to assist your customers.
- For more detailed guidance, please consult the SeaChat User Manual. Should you encounter any issues or have questions, our support team is on standby to assist you. Don’t hesitate to reach out.
In this tutorial, we will create a SeaChat agent from scratch. This AI agent will help answer FAQs about a parking lot business. We will walk you through the process of creating the AI agent, adding knowledge to its knowledge base, testing and fine-tuning the agent to ensure it’s ready to answer all incoming questions from customers!
Step 1: Create a Workspace
If this is your first time logging into SeaChat, you’ll need to create a workspace to start the process. Click on Create to create your first workspace. I named my new workspace as My Work Space. You can give your workspace a different name! If you have existing workspace available, you can simply click on Access to visit the workspace.
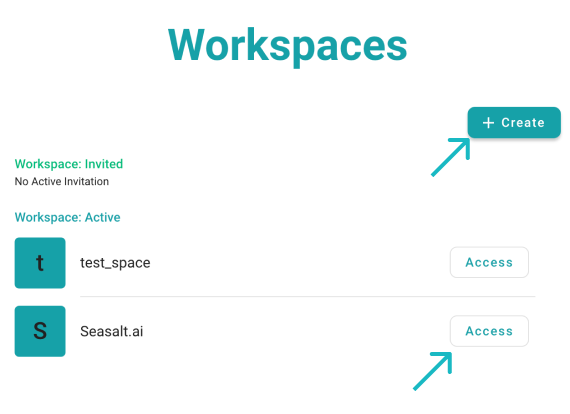
Create First Workspace
What Is a Workspace ?
A workspace serves as an information hub containing your organization’s data, offering an overview of your agents, members, and API keys. You have the option to either create a new workspace for yourself or join an existing one by requesting an invitation from the admin.
Step 2: Your First SeaChat Agent
Click on Add New Agent to configure your new agent. If you already have a workspace and an agent, you can create a new one by clicking on the dropdown menu located in the top-right corner next to your profile avatar.
📚 AI Agent and Live Agent
You will see the term, Agent, used throughout this tutorial. An AI agent is essentially an AI assistance with a custom knowledge base, we use the term to emphasize its capability to assist your customers like a real human agent. Whereas a Live Agent refers to an actual human agent who interacts with customers in real-time.
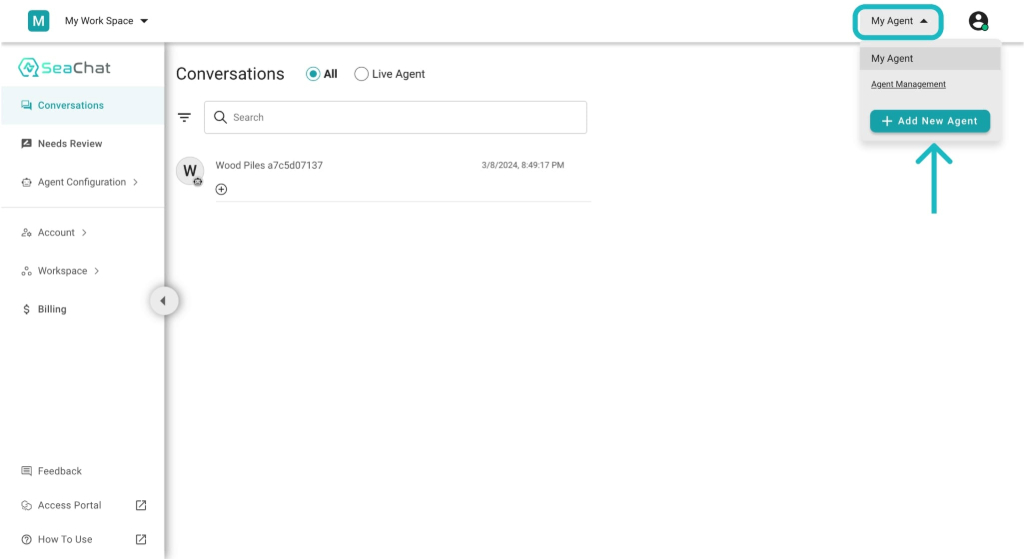
Add New Agent
Next, let’s choose Start From Scratch to create a new agent. You can also choose to start from a Use Case if you prefer.
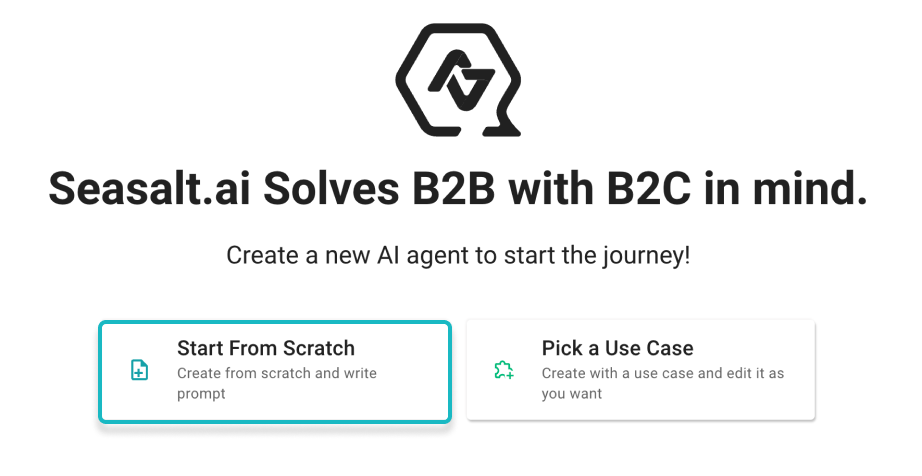
Choose Start From Scratch
In New Agent, we need to give our agent some context of its role and functions before you choose its use case and response language. After picking a creative name My Parking Agent for this tutorial, I will choose FAQ as my use case, since this agent will be used to answer frequently asked questions, and US English for the response language.
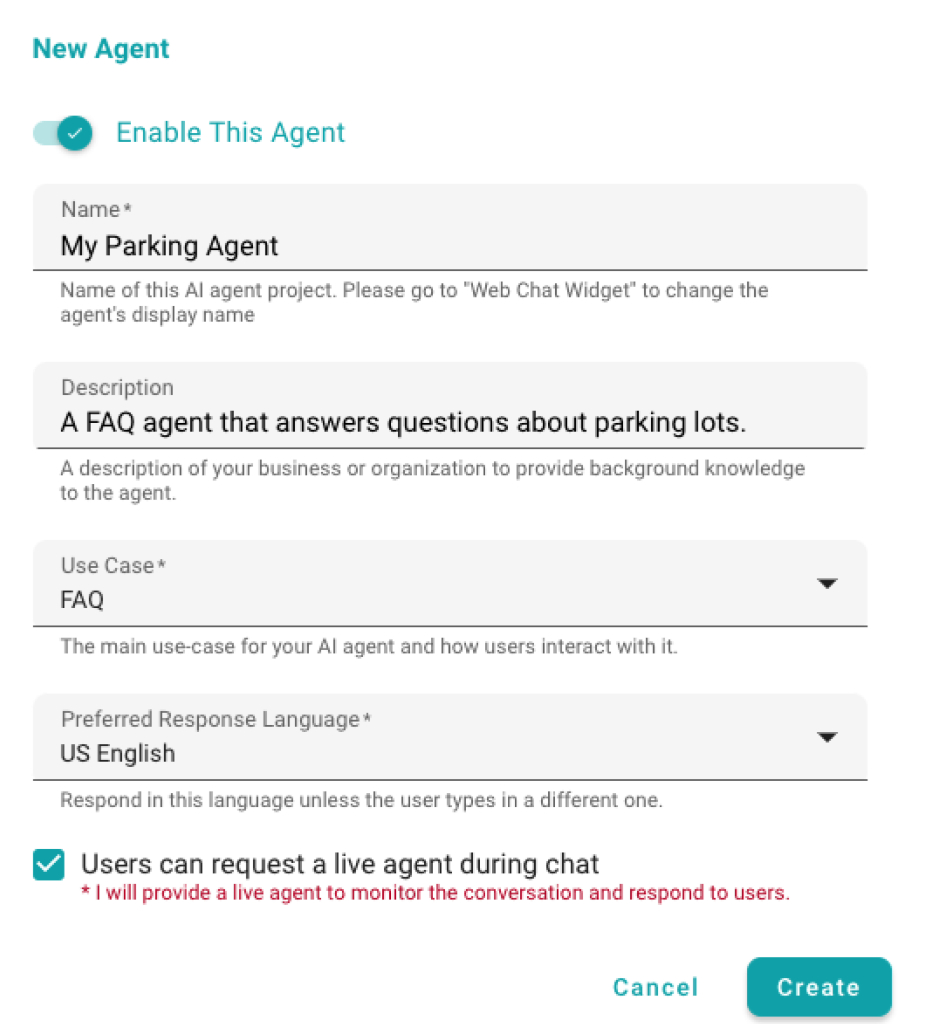
Agent Configuration
💡 Note
The live agent feature will require a human agent in case the customer wishes to be transferred to one. If you choose this option, the customer will then have the option to request a human agent during the chat, and you should arrange a human agent to respond to ongoing conversations.
Step 3: Add Knowledge
To fully leverage the capabilities of your SeaChat agent, we need to add knowledge to its knowledge base. SeaChat offers a range of options for uploading content to your agent’s knowledge base. Find your agent’s knowledge base by navigating to the Knowledge Base dashboard under Agent Configuration in the sidebar menu.
Feel free to try out the different ways to upload data to your knowledge base. For the purposes of this tutorial, we’ll focus on utilizing the Upload Spreadsheet method. However, if you’re interested in exploring additional data uploading techniques, we invite you to take a look at the Add Knowledge section within our user manual for comprehensive instructions and tips.
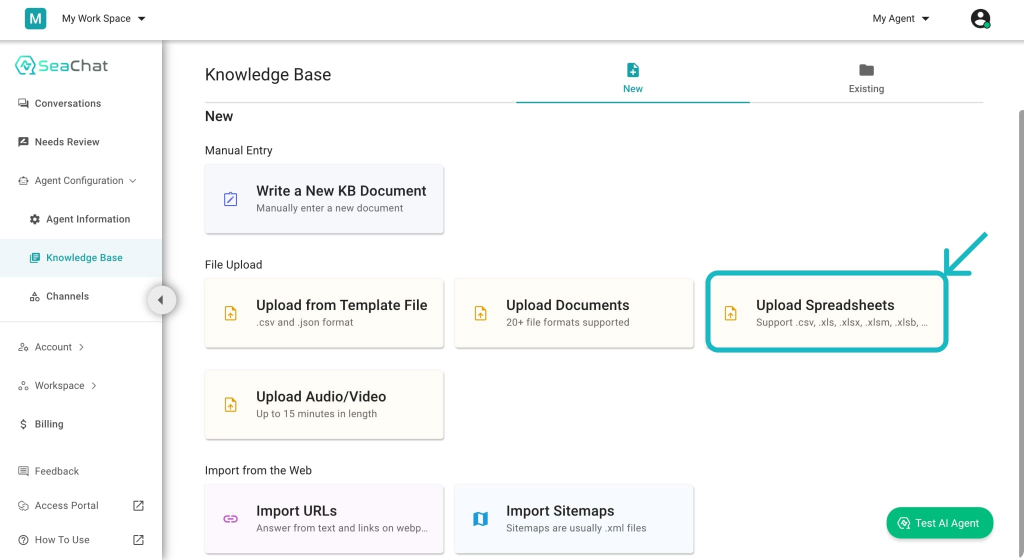
Choose an Upload Method
Step 4: Upload Files to Knowledge Base
Uploading a spreadsheet is as simple as clicking on the upload icon and choosing the desired spreadsheet. Once you see your uploaded files in the preview section below the drag-and-drop section, click on the Next button to confirm. Now, my CSV file, ncc_Car_Parks (1) is uploaded, and we can see each header and its corresponding data in the preview section. My Parking Agent is now ready for the next step.
Download the sample .csv file here, and try it out yourself.
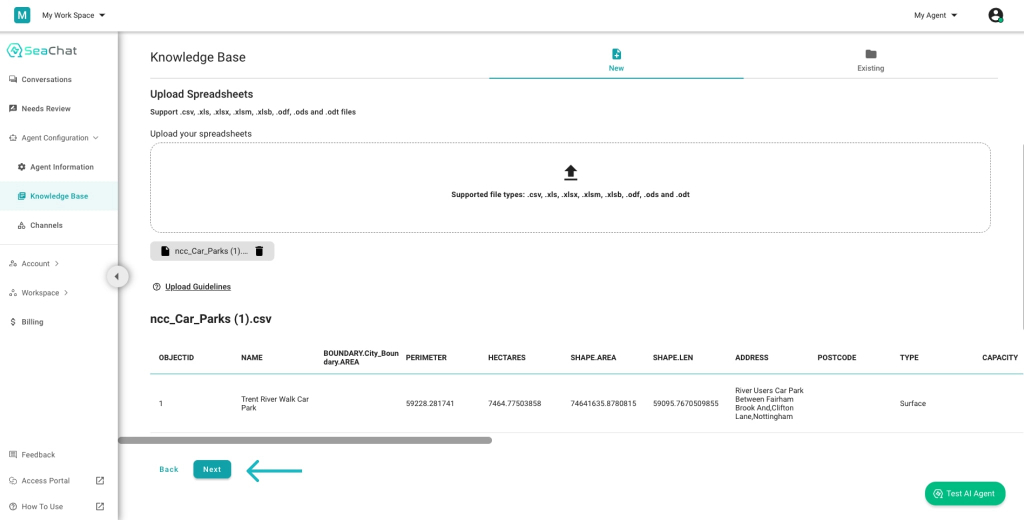
Review Uploaded File and Submit
To see the uploaded data of parking lots, we simply navigate to the Existing section in the top-right corner of the dashboard once your files have been successfully uploaded.
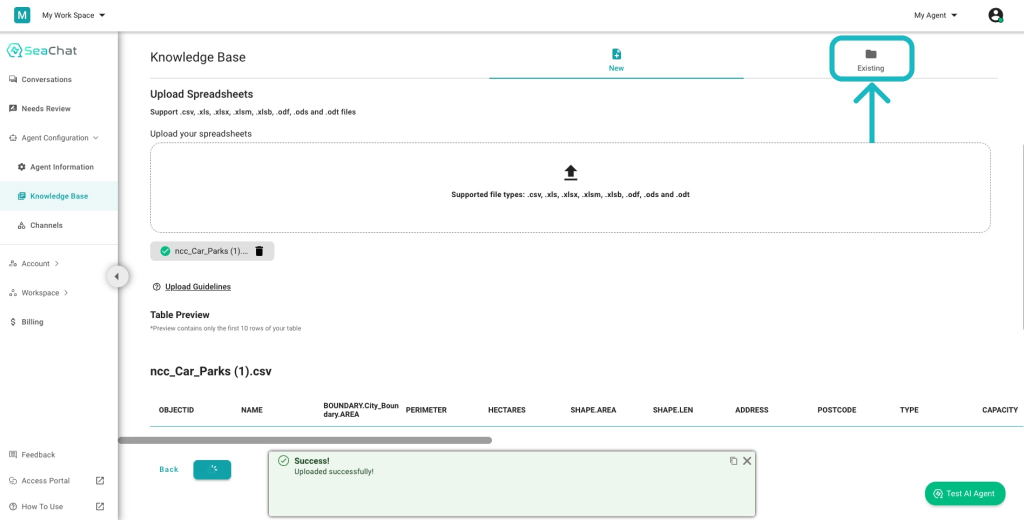
Uploaded Successfully
That’s it. Now, My Parking Agent has processed the uploaded data, and let’s set it up for a test to see if it needs further fine-tuning. Click on the Test AI Agent button located in the bottom-right corner. Let’s try chatting with My Parking Agent to see if we can optimize its performance!
`
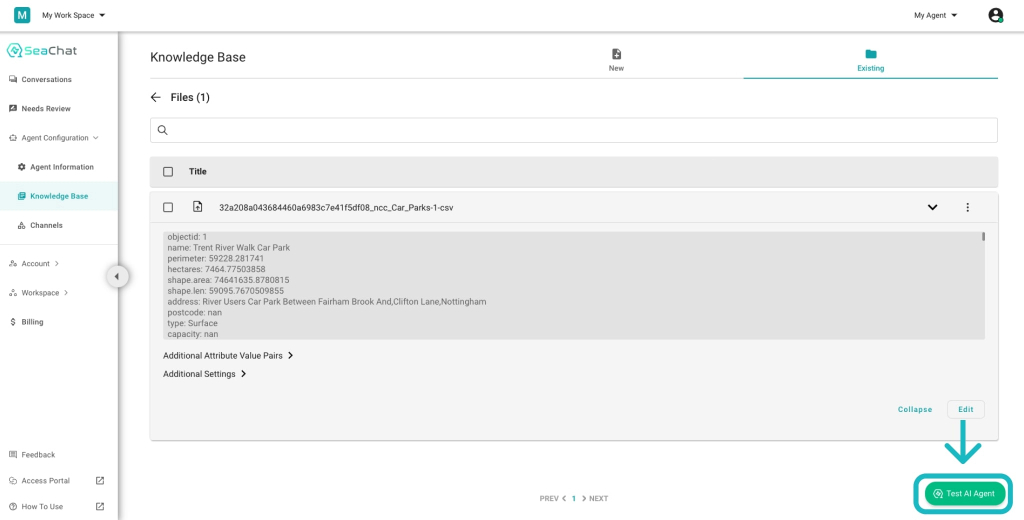
Click on Test AI Agent
`
Step 5: Test Your SeaChat Agent
Before putting the AI agent we’ve just created into action, it’s crucial to train it through testing and fine-tuning. Imagine yourself as the customer interacting with the AI agent. You can now start asking any questions to see how your SeaChat agent responds.
With its updated knowledge base, My Parking Agent is now ready to be tested. You can start by asking questions to see how your agent responds after you click on the Test AI Agent button.
Here is what my agent has to say.
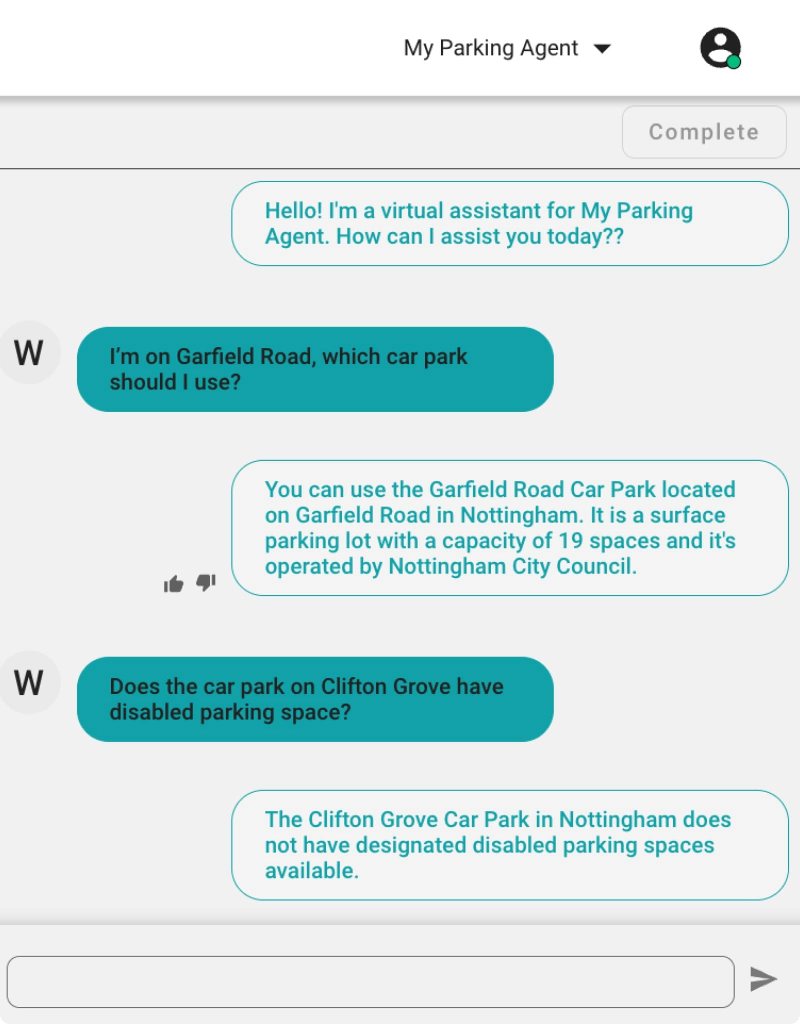
Conversation with AI Agent
To review a message, hover over it and provide positive feedback to your agent with a thumbs up. If the message needs further review, give it a thumbs down.
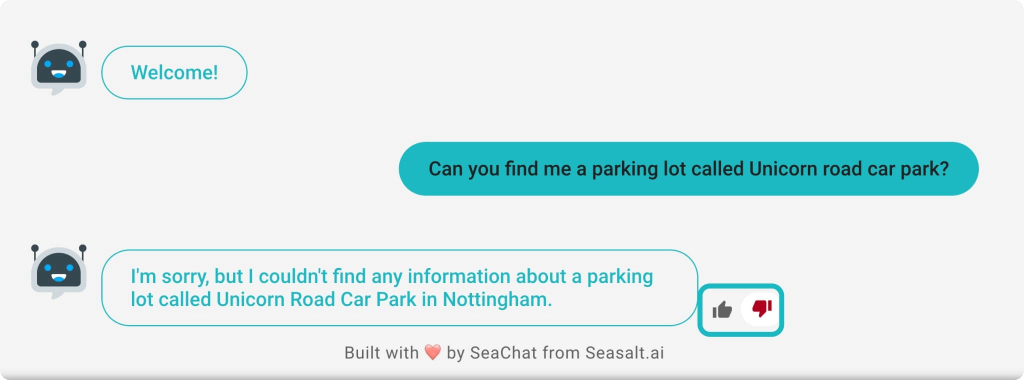
Oops, it looks like My Parking Agent needs some fine-tuning. I will give a thumbs down here to provide a feedback.
Review Agent’s Response
Step 6: SeaChat Agent Fine-Tuning
SeaChat provides a set of sophisticated tools for you to fine-tune your agent to perfection. You can find these amazing features in the Needs Review section, accessible via the sidebar menu on the left. Here, you can review the responses that have received your feedback.

Review Agent’s Response
It looks like the information about Unicorn Road Car Park is missing in the knowledge base of My Parking Agent. I need to click on the CSV file that the missing information belongs to and add it.
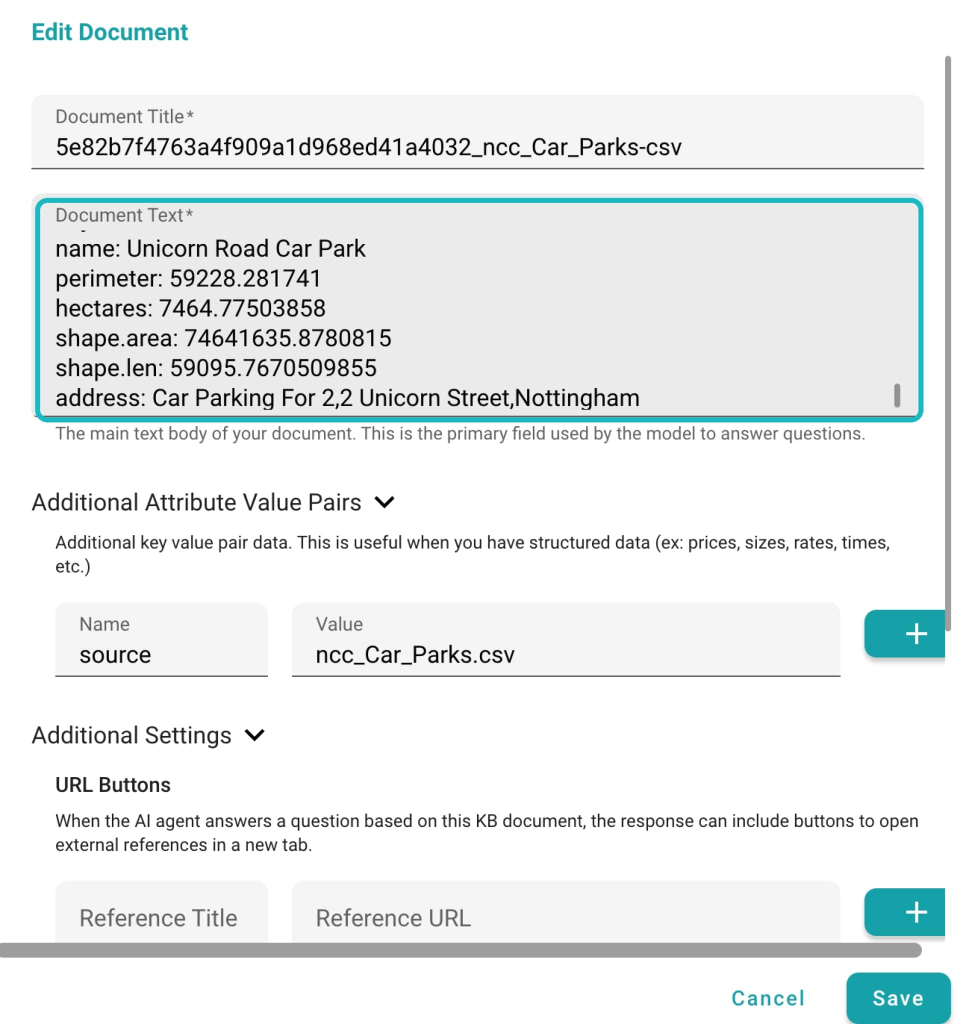
Modify Relevant Documents
Now, click save once you are sure of the uploaded information. Don’t forget to click on Move to Reviewed to consolidate your changes. You can switch to Reviewed section to see the changes you’ve made. All done! Now, let’s test the agent again to see if it has improved.
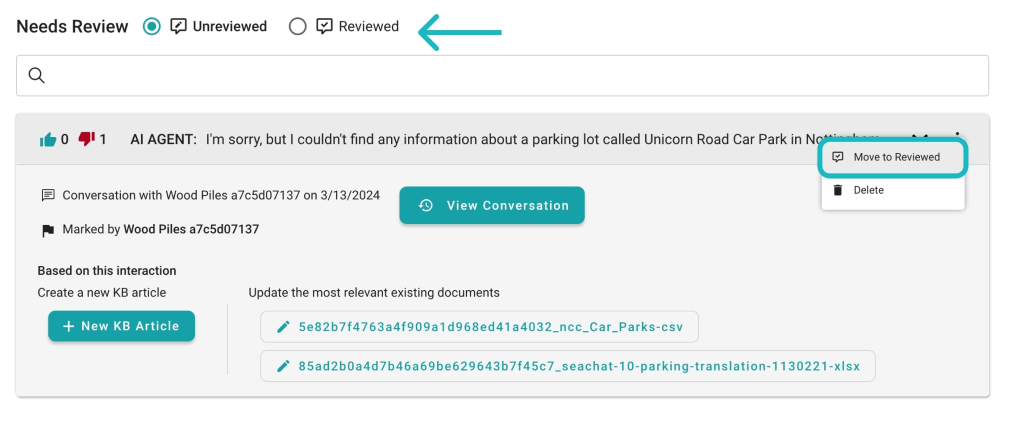
Mark Conversation as Reviewed
Ta-da! My Parking Agent now is giving me the right information. It is that easy! You can now try it out yourself and see how your agent performs.
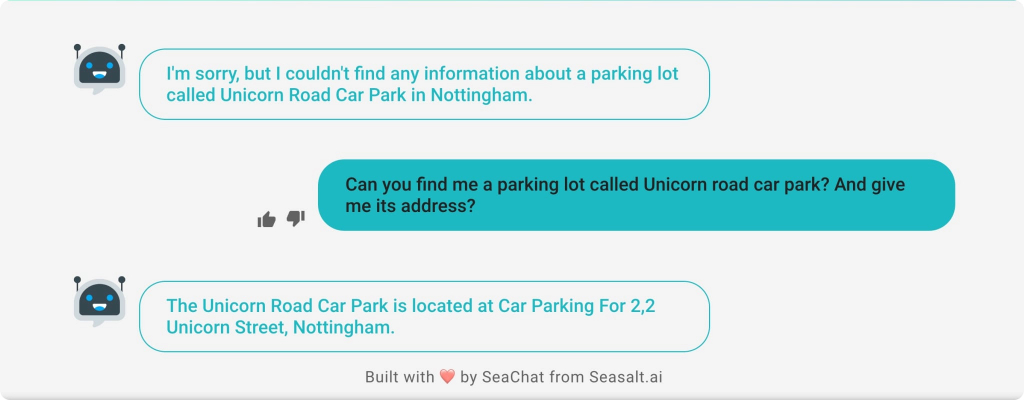
Optimal Performance with Fine-tuned Responses
Fine-tuning your AI agent is a crucial and continuous process. We kindly advise you to check out the Advanced section in our user manual for a more comprehensive explanation and to understand the different parameters and features involved in the fine-tuning process.
Custom AI Agent at Your Service
Sit back and watch how SeaChat AI agents can elevate your operations. From customer service and marketing to serving as a collaboration coordinator, SeaChat empowers you to automate your workflows for optimal efficiency with ease. In this tutorial, we’ve walked you through the steps necessary to set up your first AI agent. However, to fully unleash the power of SeaChat AI agent, there are a few more aspects for you to grasp. We kindly invite you to explore our detailed user manual to understand the true potential of SeaChat, or you can directly contact our support team for further information and assistance.
Support
Need assistance? Contact us at seachat@seasalt.ai.