Auto Labeling
On this page
Video Tutorial
Overview
Auto Labeling is an integral part of the integrations in Seasalt.ai’s suite of tools. This feature intelligently and automatically applies labels to conversations, streamlining processes for use cases such as customer service and healthcare.
We welcome you to check out our feature of Label Automation for more advanced workflows as labe-automation builds upon the auto Labeling feature.
What Is Auto Labeling?
Auto Labeling is a system that automates the application of labels to conversations or other data points based on predefined rules and AI-driven analysis. Instead of manually tagging, users can set conditions under which labels are applied or removed dynamically.
Key Features

-
Automated Label Application
- Adds labels like
EscalatedorLow Prioritybased on conversation content. - Handles multiple labels simultaneously.
- Adds labels like
-
Dynamic Rule-Based System
- Users can define triggers for labels, such as specific keywords or phrases.
- Includes functionality to both add and remove labels automatically.
-
Custom Use Cases
- Examples include healthcare hotlines, where
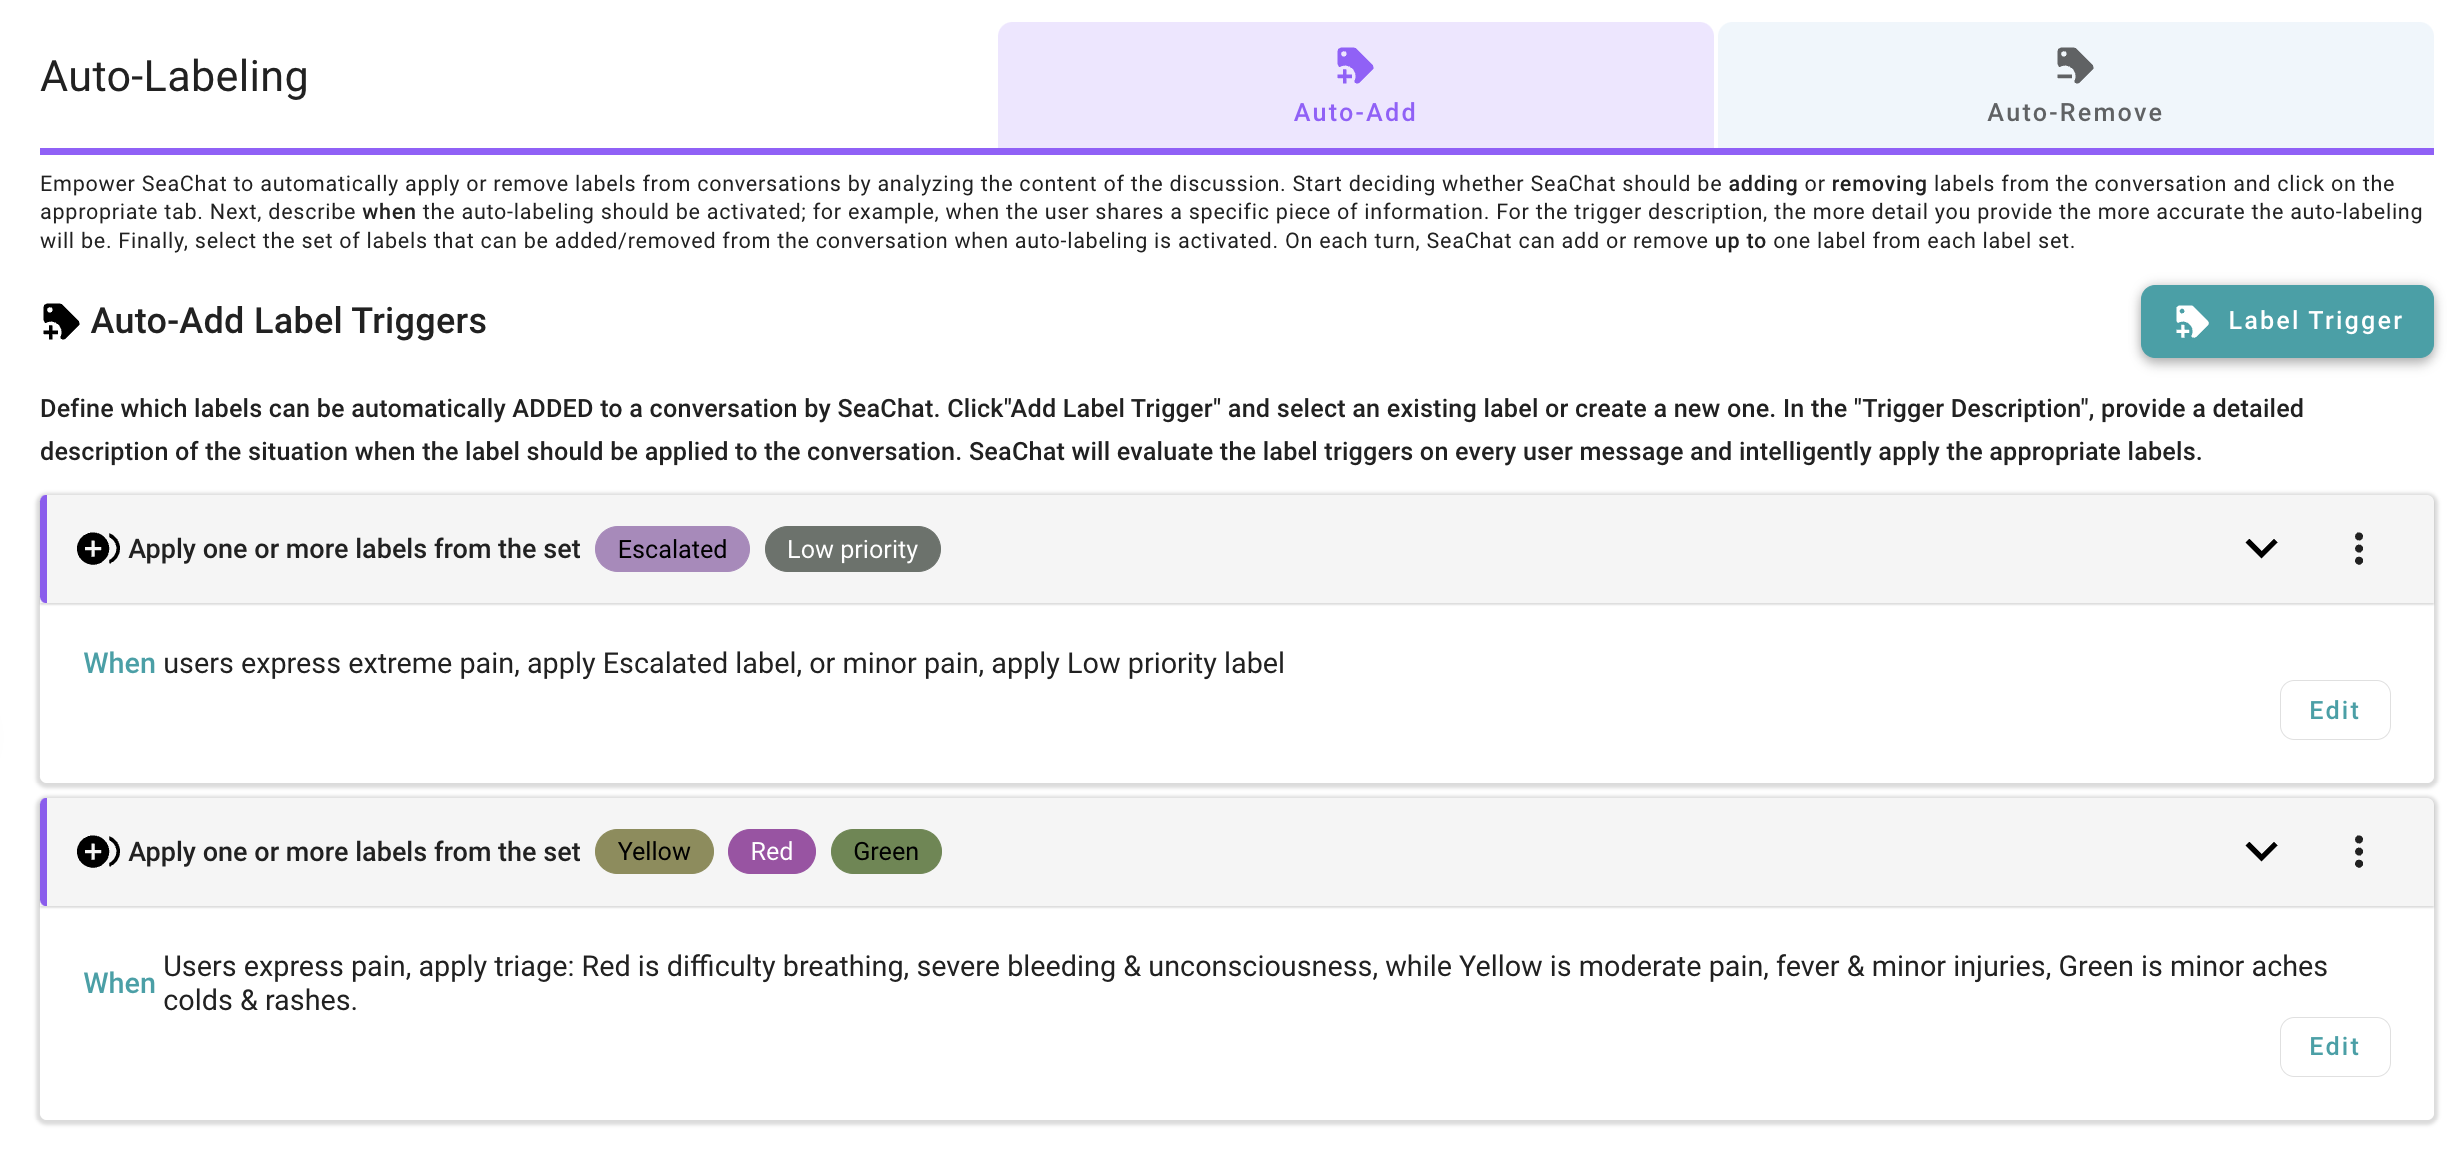
Escalatedmight apply to severe pain, orLow Priorityto minor aches.
- Examples include healthcare hotlines, where
-
Visual Feedback
- Labels appear in conversation histories, providing instant insight into their classification.
How to Set Up Auto Labeling
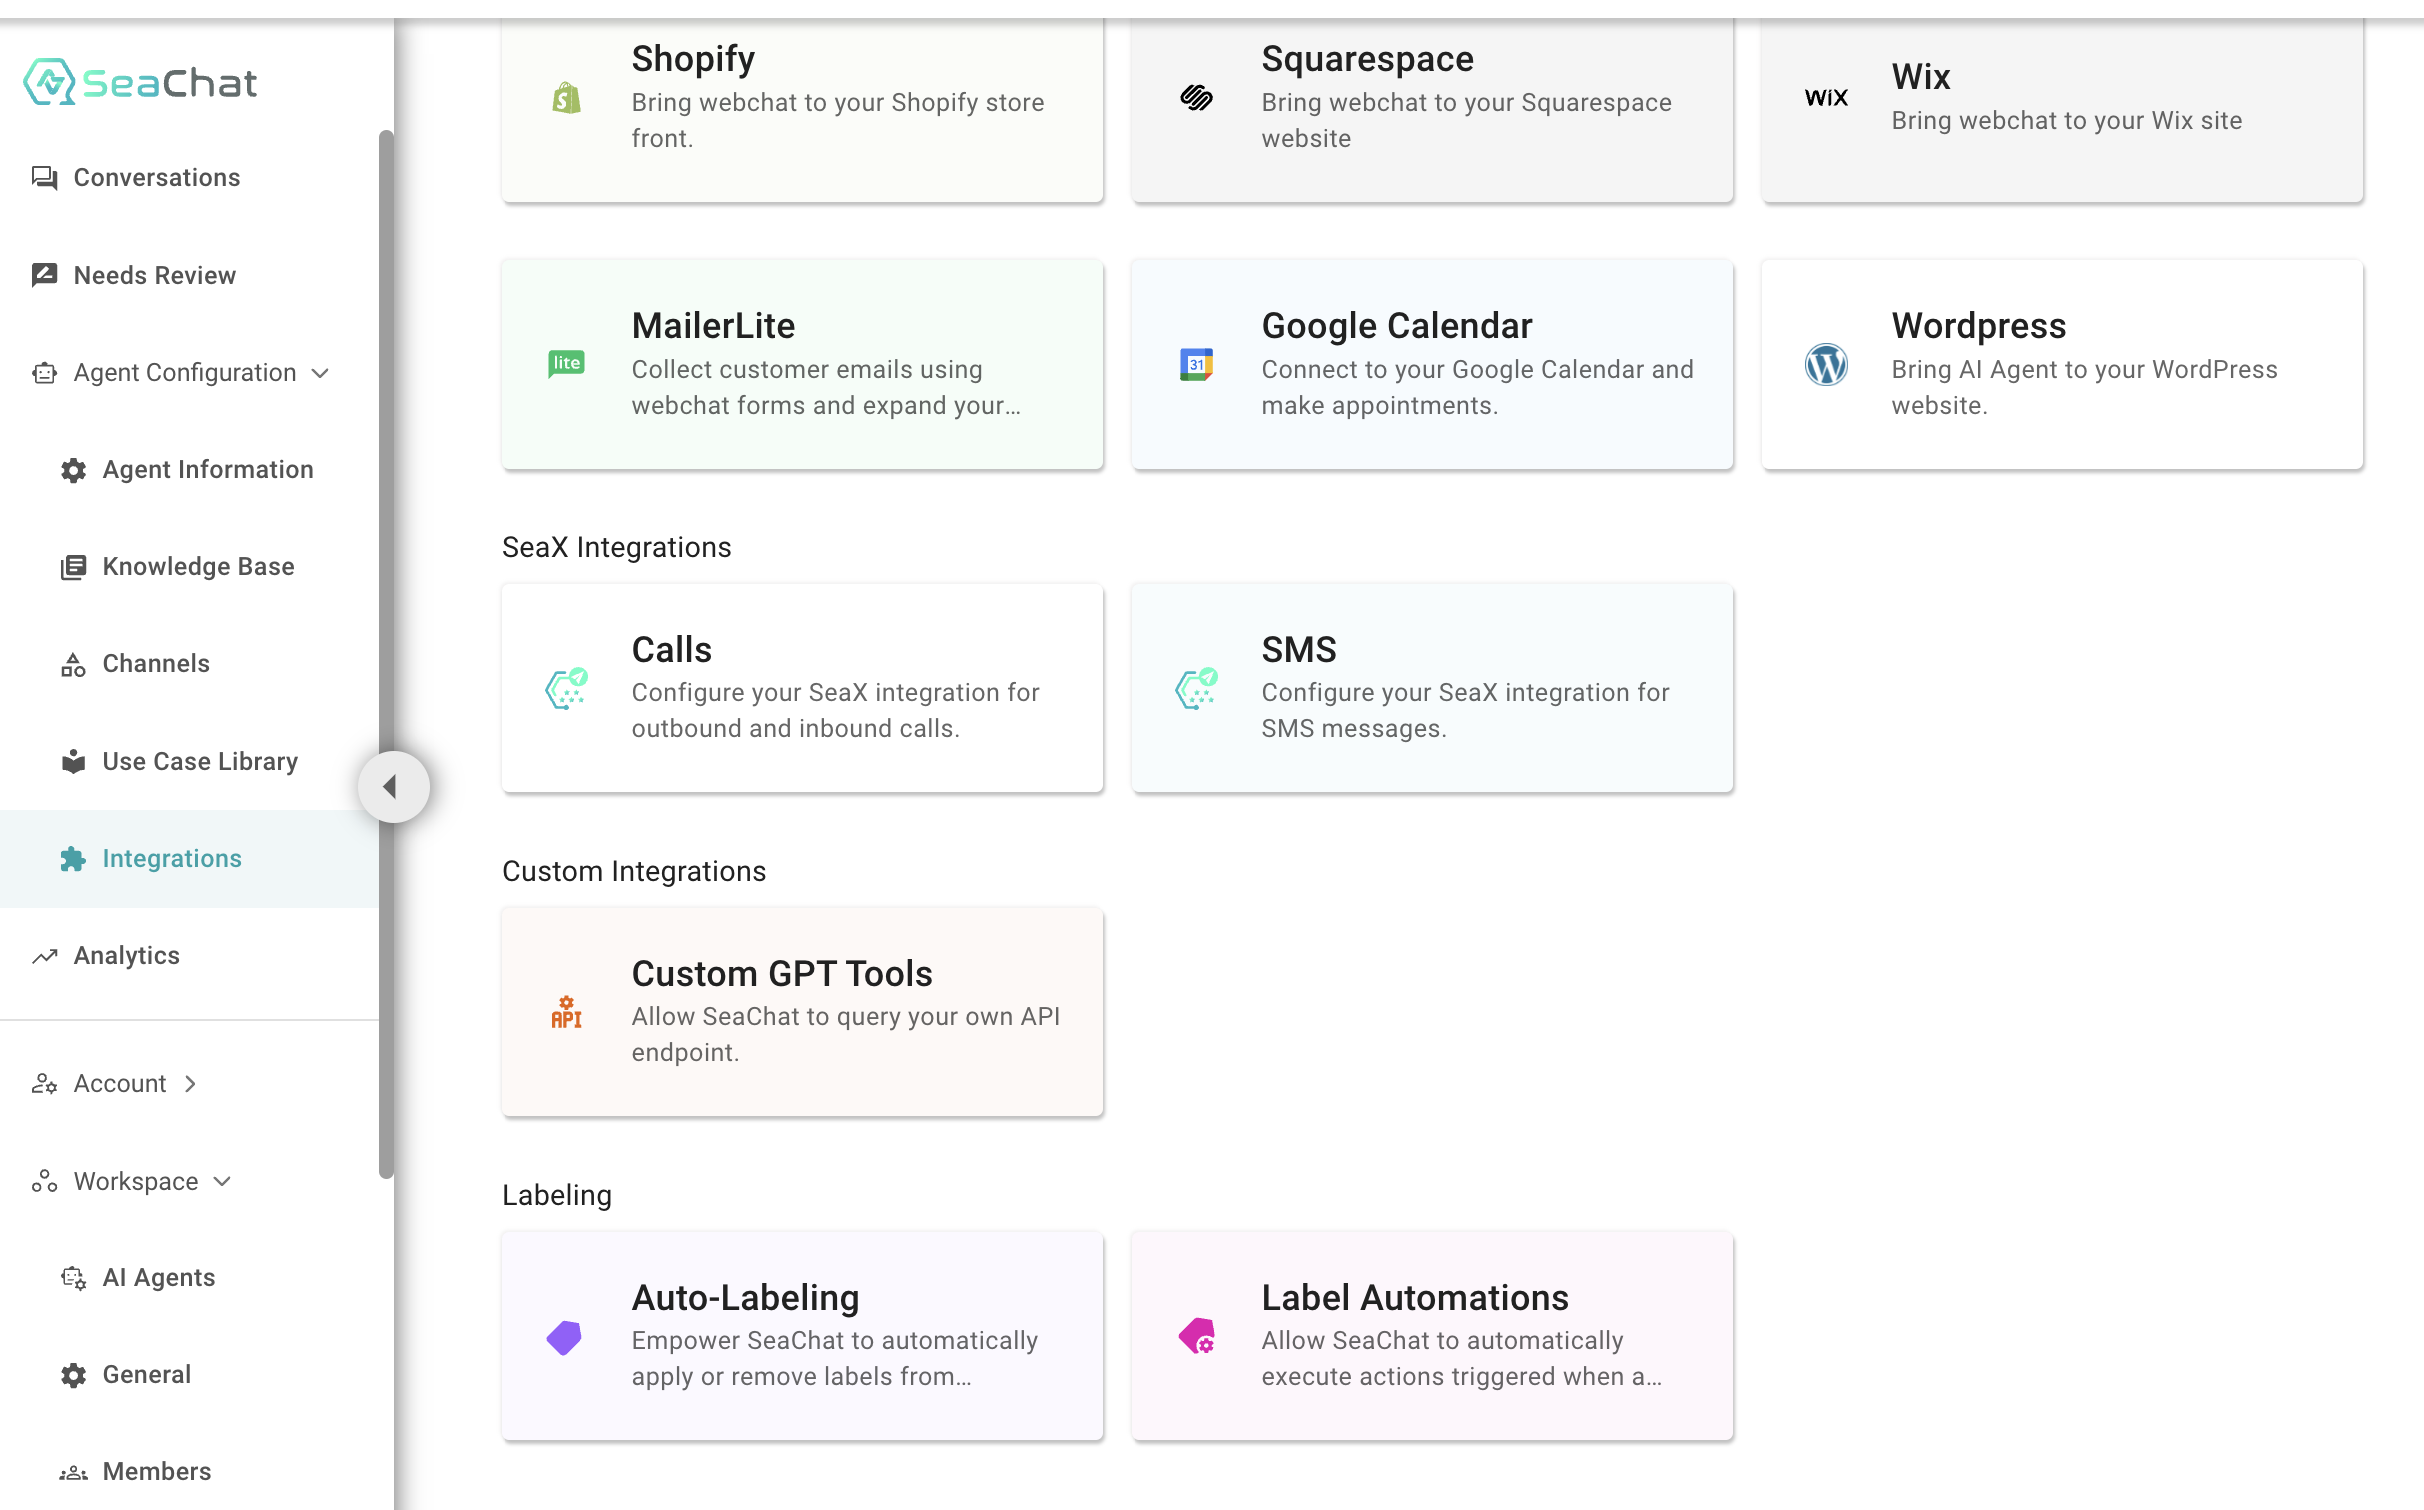
- Navigate to Integrations
- Open the
Integrationssection and selectAuto Labeling.
- Open the

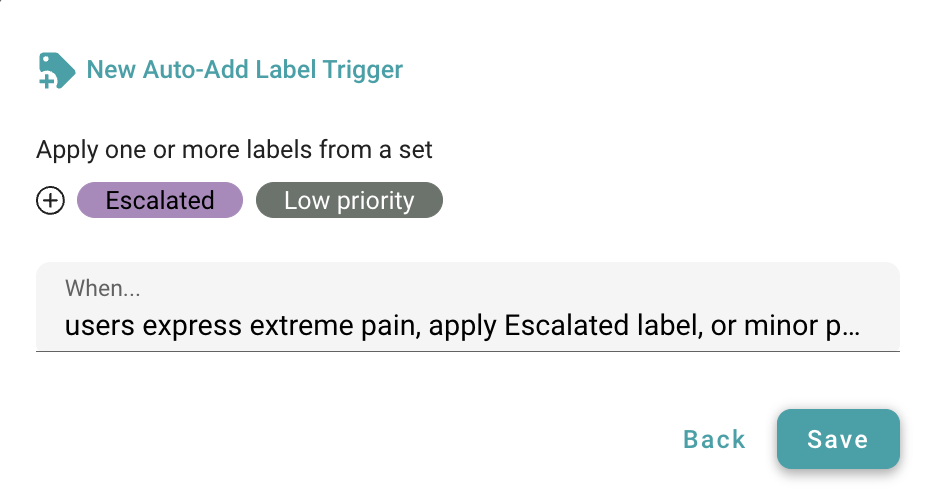
- Create Rules
- Define triggers for adding or removing labels.
- Example: For healthcare hotlines:
Extreme paintriggers theEscalatedlabel.Minor achestriggers theLow Prioritylabel.

- Test Your Rules
- Simulate conversations to see if labels apply correctly.
- Example: Input “I feel so much pain, I need a doctor’s attention” to trigger
Escalated.

- Adjust and Save
- Modify rules to refine accuracy and save the configuration.

Advanced Use Cases
- Medical Triage System
- Labels like
Green,Yellow, andRedcan classify conditions based on severity.- Red: Severe issues like difficulty breathing or severe bleeding.
- Yellow: Moderate pain or fever.
- Green: Minor aches or colds.
- Labels like

- Label Automation
- Link actions to specific labels:
- Trigger an email or SMS when
Escalatedis applied. - Automate follow-ups for
Low Prioritycases.
- Trigger an email or SMS when
- Check out our tutorial on Label Automation for more details.
- Link actions to specific labels:
Benefits of Auto Labeling
- Efficiency: Reduces manual labeling efforts.
- Scalability: Handles high volumes of data.
- Accuracy: Ensures consistent application of rules.
- Customization: Adapts to various industries and use cases.
Conclusion
Auto Labeling transforms how businesses manage conversations and data. From dynamic triaging in healthcare to streamlining customer support, this tool simplifies and accelerates processes while ensuring accuracy. Future tutorials will delve into removing labels and leveraging label automation for more advanced workflows. Stay tuned!