Context Extraction
This feature is only available on
plans
Overview
Extraction allows users to intuitively define the most important aspect of the conversation to keep dialogue relevant and to aid in objectively determining the conversation outcome.
The use cases of Extraction include:
- Build a user persona, so next time the same user comes back, the AI agent still remembers key points from last conversation. For instance:
{married: yes, family: 2 kids, hobby: golf}. - Store a survey results, then later retrieve these results from the API to analyze them. For instance:
{score: 2, feedback: wifi charging issue}. - Qualify a potential buyer, then trigger some actions based on that. For instance:
{intent: buying an iPhone, lease or cash: cash, when: ASAP}.
In this document we’ll cover:
- Designing extraction fields and descriptions for agents to extract for each conversation.
- Extract extraction for each conversation.
Set up Extraction in Advanced Settings
In this section we’ll go through how to effectively set up Extraction fields for your agent. We separate the use cases into two categories:
- Non-survey use cases: the agent editor needs to manually define Extraction of interest.
- Survey use cases: the Extraction is automatically extracted from a list of survey questions and cannot be modified.
Extraction Setup for non-Survey Use Cases
For most agents, to set up Extraction we’ll use the provided UI in the Advanced settings section.
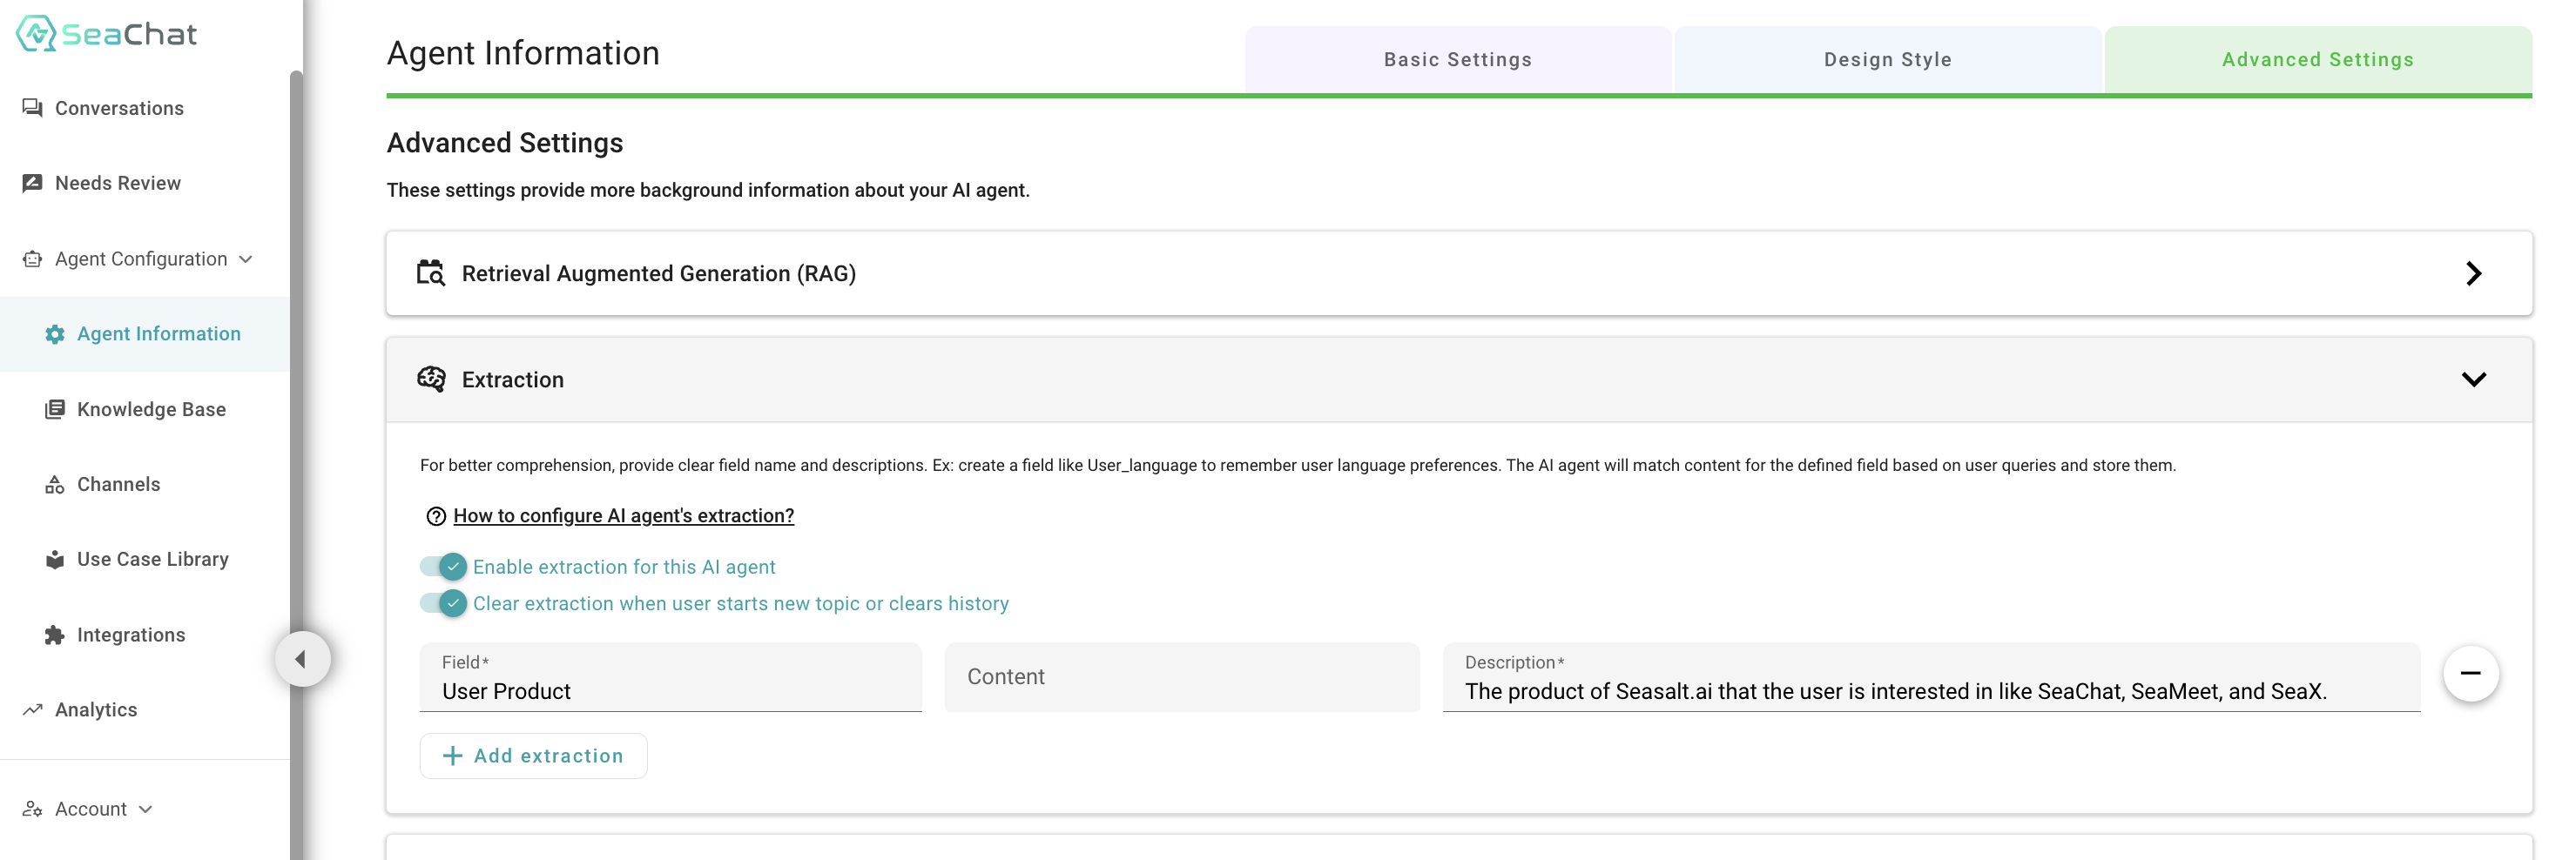
- In the Agent Information, head to the Advanced Settings section at the top right.

Agent Information → Advanced Settings
- Create desired fields in the sections provided:
- Field: The name of the extraction “variable” we want to extract
- Make this name intuitive. Ideally you should know what this field is monitoring for based on the name.
- Content: The default value for this extraction field
- This is the starting value for the extraction field. This will usually be empty.
- Description: The definition of the field
- In natural language, describe what this field is and what type of value to extract.
- Be descriptive yet concise here. This can greatly affect extracted values.
- Field: The name of the extraction “variable” we want to extract
- Add or remove fields as necessary using the plus (add) and minus (remove) icons on the right side of the page
- Finally, save your extraction settings by clicking the save button at the bottom.
Extraction Setup for Survey Use Cases
For the survey use cases (CSAT, Brand Perception, Market Research, etc.), the extraction pane in Advanced Settings will be dynamically set from the description section.
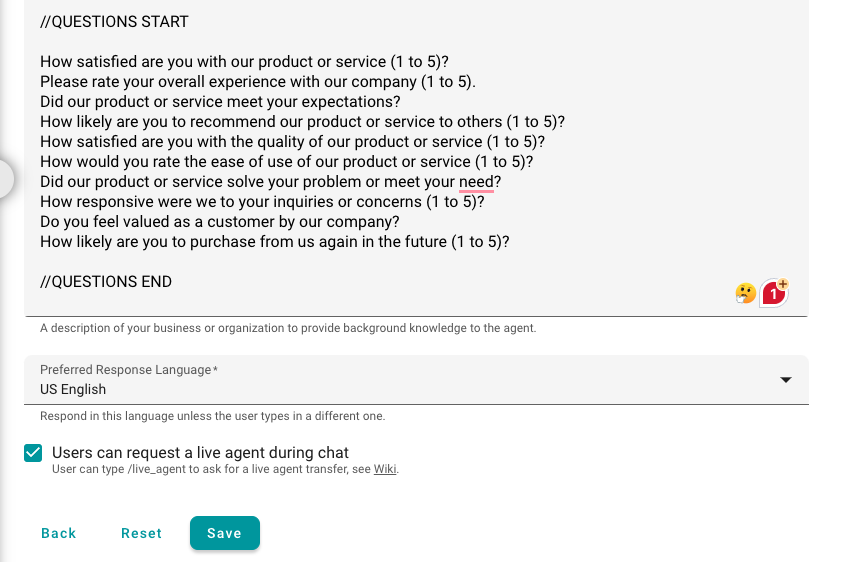
- By selecting one of these use cases, the description section will contain a blank question section (for base survey use case) or a pre-filled question section (templated surveys such as CSAT).
- This section is denoted by //QUESTIONS START at the top and //QUESTIONS END at the bottom.
- The format is ONE question per line with ALL question in between //QUESTIONS START and //QUESTIONS END.
- Feel free to add, remove, or alter the questions.
🚨 NOTE 🚨
DO NOT modify the //QUESTIONS START and //QUESTIONS END tokens. These are crucial to properly populate the extraction field for this use case
- After setting up the description and question section, press the save button at the bottom.

Question Section
- Head over to the Advanced Settings tab to make sure the fields are properly set.
🚨 NOTE 🚨
DO NOT change any section in the extraction pane when using Survey use cases. If you need to make a change to the questions use the description page.

Advanced Settings
Extraction in Conversations
The extraction for each conversation will update in real time and we can check the values from the Conversation page
- Head to the Conversations page from the left hand side

Conversations
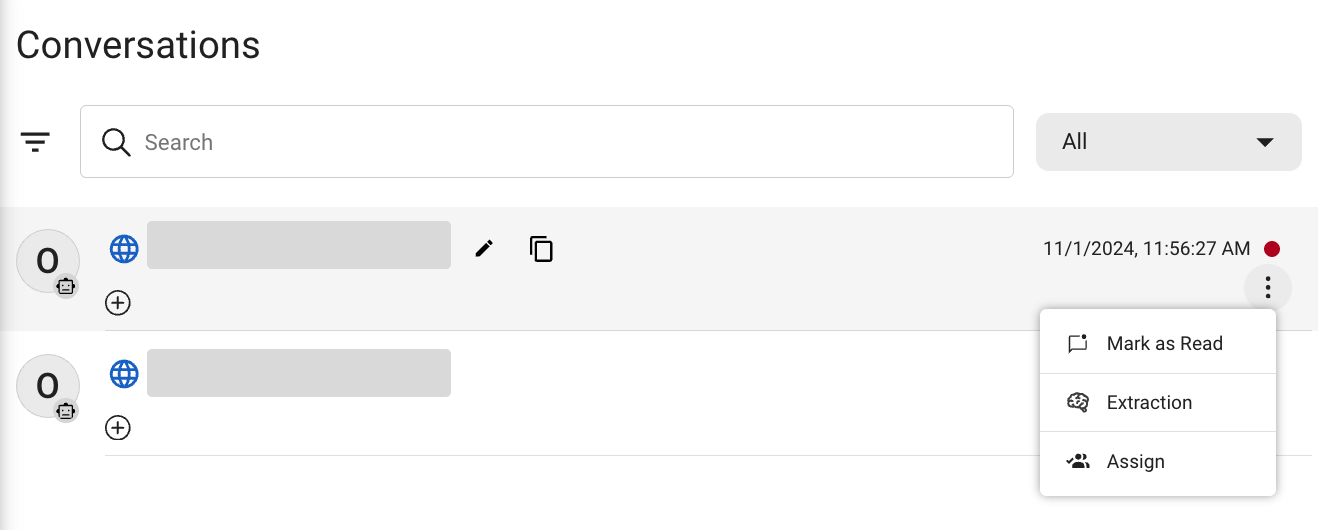
- Find the desired conversation from the list and press the triple dot icon in the bottom right corner for that conversation.

Click on Extraction
- Pressing Extraction will bring up the latest extracted values for that conversation

Latest Extracted Values
🤖 Example Use Case
Imagine we have an AI agent tailored to enhance customer experience management. The agent’s effectiveness hinges on its ability to track user preferences accurately, necessitating the establishment of specific extraction fields for such data.
Initial Setup
Before delving into extraction field configurations, it’s crucial to have your AI agent operational. If you haven’t set up your agent yet, please consult our Create New Agent guide for detailed instructions.
Define Extraction
Proceed by navigating to the Advanced Settings tab where you can define the extraction fields:
-
Field: For instance, setting ‘product_name’ as a field indicates the agent will focus on extracting information about the product names mentioned during interactions.
-
Description: Here, you’ll specify what information the field should capture. For ‘product_name’, the description would guide the AI to recognize and remember product names from the conversation. I also gave examples of the type of information to extract.
-
Save: Ensure to save these configurations to apply them.
Monitoring Conversation Extraction
The AI agent will monitor conversations in real time, updating extraction fields as soon as relevant information is detected. This dynamic updating enables the agent to adapt its responses based on the extracted data.
The extracted values from conversations are accessible within the system. Simply Move to the Conversations page, select the desired conversation, and click on the Extraction button to view the extracted values. Read again here to learn to see your result like the image below.
Retrieve Conversation Extraction
Each conversation’s Extraction value can be retrieved via the API for further processing.


