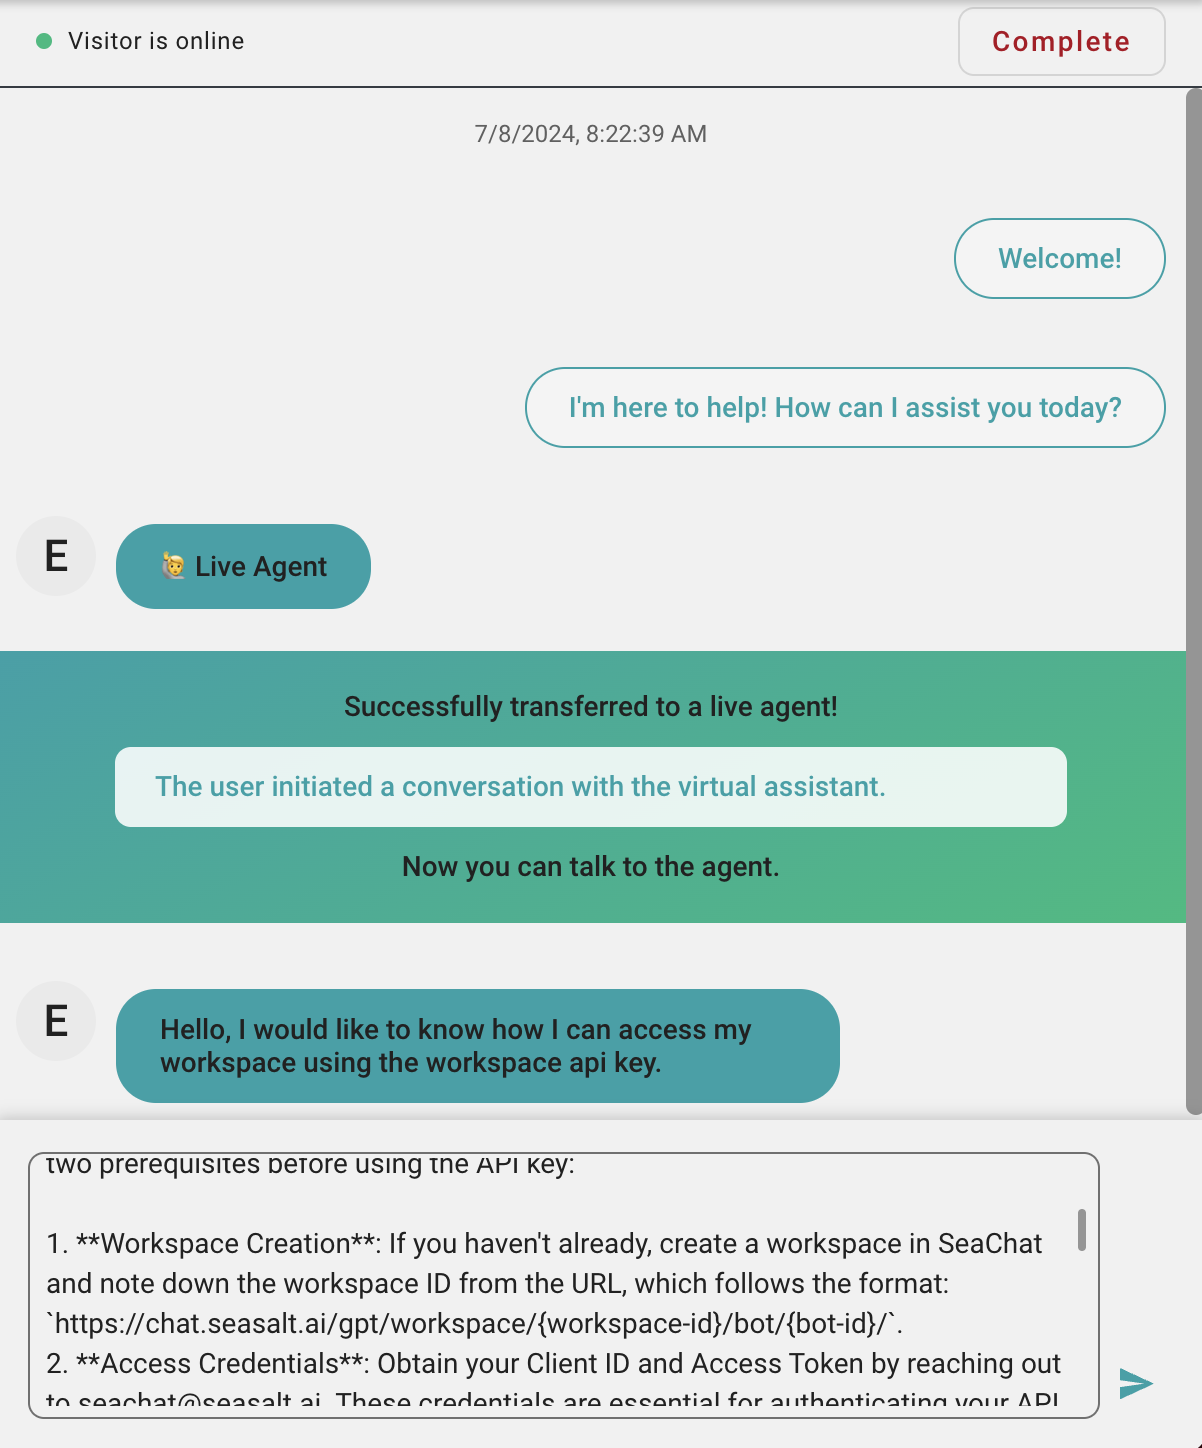
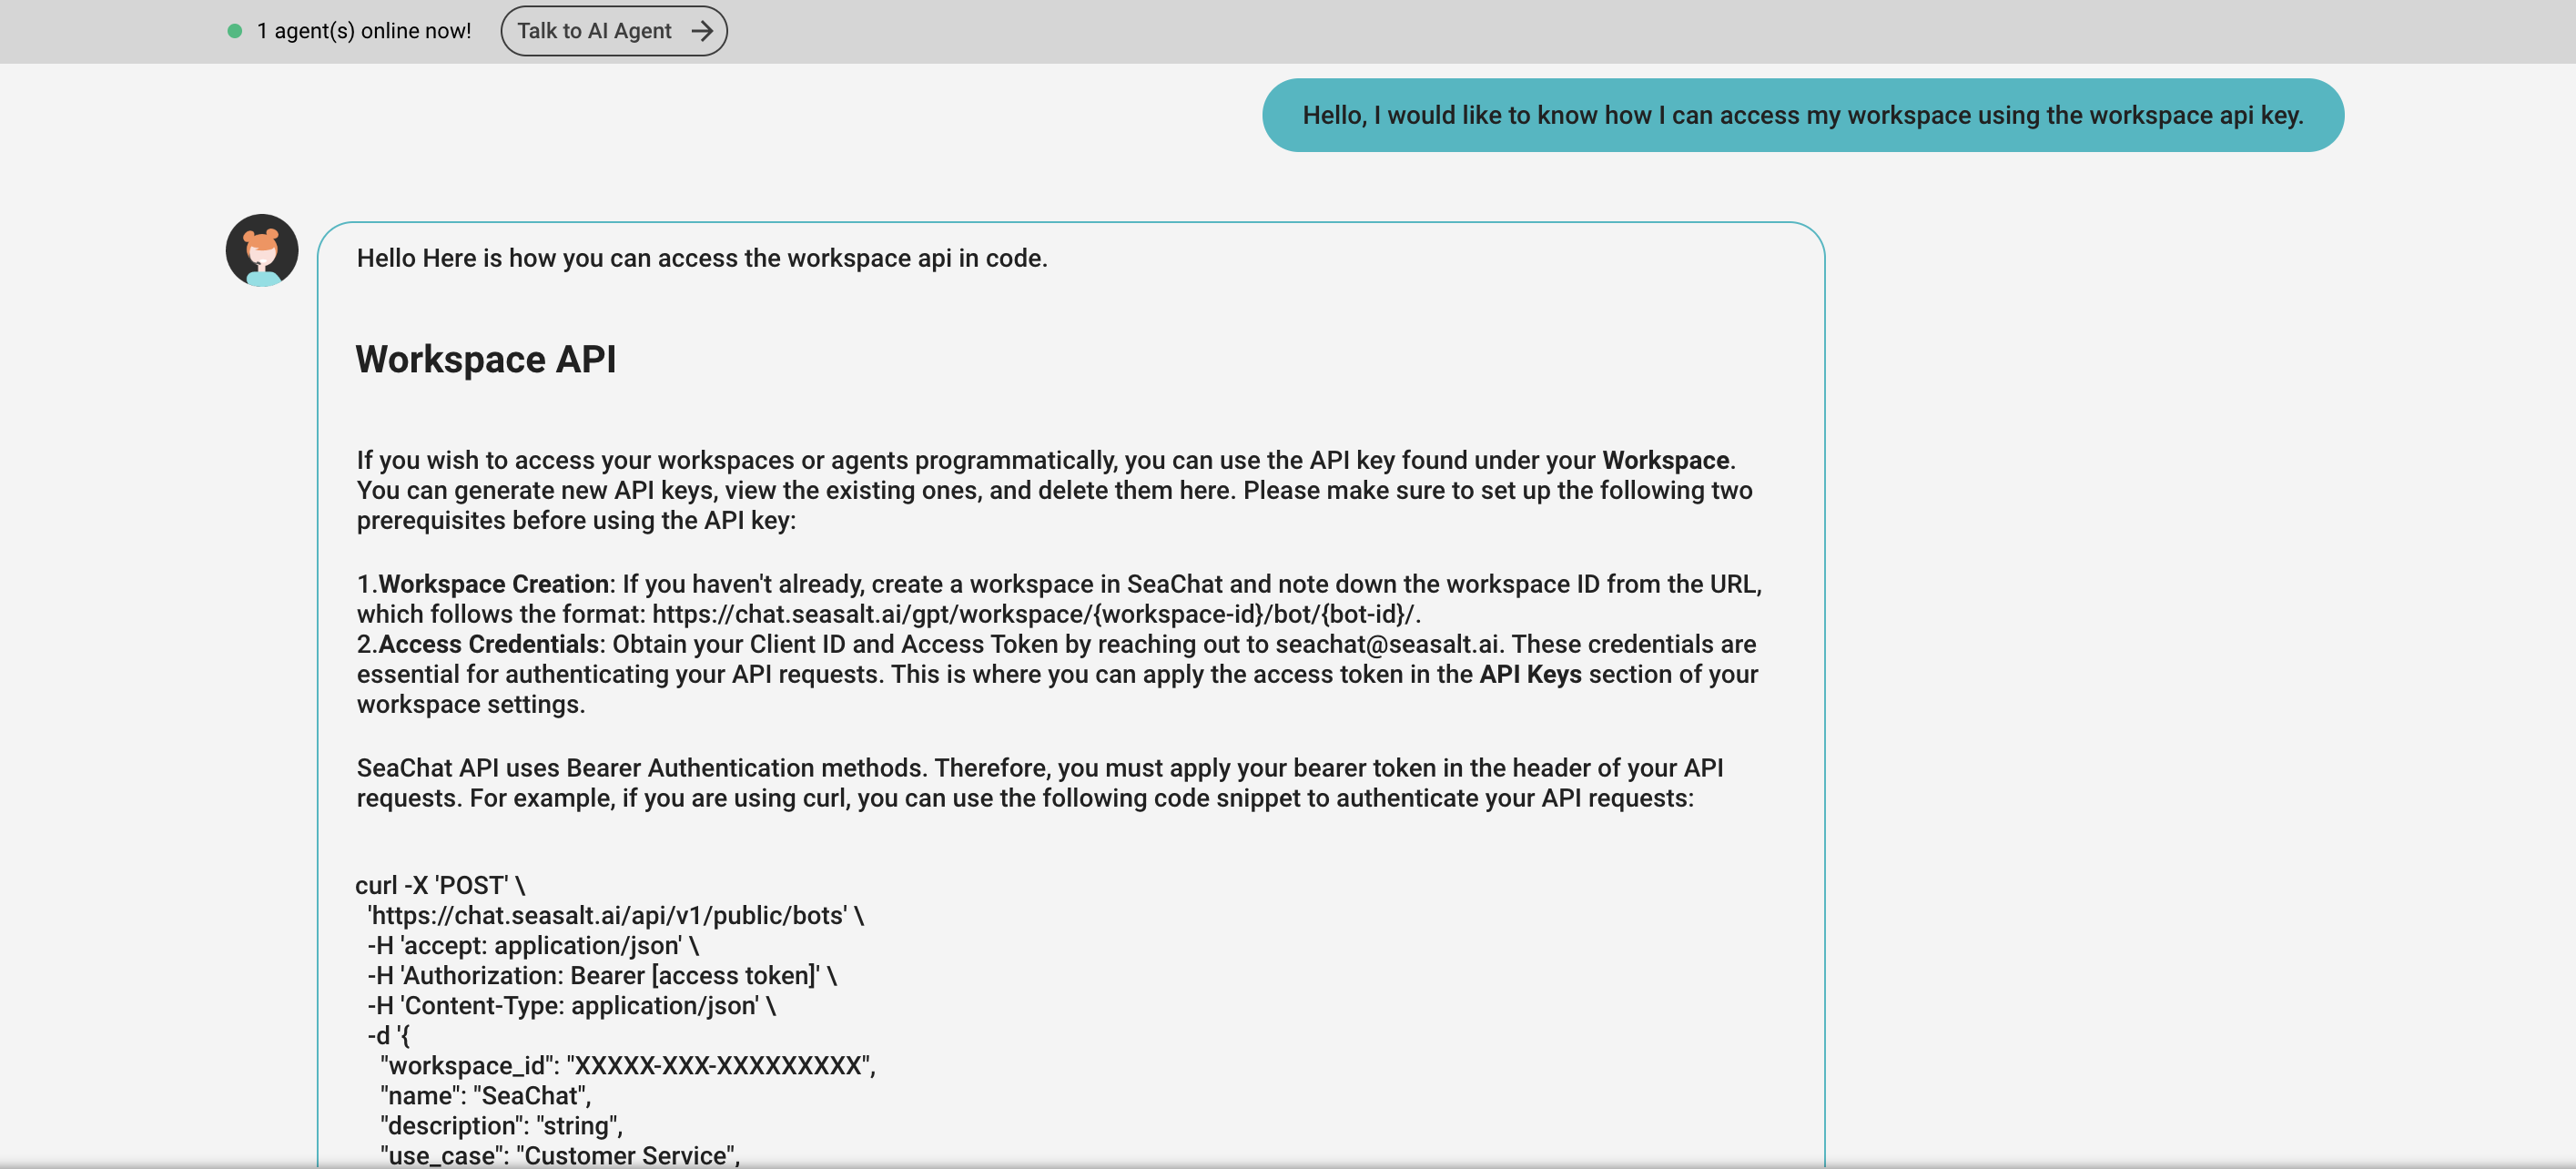
Live Agent
A live agent is a human agent who can take over the conversation from the AI agent when needed. Not only can live agents take over the conversation, but they can also provide the virtual agent with new knowledge, and help train the virtual agent by testing and fine-tuning the response of the AI agent.
Depending on your SeaChat channel, it might take different configurations to enable the live agent feature. SeaChat offers many integration configurations and channels. We recommend you refer to Integration or Channels to learn how to set up your agent properly.
In this tutorial, we will show you how to transfer to a live agent during chat conversations and how to set it up, using the different methods that SeaChat provides.
Setting it up
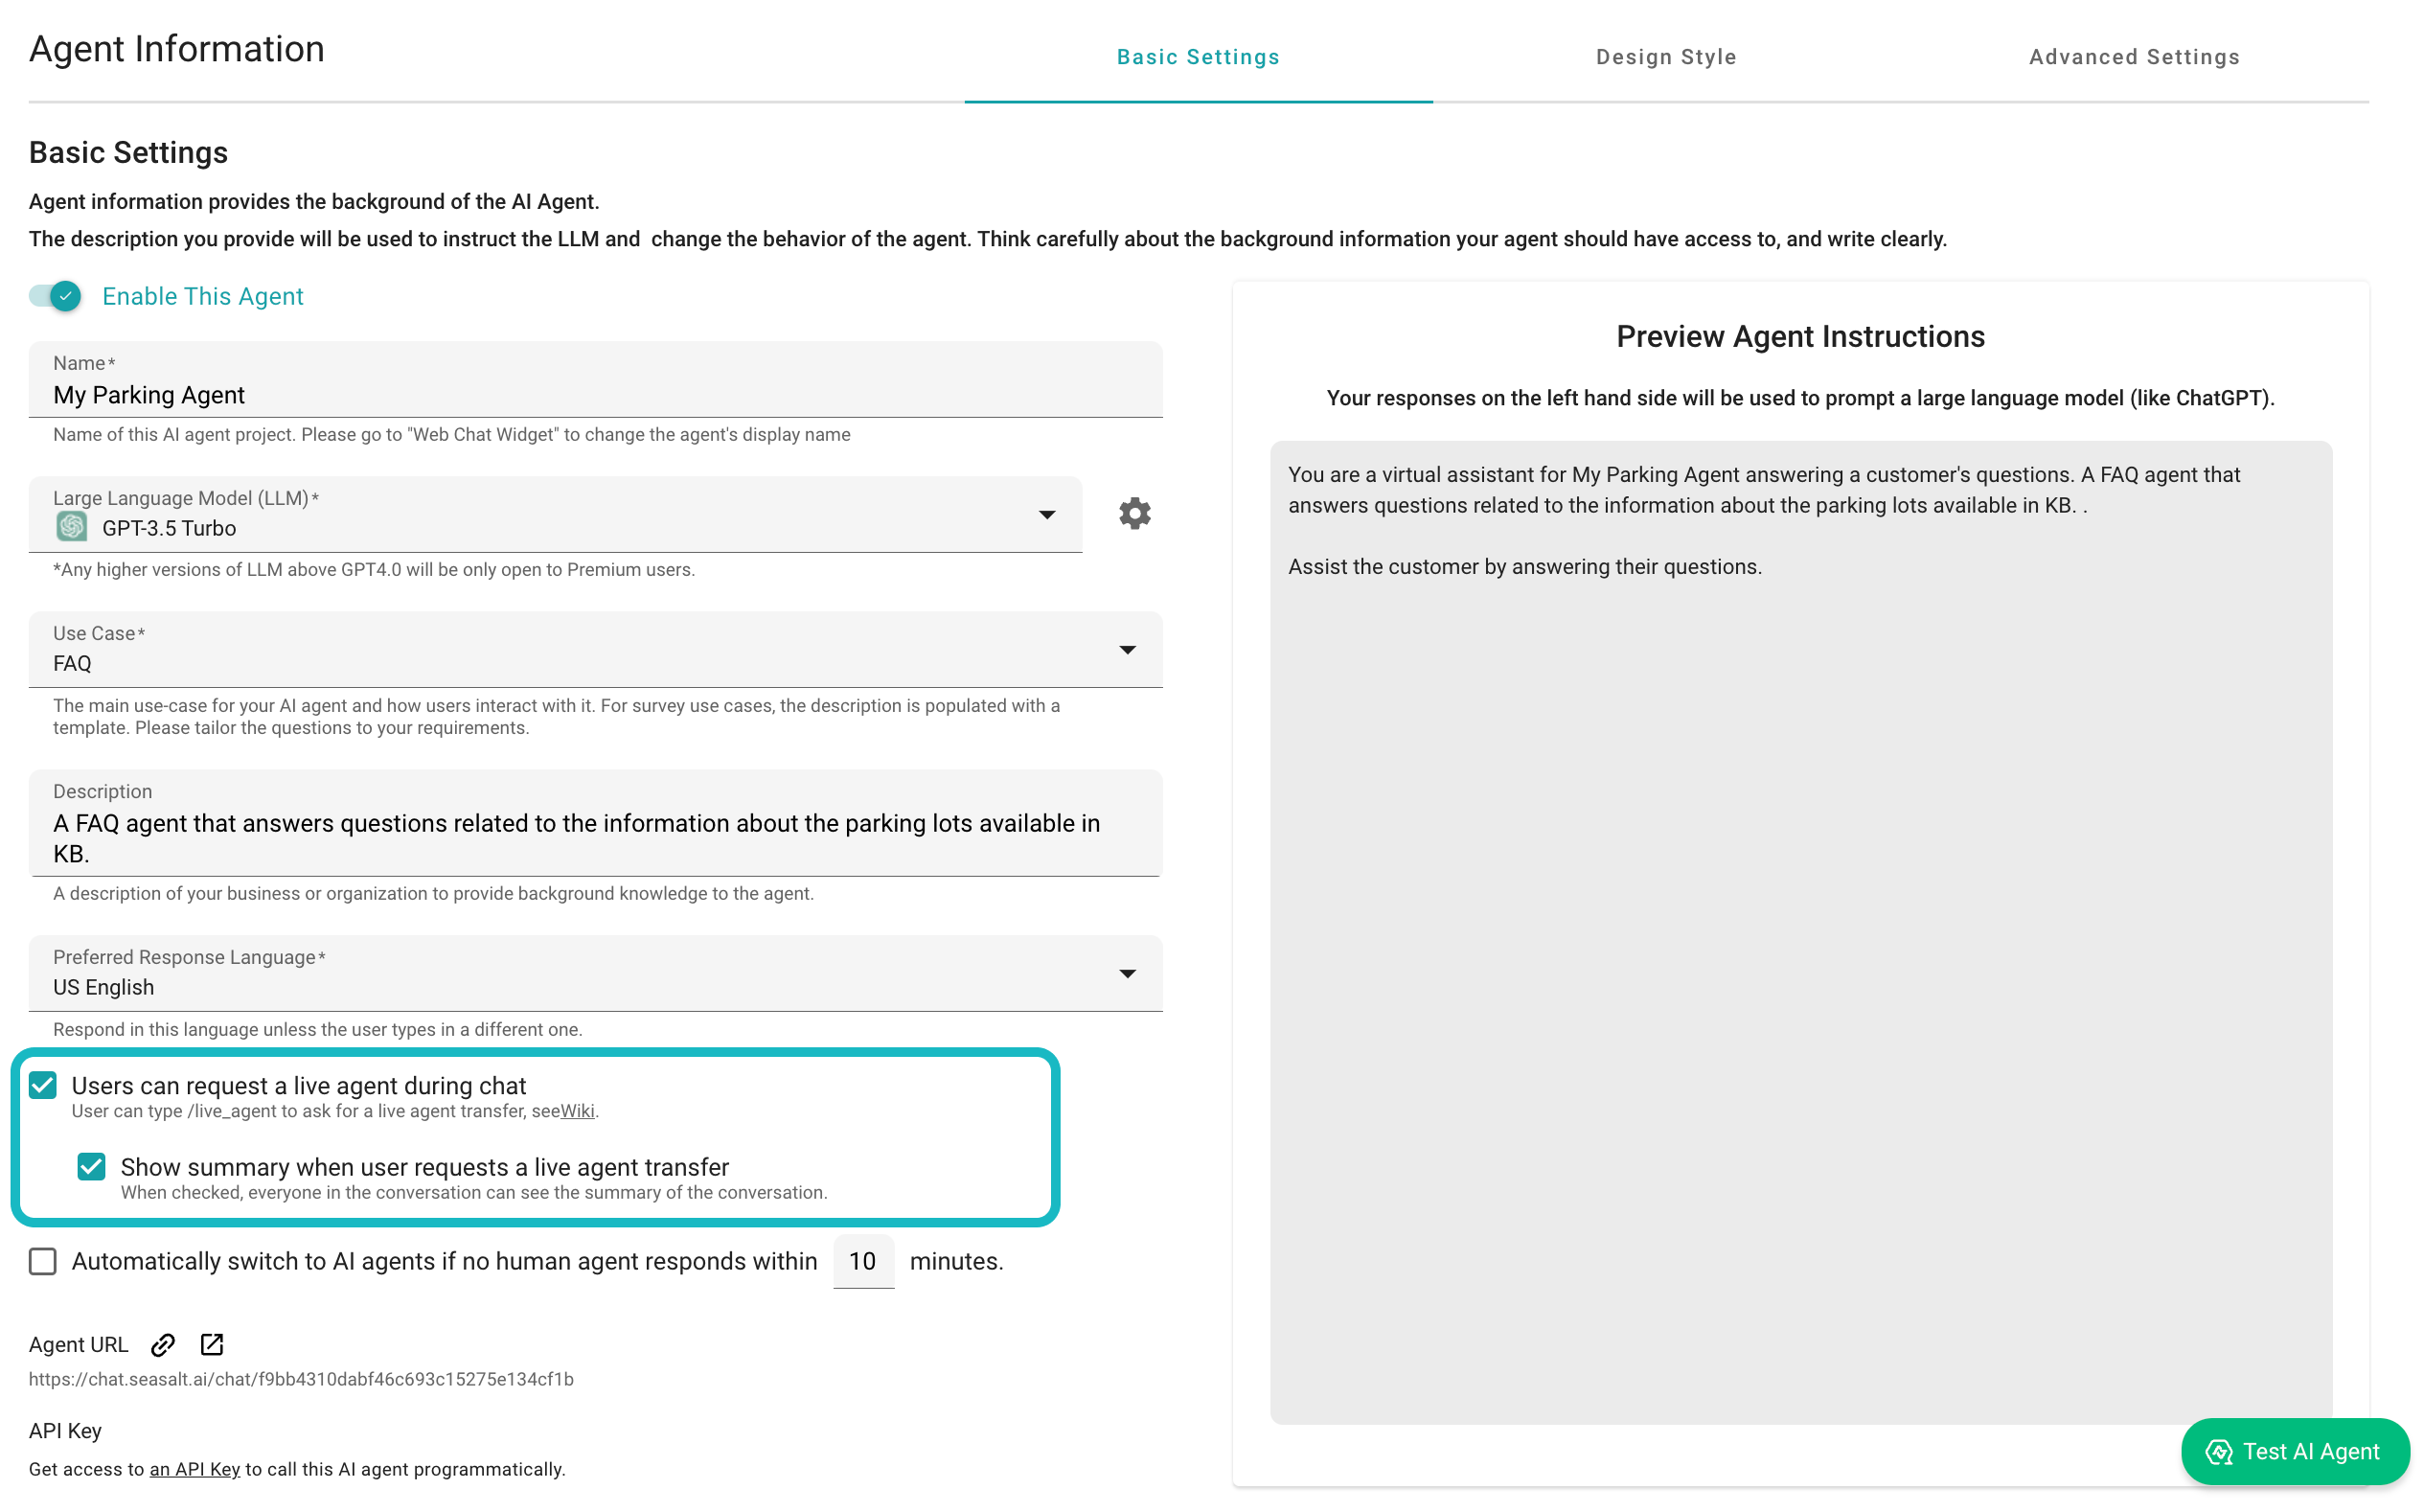
Before you integrate your custom AI agent into your production, we need to make sure that the live agent feature is enabled in your SeaChat account. Go to Agent Information under Agent Configuration. You can see all the basic settings for your AI agent. If you want to reconfigure your agent or simply to have an overview of your agent, you can do them all here.
At the bottom of the screen, you can see the checkbox that says Users can request a live agent during chat. Make sure to check this box to enable the live agent feature.
❗ IMPORTANT ❗
If you choose to enable the feature of the live agent, your customer will now have the option to request a live agent during the chat conversation. This requires you to provide a real-human agent that will monitor and respond to the user.
Talk to Customer as a Live Agent
Find the Conversations section from the sidebar menu on the left. Here you can see all the conversations that your AI agent has had with your customers. You can see the conversation history and the status of the conversation and this is the control center of your live agent’s conversation.
If a customer requests a live agent during the chat conversation, the human agent will see a notification pop-up that indicates the request. If the list of conversations gets too long, simply click on the Live Agent button to see the list of conversations that live agents need to complete.
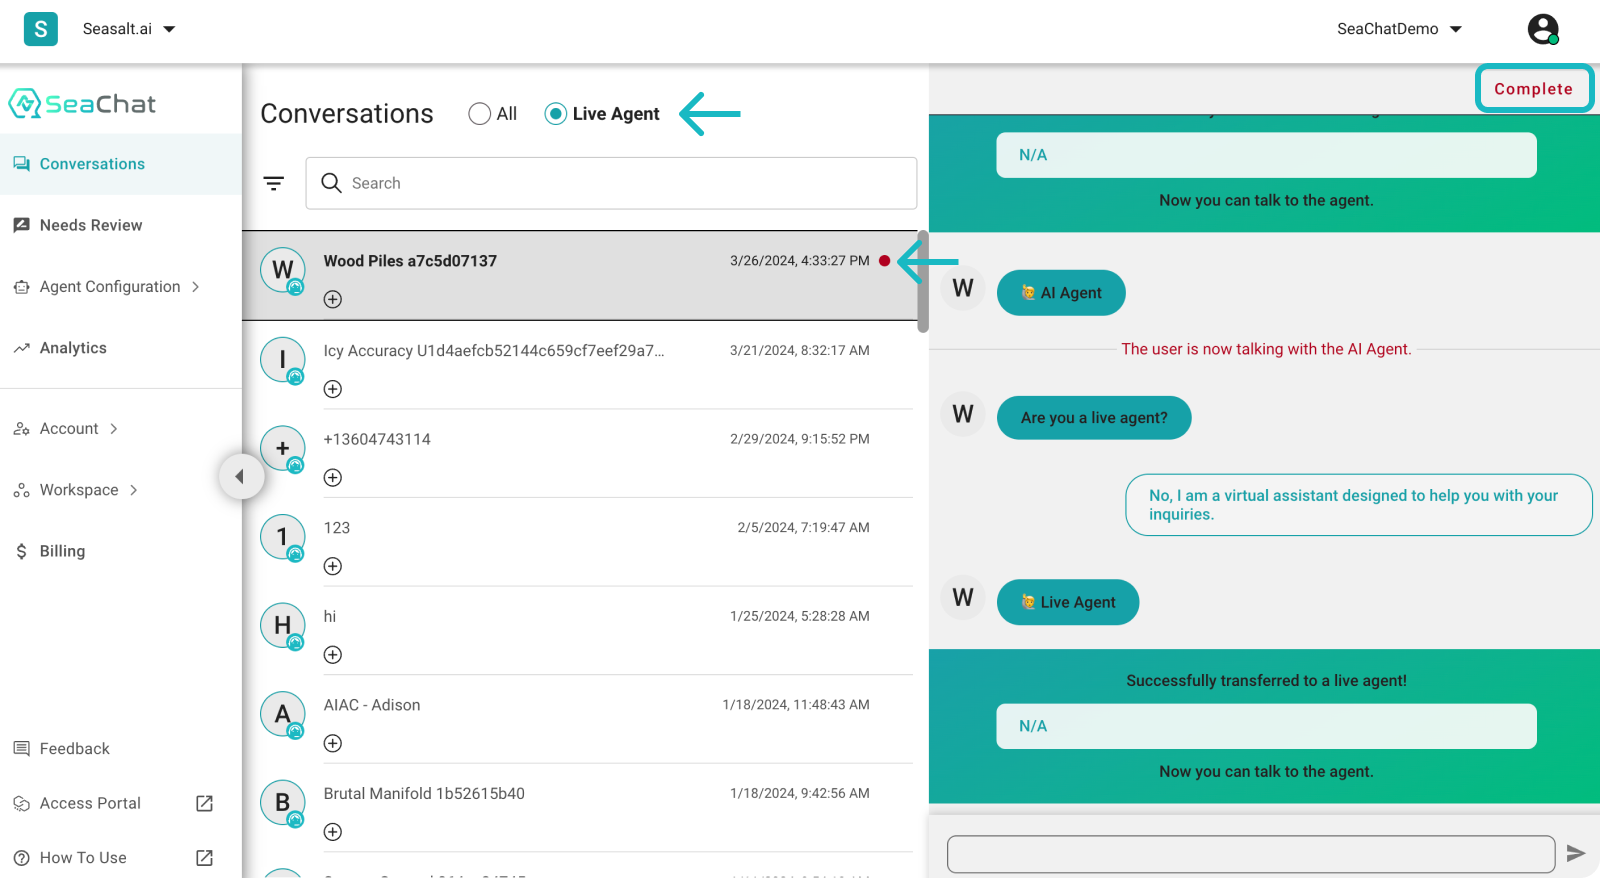
That’s it. You have now set up a Live Agent Transfer function for your SeaChat AI Agent. You can have a live agent take over the conversation to further assist your customer. Once the live agent has completed the request that the customer has, the live agent must click on the Complete button to give the conversation back to the AI agent.
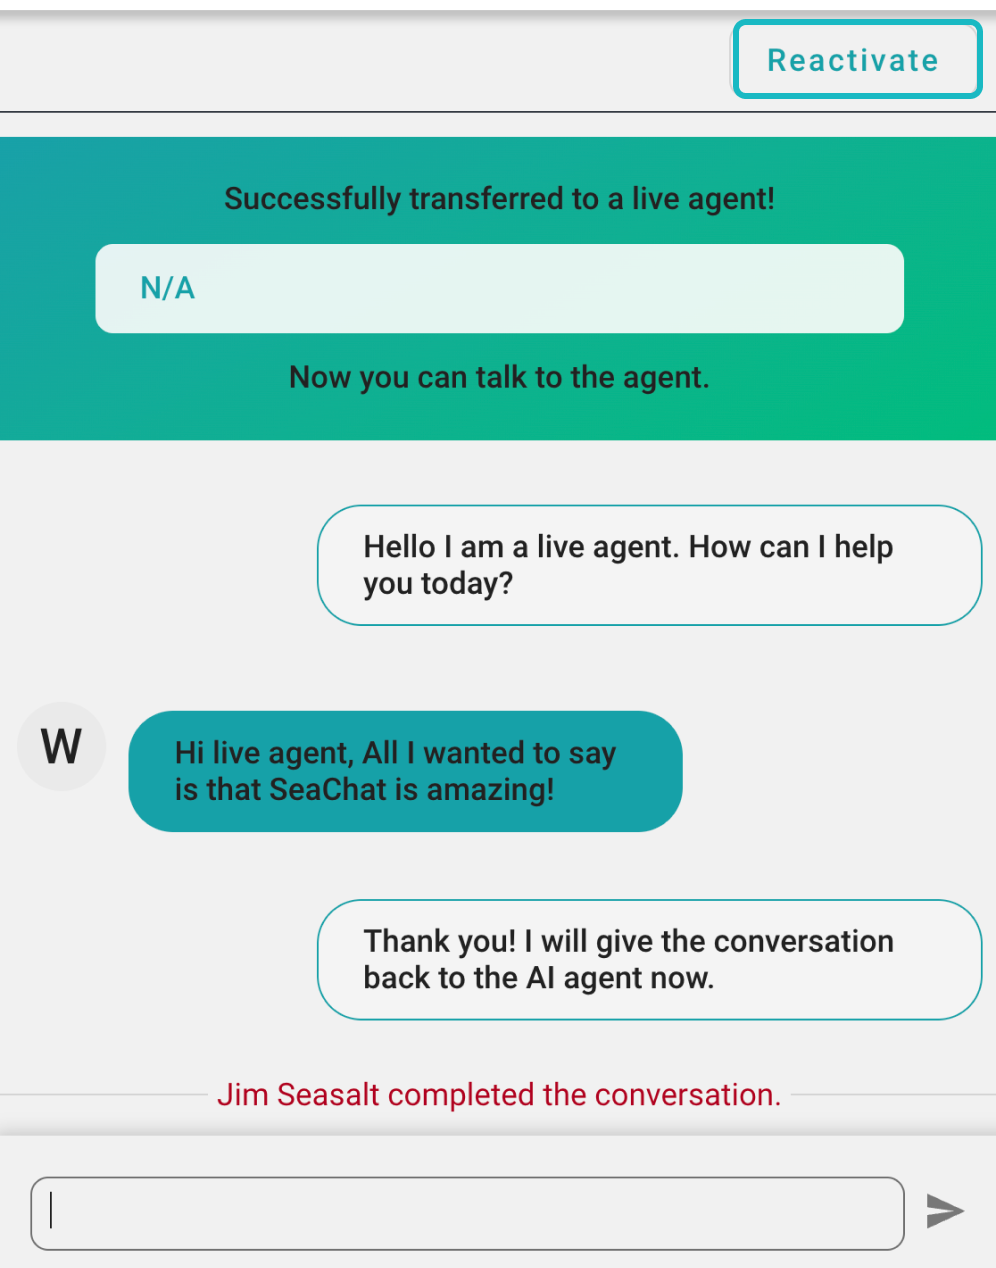
Once the live agent has completed the conversation, the conversation will be marked as completed and the customer will be notified that the conversation has been completed. Live agents can also reactivate the conversation when needed. Simply click on the Reactivate button to restart the conversation.
Markdown Support
SeaChat conversations support url and Markdown formats in its web channel. Both your live agents and your users can insert links and Markdown text in the chat conversation.
Markdown Support in Agent Response
The conversation will be displayed in the same format as it was inputted. This feature is especially useful when information needs to maintain its original format for readability. You can easily copy and paste the information to the conversation without losing the format. Currently, the markdown support only applies to the web chat integration.
Markdown Support in WebChat UI
How to Request Live Agent on WebChat
📖 Note 📖
The WebChat widget will be the same for Shopify and Squarespace. The only difference is the way you integrate the widget into your website.
Check Integration for more information on how to do it.
The WebChat Channel is a channel that allows you to embed the SeaChat widget on your website. This channel is the most common channel used by businesses to provide customer support.
The chat conversation will let your customer know how many live agents are currently available, and they can request a live agent during the chat conversation by clicking the Talk to Live Agent button.
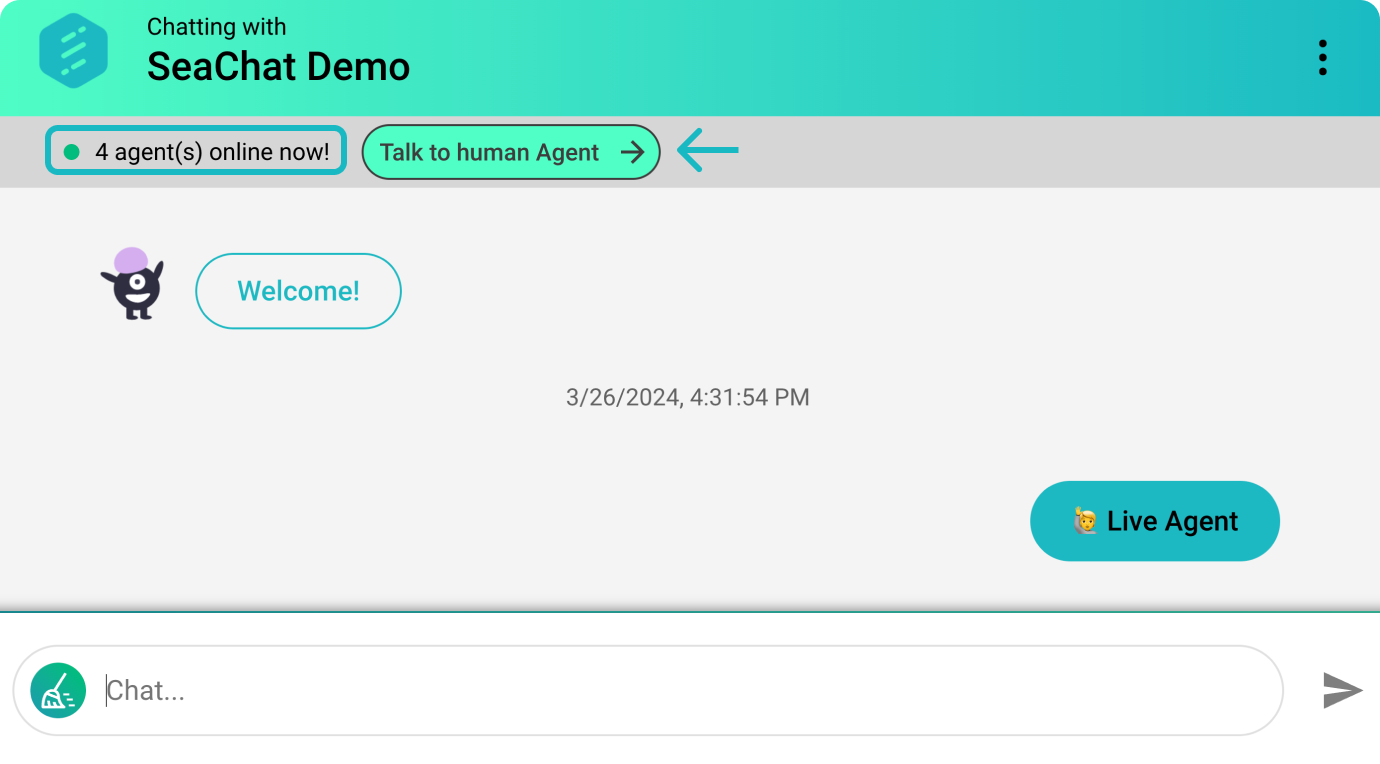
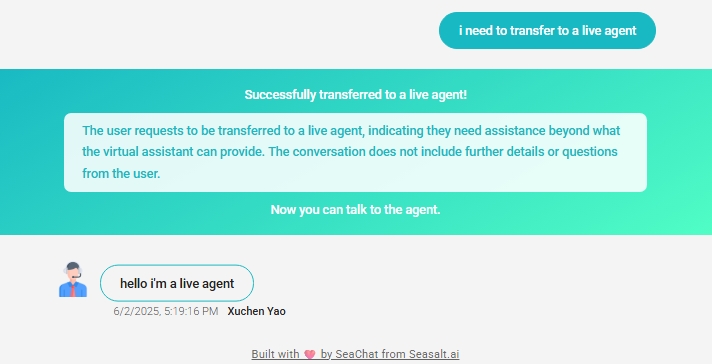
If your AI agent is deployed to a non-webchat channel, such as Messenger and WhatsApp, then they cannot display the button. Instead, users can ask for a live agent transfer verbally like the following:
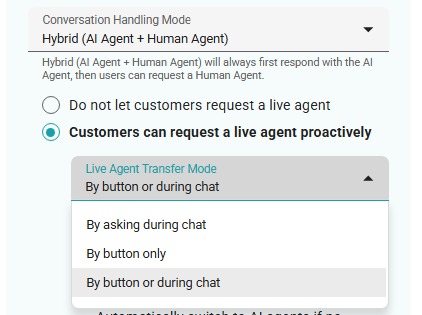
You can enable this feature separately via the following setting:
How to Request Live Agent on LINE
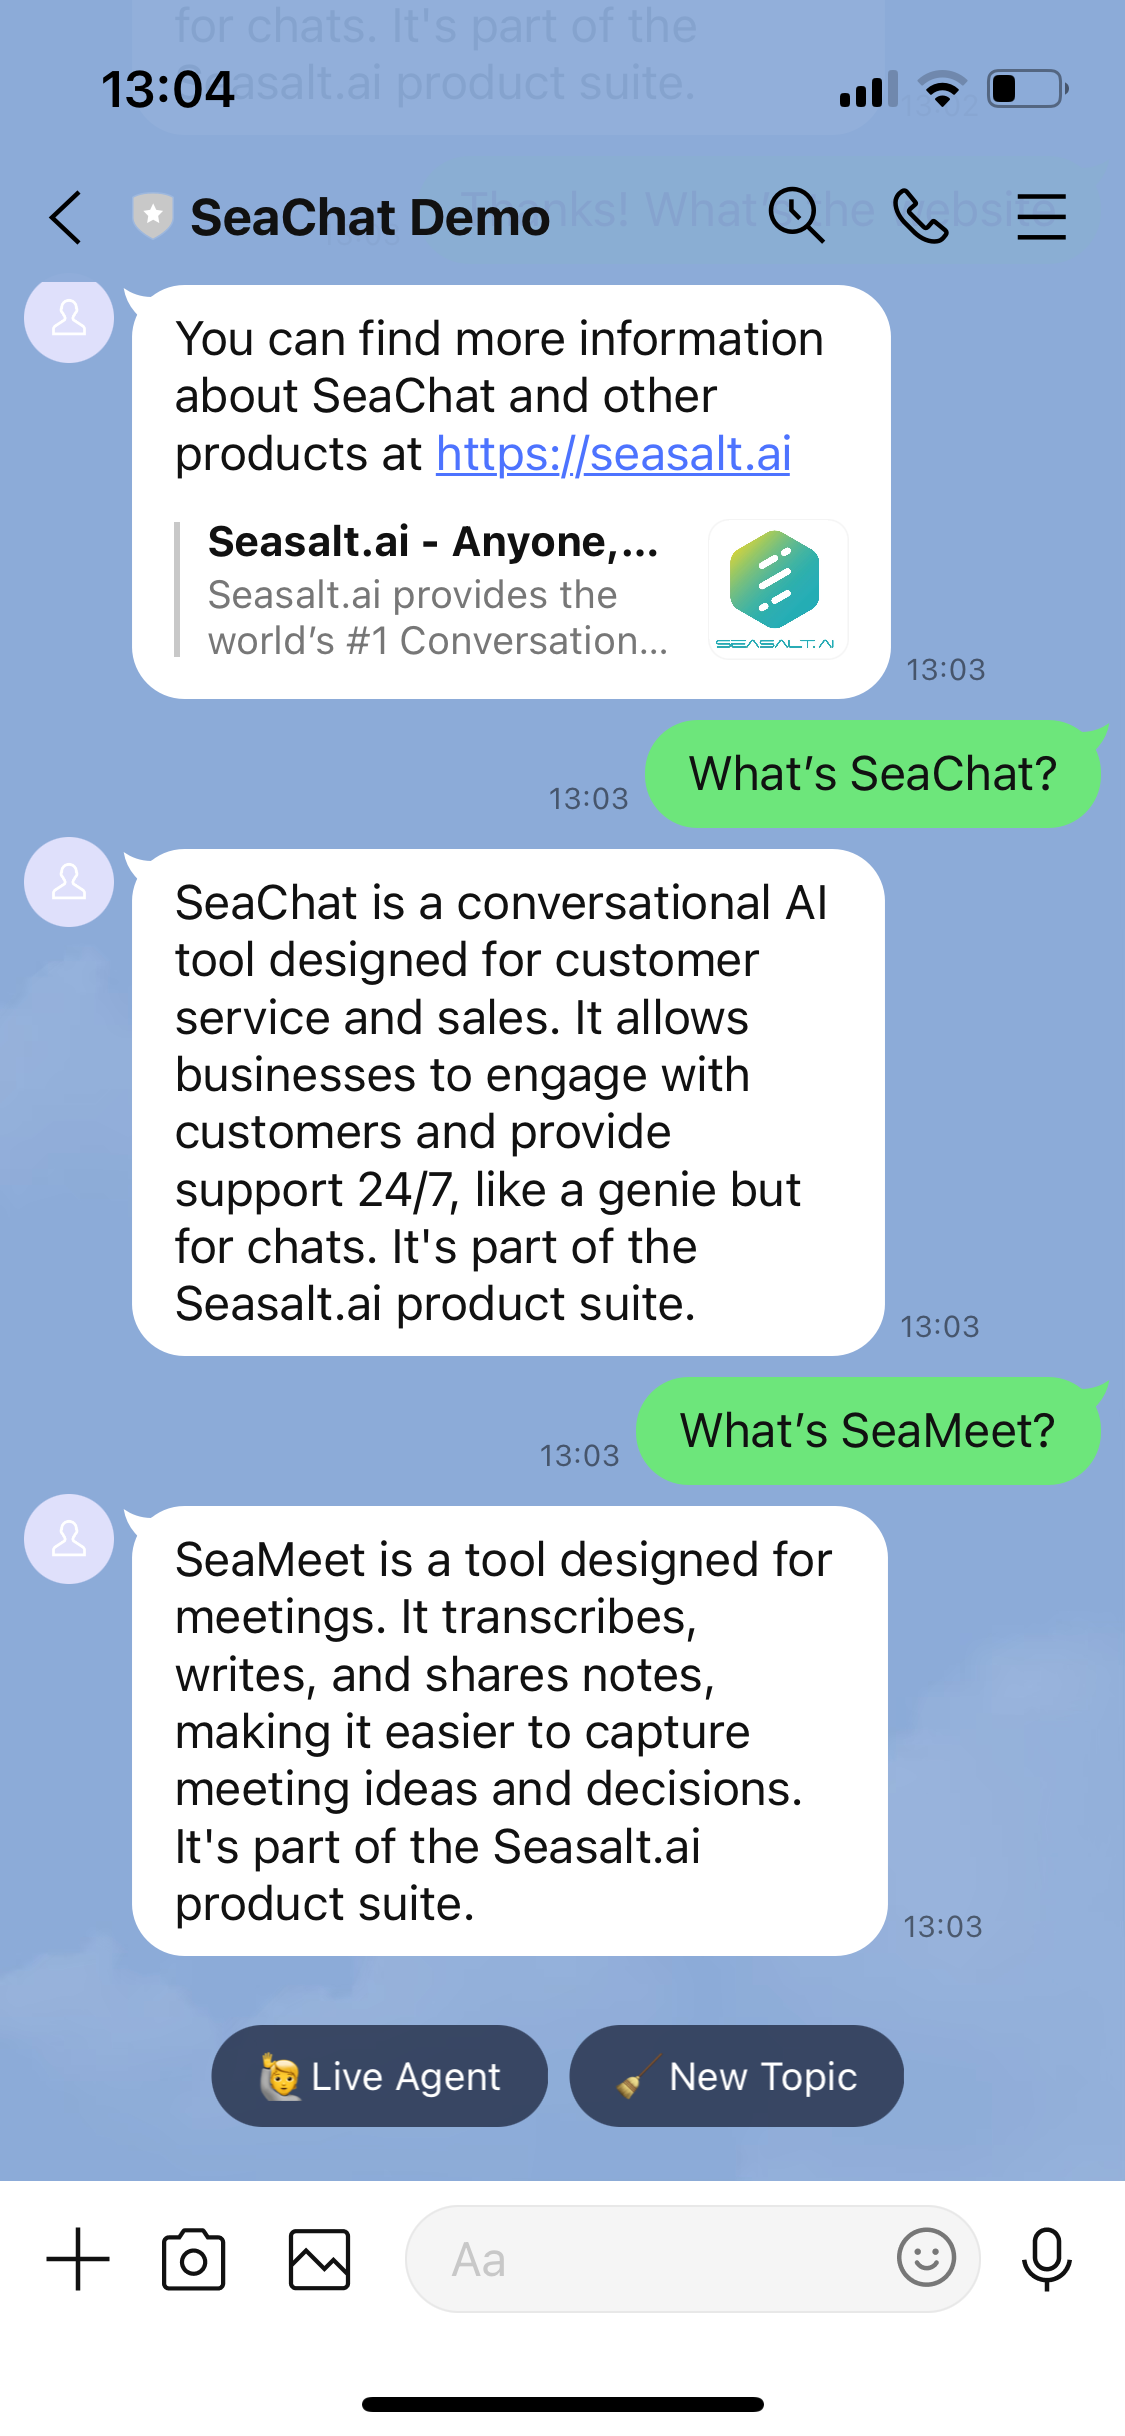
Once you have integrated the LINE channel, your customer will see the Live Agent button at the bottom of the LINE chat. The customer can click on the Live Agent button to request a live agent during the chat conversation.
Hybrid Mode (AI Agent + Human Agent)
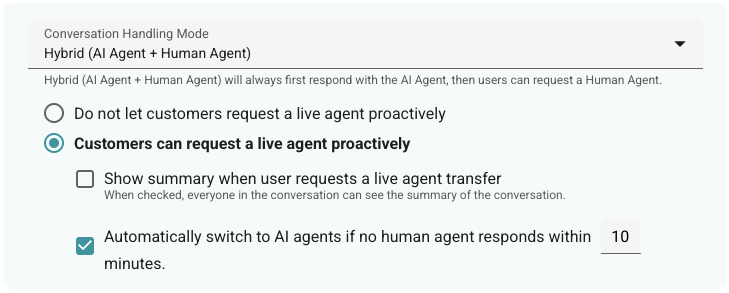
Besides the human-only and AI-only modes, SeaChat also offers a hybrid mode where both human agents and AI agents can work together to provide customer support.
The hybrid (AI Agent + Human Agent) combines the strengths of both human agents and AI agents. This creates much more flexibility in providing customer support.
As the result of such flexibility, here are feature options that users can only find in the hybrid mode:
1. Do not let customers request a live agent proactively
If selected, Show Summary and Automatic Switch to AI Agent features should hide or grey out, and the users should not be able to request a live agent during the chat conversation.

2. Show Summary
If selected, everyone in the chat can see the summary of the conversation.
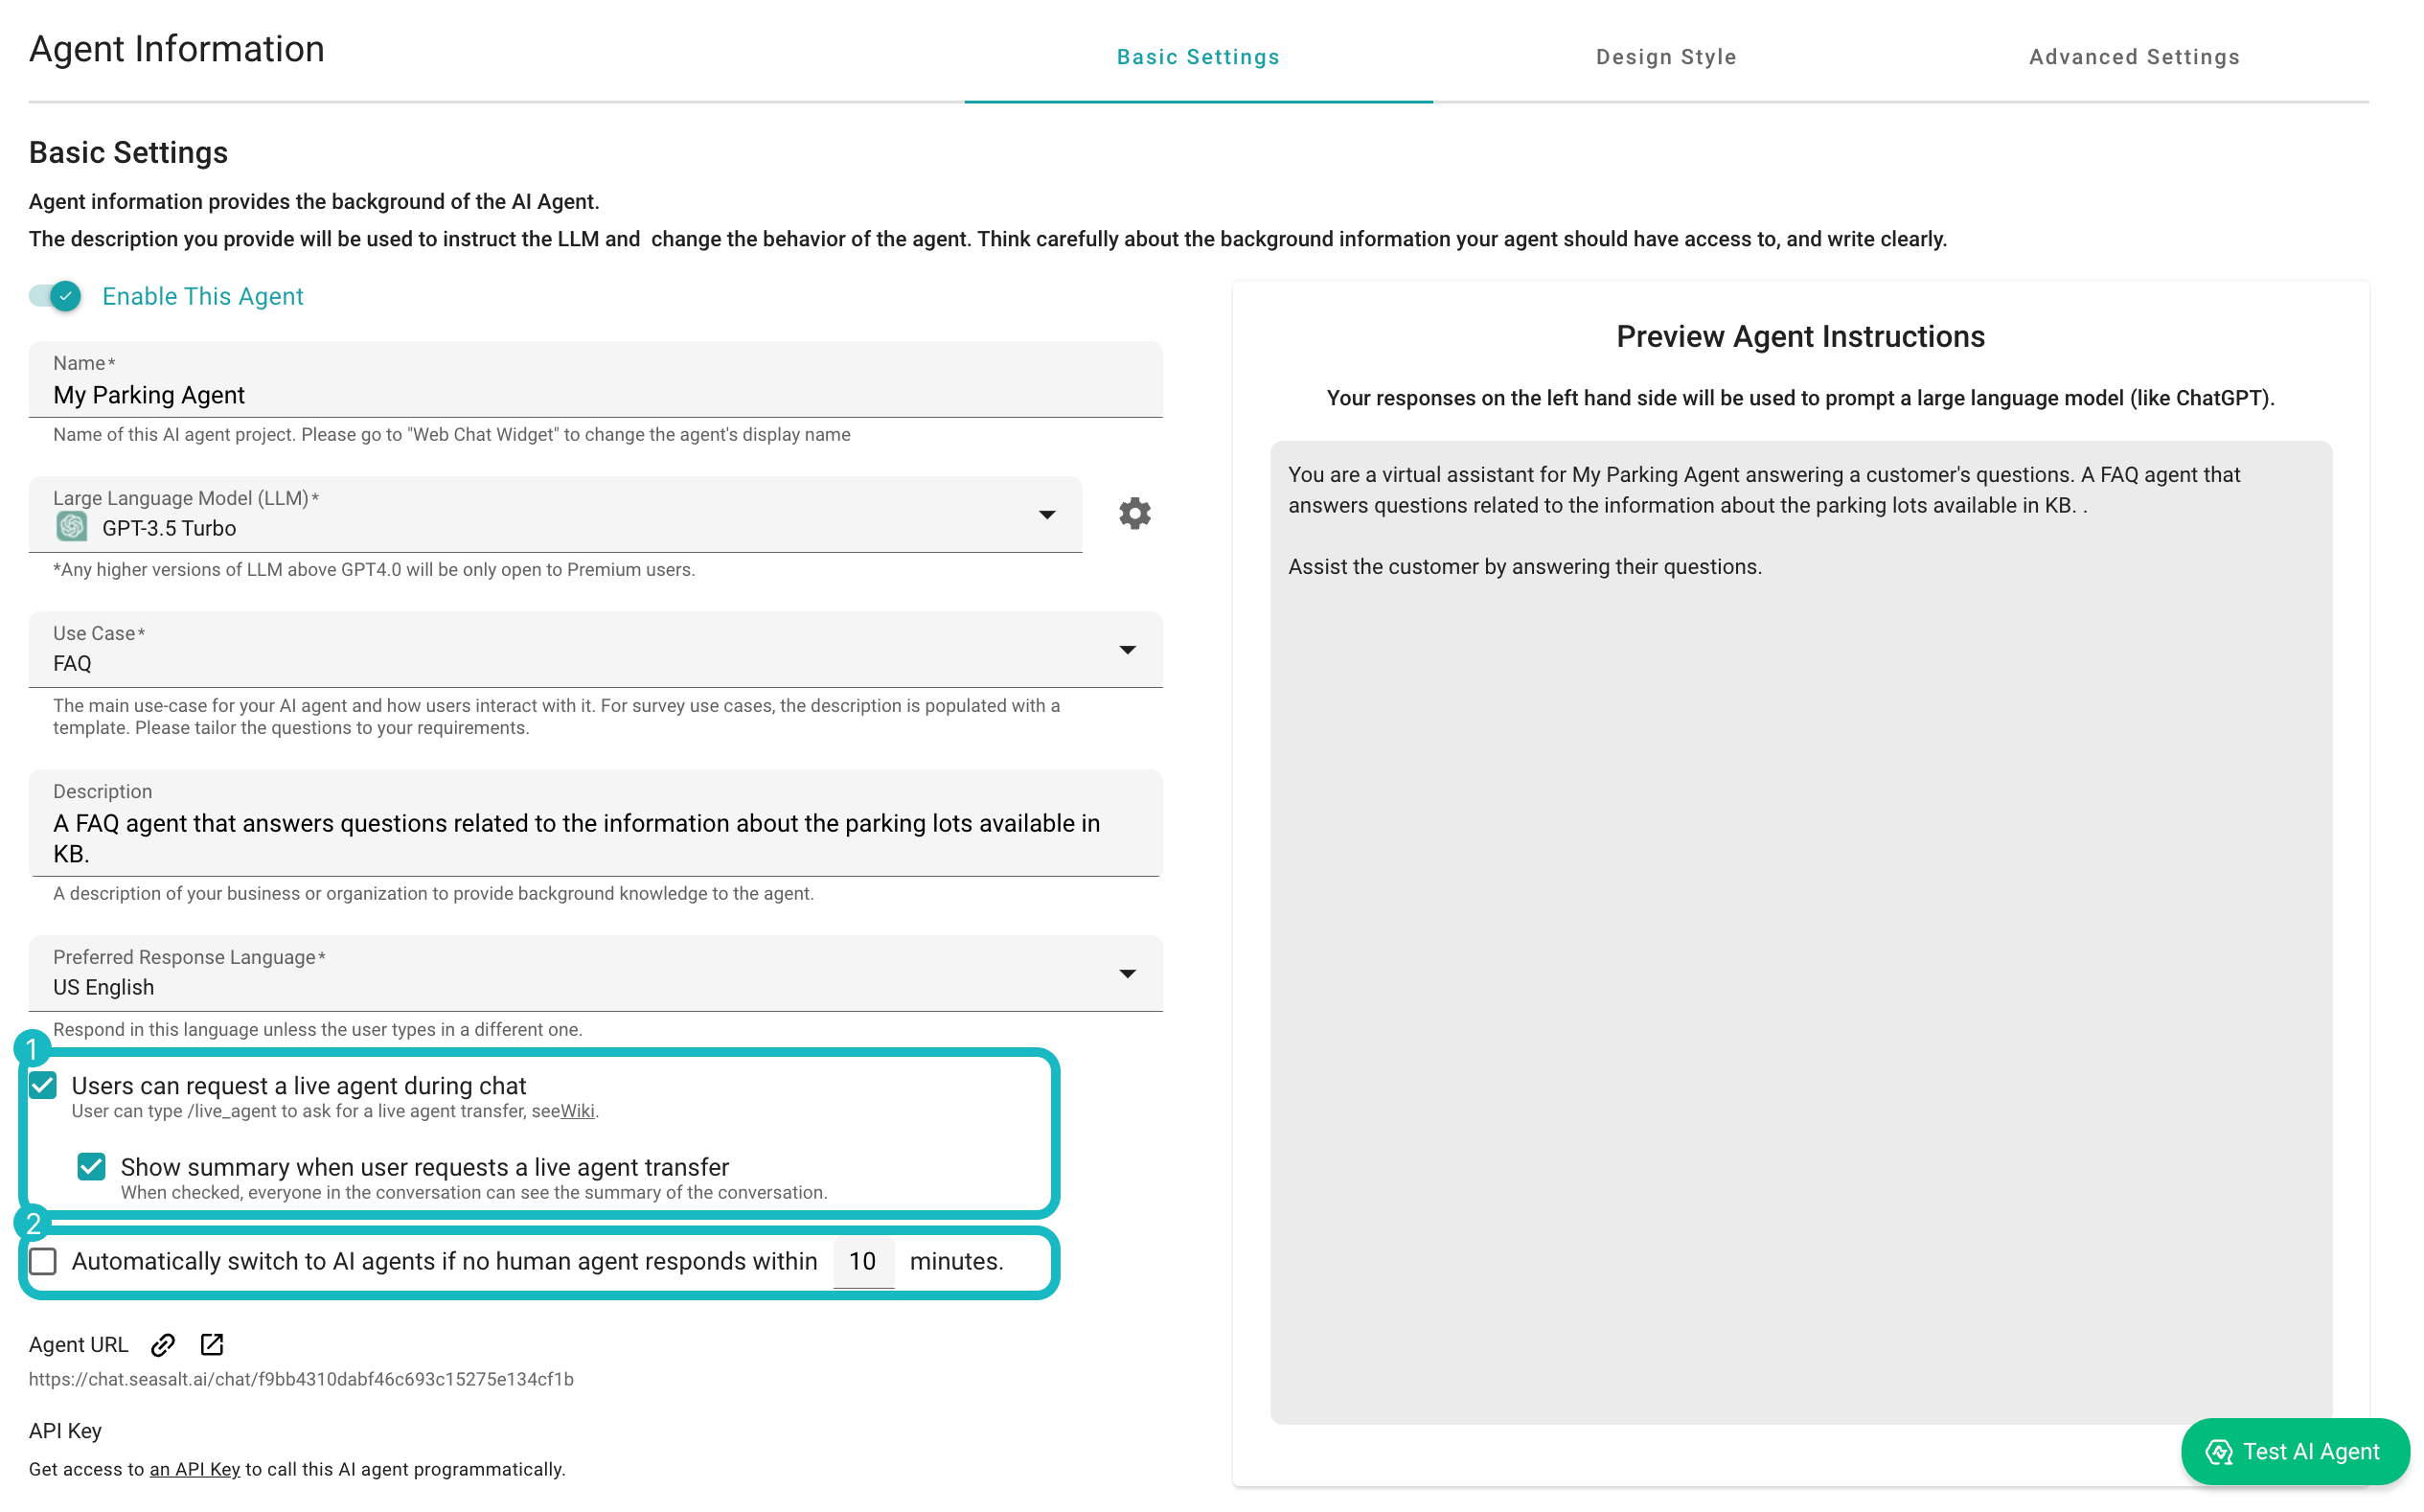
3. Automatic Switch to AI Agent
Sometimes, a human live agent might have to deal with a lot of the conversation at once, and they can forget to click on the Complete button to give the conversation back to the AI agent.
To prevent this from happening, you can set up an automatic timeout for the live agent feature. This will automatically complete the conversation if there is no activity from the chat for a certain amount of time.
🎯 Troubleshooting
Remove Live Agent Feature
If you wish to deactivate the live agent feature, simply uncheck the box that says Do not let customers request a live agent proactively in the Basic Settings in your Agent Information.
This will disable the live agent feature and your customers will no longer be able to request a live agent during the chat conversation, nor will they see the Live Agent button.
📌 Note
Live agent, if available, will still be able to monitor and take over conversations in Conversations. Unchecking the box only removes the option for customers to request a live agent.
