Programmatically Pre-Fill Contact Forms in WebChat
SeaChat supports pre-filling user information in the webchat form by detecting query strings in the webchat URL. This allows seamless integration between your website and the chat widget, so your customers don’t need to enter their details manually.
Why is this important? This is mostly used in scenarios where your end users have already logged into your system, then you can use their login info to auto fill in the contact form. In this case:
- Users save time by not manually filling the contact form once again.
- You prevent users from inputting wrong or fake information in the contact form.
Use Cases
The ability to pre-fill user details in the webchat form is particularly useful in the following scenarios:
-
Customer Support & Helpdesk
When users initiate a chat from a customer support portal, their details (name, email, phone) can be auto-filled to save time. -
Logged-In Users on Websites & Apps
If users are already logged in, their details can be automatically injected into the webchat form. -
E-Commerce & Sales Inquiry Forms
If a customer is browsing a product and needs support, their account details can be passed into the chat. -
Booking & Reservation Systems
In online booking or appointment scheduling, AI agents can pre-fill customer information to confirm their details faster. -
Lead Capture & Marketing Campaigns
When running email campaigns or ads, a pre-filled chat form ensures that potential leads don’t have to re-enter information when engaging with the AI agent.
How It Works
Step 1: Add a contact form to display in WebChat
- Login to SeaChat and go to Channels tab.
- Click the Webchat Widget card
- On top right, go to the Custom Forms tab
- Click + Add New Form
- Enable the form by turning of the switch on top of the page
- If you allow users to skip the form, Allow users to skip the form too
- Edit the form if you would like customize
- When finish editing, click Save
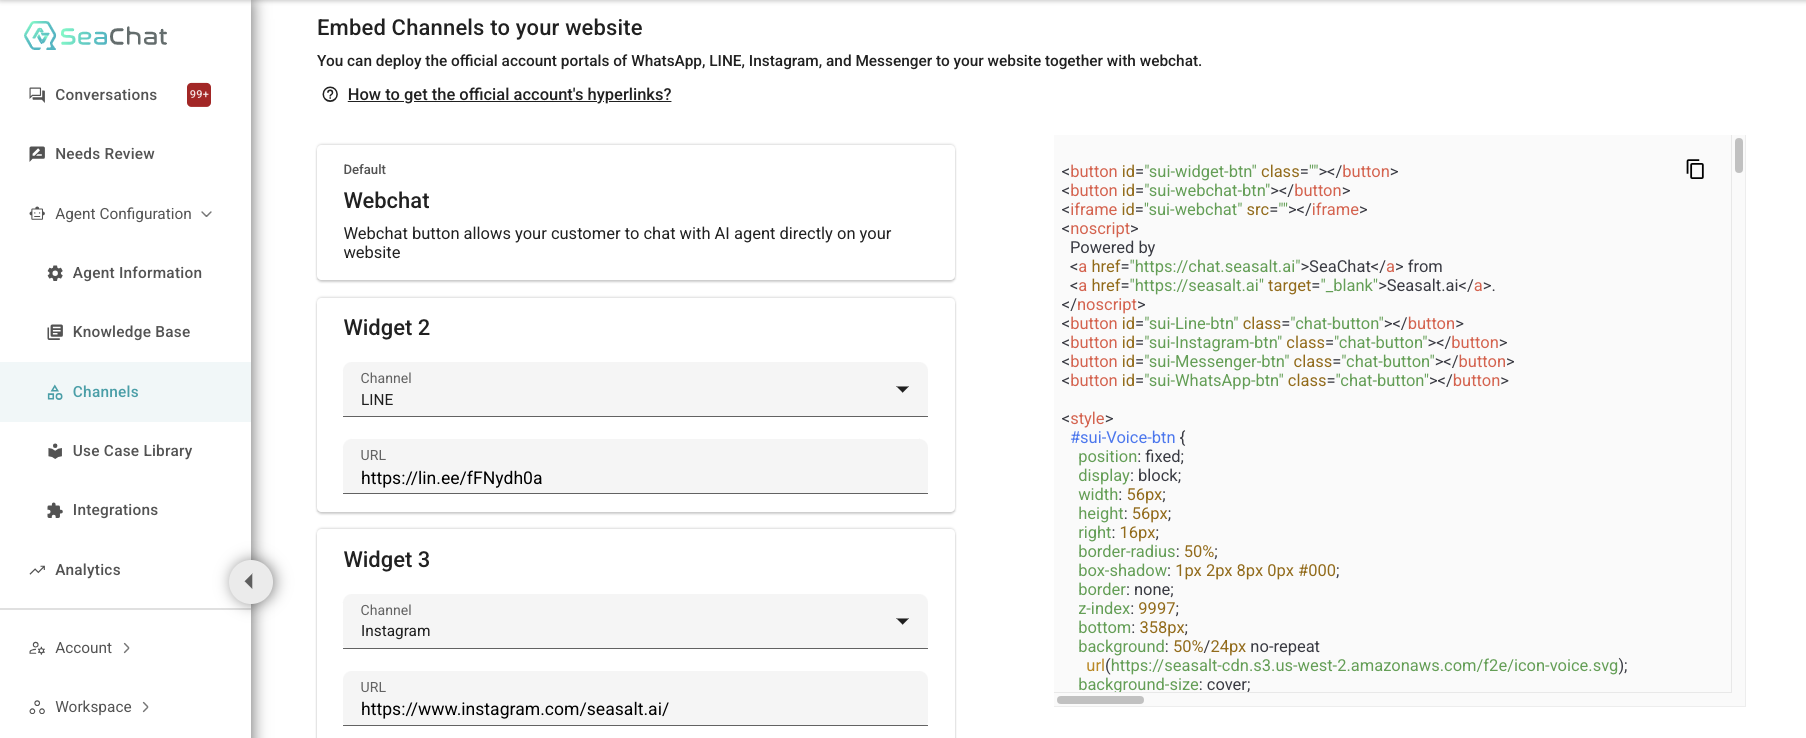
Step 2: Retrieve Your Webchat Widget Code
- Log in to SeaChat and navigate to the Channels tab.
- Click the Make your webchat widget support omni-channel button.
- Copy the widget code and integrate it to your website.
Step 3: Append Query Parameters to Webchat URL
You will find your webchat URL in this format in your widget code:
https://chat.seasalt.ai/chat/uuid
To pre-fill user details such as name, email, and phone number, you should append query parameters to all webchat URLs in your widget code.

Field Format:
| User Information | Query Parameter |
|---|---|
_EMAIL |
|
| Name | _NAME |
| Phone | _PHONE |
Example: Pre-fill webchat form with user’s name, email and phone number
Your original webchat URL is:
https://chat.seasalt.ai/chat/uuid
You should modify your webchat URL as the follows:
https://chat.seasalt.ai/chat/uuid?_NAME=JohnDoe&_EMAIL=johndoe@example.com&_PHONE=123456
When the webchat loads with the modified URL, the form will be automatically populated with the provided user details:
- Name: John Doe
- Email: johndoe@example.com
- Phone: 123456
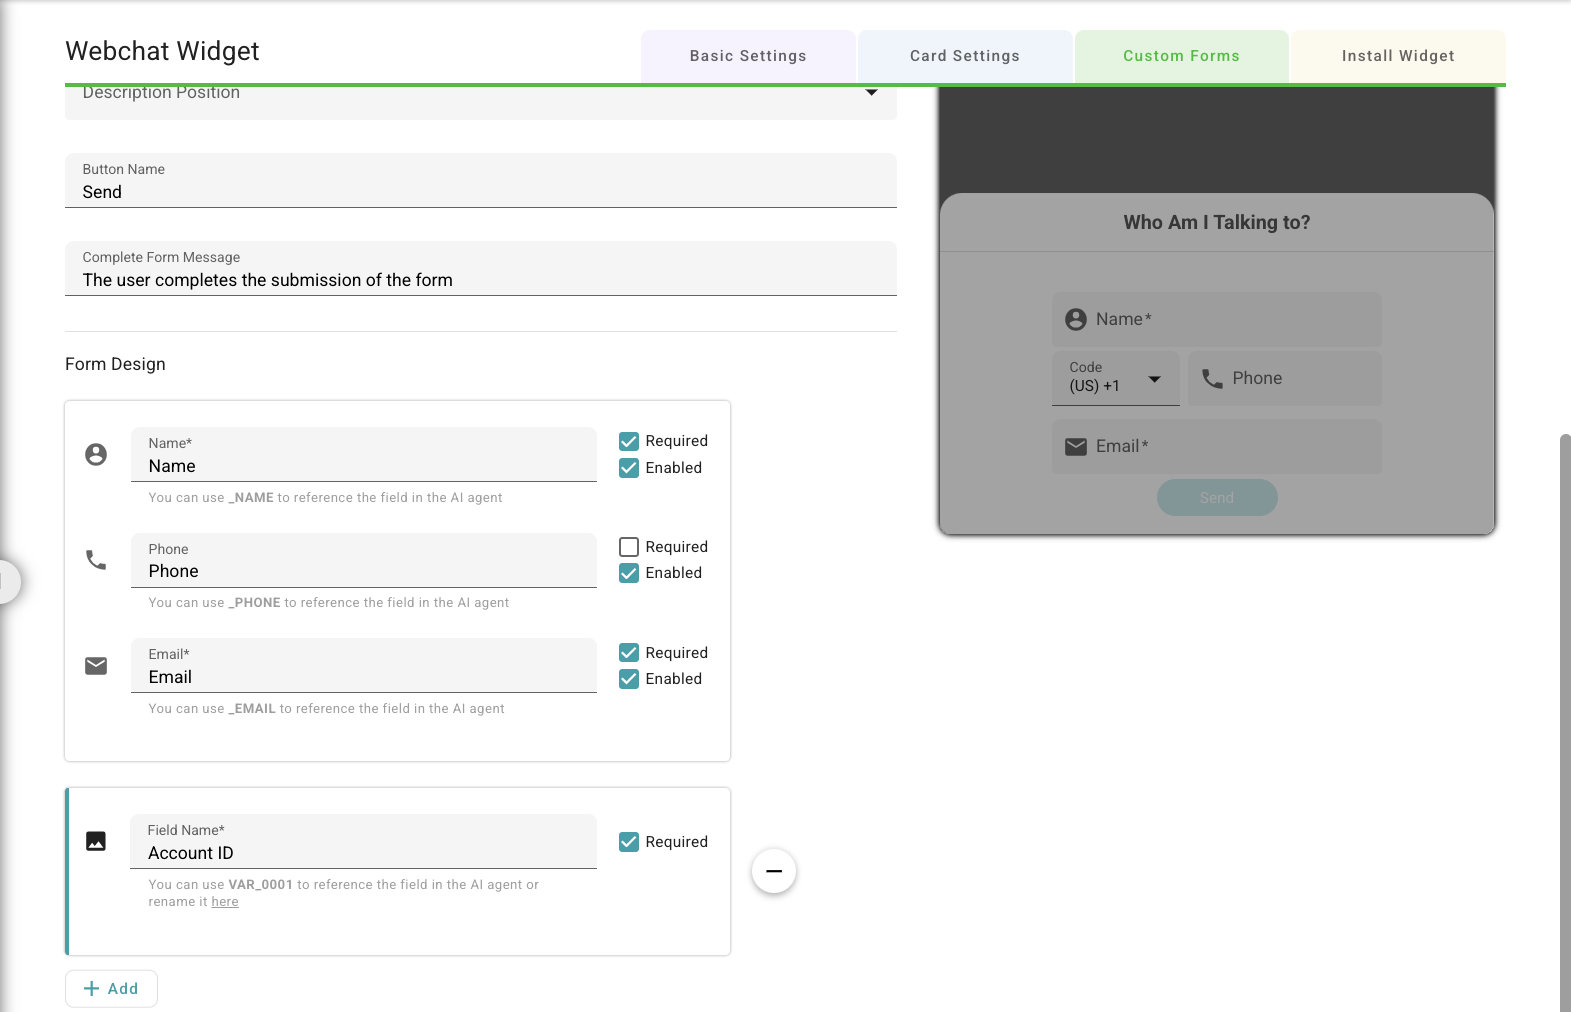
Adding Custom Fields
SeaChat also supports pre-filling custom fields in the webchat form.
How to Add Custom Fields to webchat form:
- Log in to SeaChat and navigate to the Channels tab.
- Go to the Webchat Widget card.
- Navigate to the Custom Forms tab and edit your form.
- Click +Add to add a new custom field.
- When you add the first custom field, it will use
VAR_0001. - If you add more fields, they will use
VAR_0002,VAR_0003, and so on.
- When you add the first custom field, it will use
Custom Field Format:
| User Information | Query Parameter |
|---|---|
| Custom Field Name 1 | VAR_0001 |
| Custom Field Name 2 | VAR_0002 |
Example: Pre-fill webchat form with user’s name and account ID
If you want to pre-fill an Account ID (identified using VAR_0001) field in your webchat form, your updated webchat URL will look like this:
https://chat.seasalt.ai/chat/uuid?_NAME=JohnDoe&_EMAIL=johndoe@example.com&_PHONE=123456&VAR_0001=9876
When the webchat loads, the form will be auto-filled with:
- Name: John Doe
- Email: johndoe@example.com
- Phone: 123456
- Account ID: 9876
Summary
- Retrieve and integrate the webchat widget code from SeaChat.
- Modify the webchat URL with
_NAME,_EMAIL, and_PHONEparameters. - Add custom fields using
VAR_0001,VAR_0002, etc. - When users open the webchat, the form is pre-filled automatically.
🚀 That’s it! Your webchat is now set up to accept user details programmatically.