Auto Share Meeting Records
On this page
Get Started
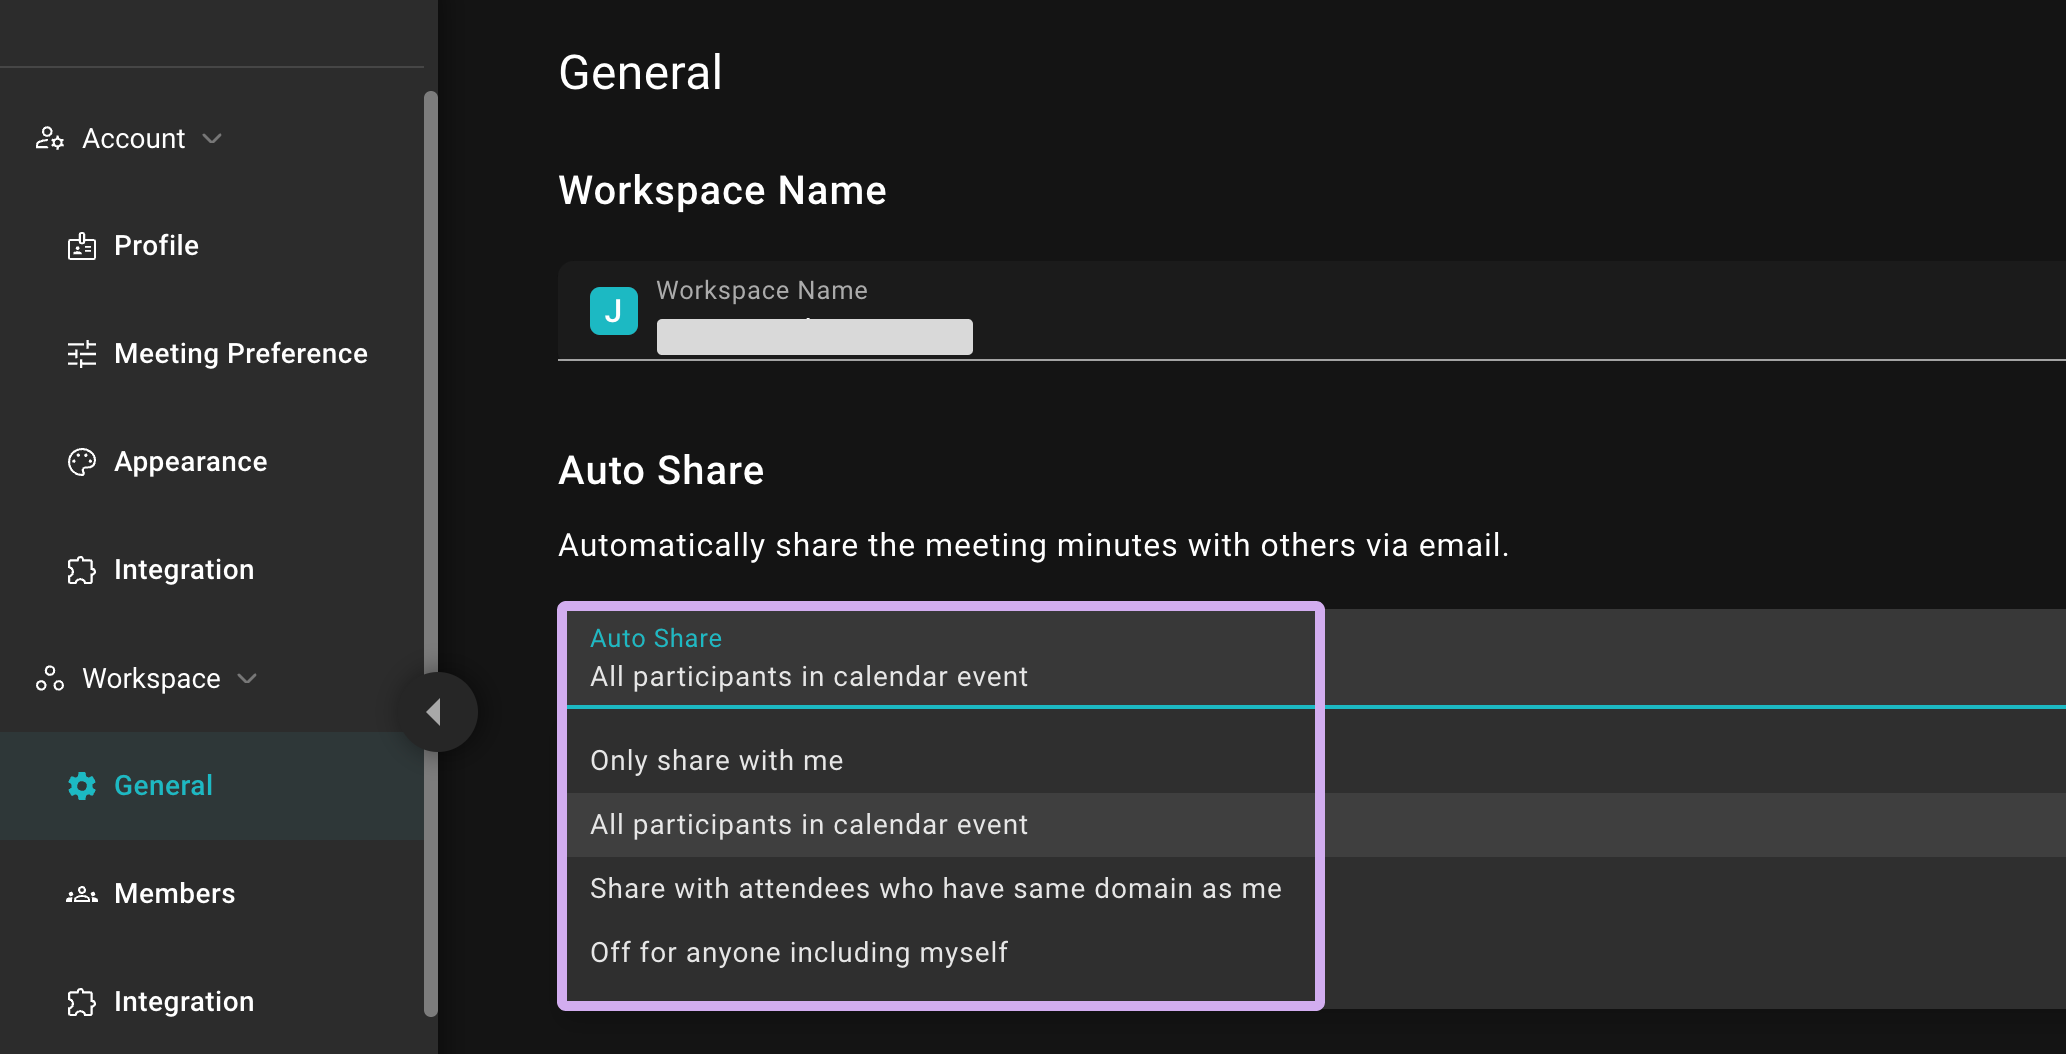
You can adjust the recipients of automatically shared meeting records in the General of the Workspace.

Auto Share Settings
You can set the auto-sharing feature in the General. Currently, SeaMeet offers the following options:
-
Only share with me
When you invite the copilot to transcribe a meeting, the system will automatically send an email to your inbox once the meeting ends.
-
All participants in calendar event
When you invite the copilot to transcribe a meeting and the meeting ends, the system will automatically send an email to all attendees invited via Google Calendar.
-
Share with attendees who have the same domain as me
When the meeting ends, the system will automatically send an email to all attendees who have the same domain as you. For example, if I am using an email with the domain,
@seasalt.ai, in a meeting where there are attendees using@seasalt.aiand@client-company.com, the system will only send the meeting record to attendees with the private domain of@seasalt.aiinstead of@client-company.com. It only applies to those with private email addresses sharing your domain, not to those using public email domains like Gmail, Hotmail, and Outlook. -
Off for anyone including myself
No meeting records will be sent after the meeting ends.
If you enable the auto-sharing feature, the system will automatically send the meeting record via email to the designated recipients according to your auto-sharing settings after the meeting ends.
Additional List

Auto Share - Additional List
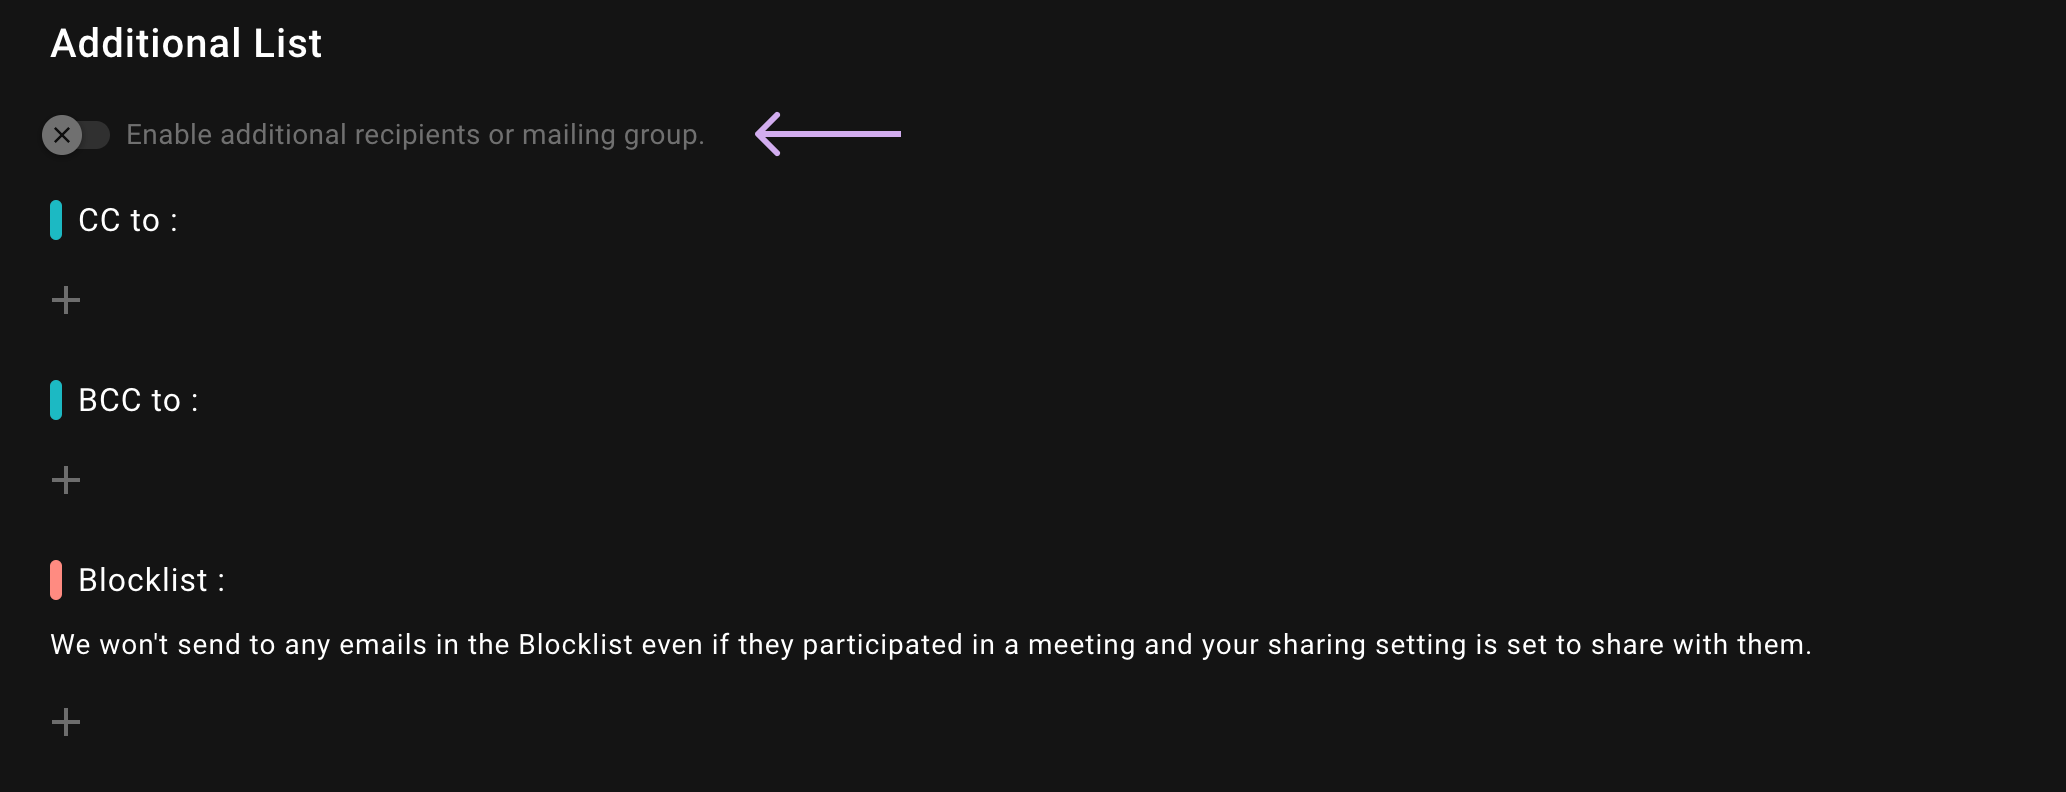
The additional list allows you to send the meeting record to recipients who did not attend the meeting. You can send CC and BCC of the meeting record to additional recipients. The CC and BCC recipients can also be an email group.
One very useful feature of the additional list is the blocklist. When you choose the option to send the meeting record to all attendees in the calendar event, you can exclude certain attendees from receiving the meeting record by adding them to the blocklist.
Remember to enable the additional list feature first before you can use it.