Shopify
此頁教學將詳細說明嵌入整合SeaChat AI助理到您Shopify商店前端的過程。
步驟1:建立一個SeaChat帳戶
如果您還沒有SeaChat帳戶, 您可以在 SeaChat網站免費註冊! 然後您可以將訓練好的AI助理,移至您的Shopify網站上。
步驟2:開啟Shopify
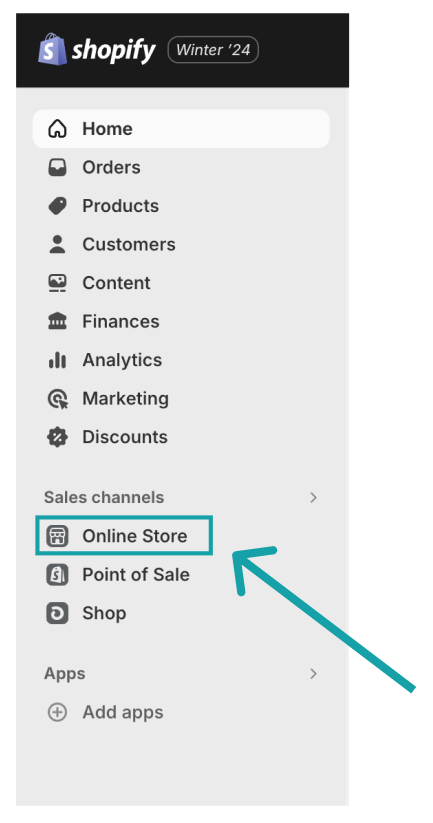
前往您的Shopify儀表板,從選單中點擊「Online Store」。
步驟3:在Shopify上編輯程式
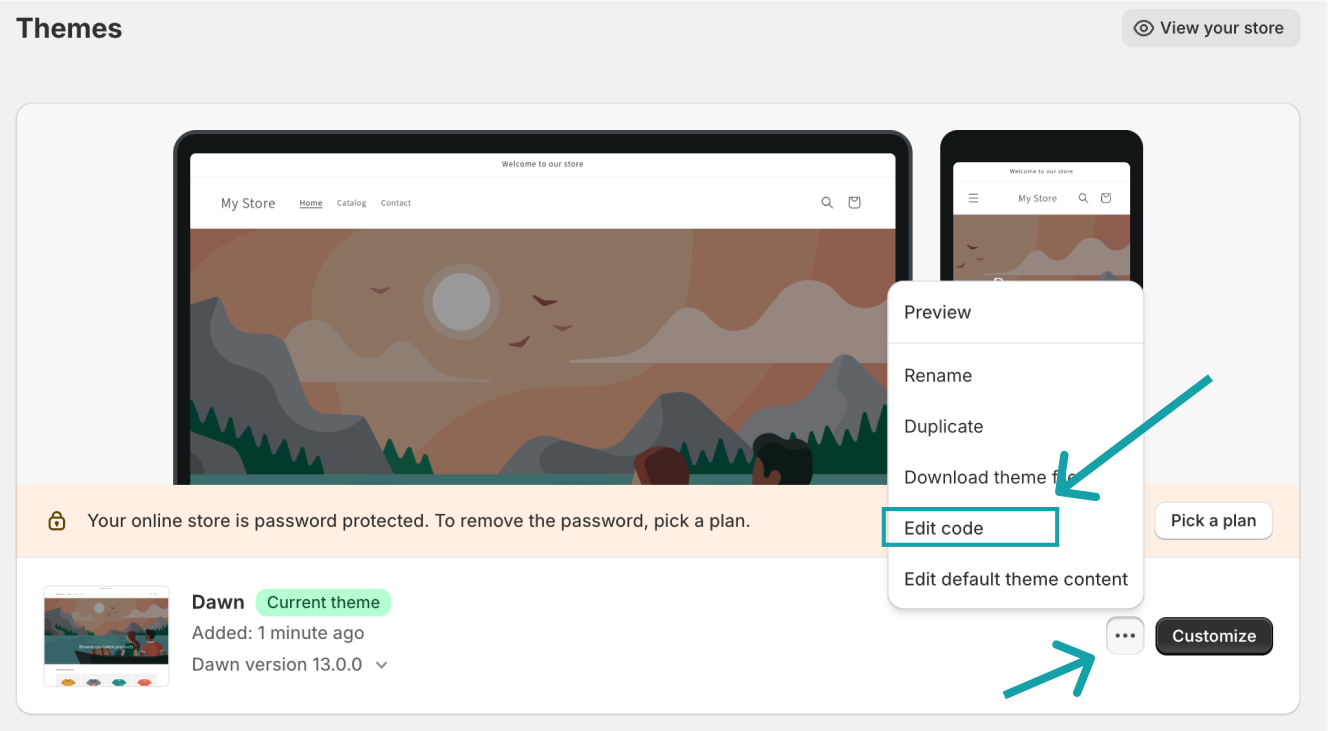
點擊您目前主題旁邊的刪節號圖標•••,選擇「Edit Code」並開始編輯。
步驟4:點擊theme.liquid
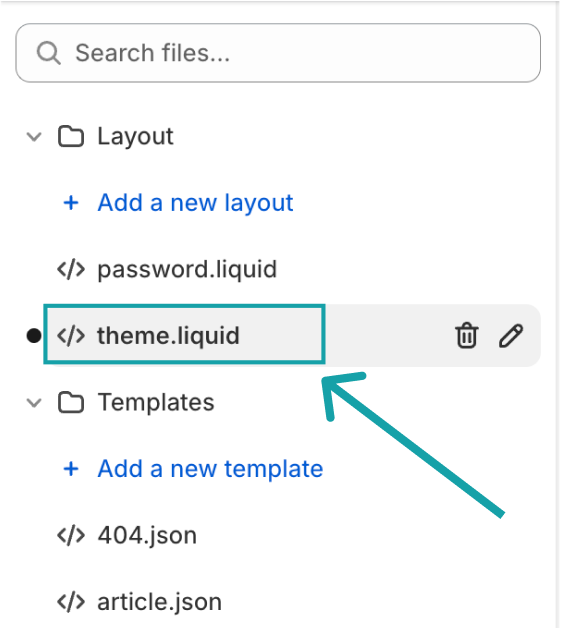
點擊左側面板上的「</> theme.liquid」。
步驟5:複製SeaChat程式代碼
您需要登入SeaChat才能查看此程式片段。您可至SeaChat免費註冊。在SeaChat儀表板的工作區內找到「AI助理配置」->「頻道」,並在Shopify頻道下,來取得所需的程式片段。
將從Seachat上的Shopify整合設置中獲得的SeaChat程式片段貼上到
。您可以在開頭的標籤和結尾的標籤之間的任何位置貼上它。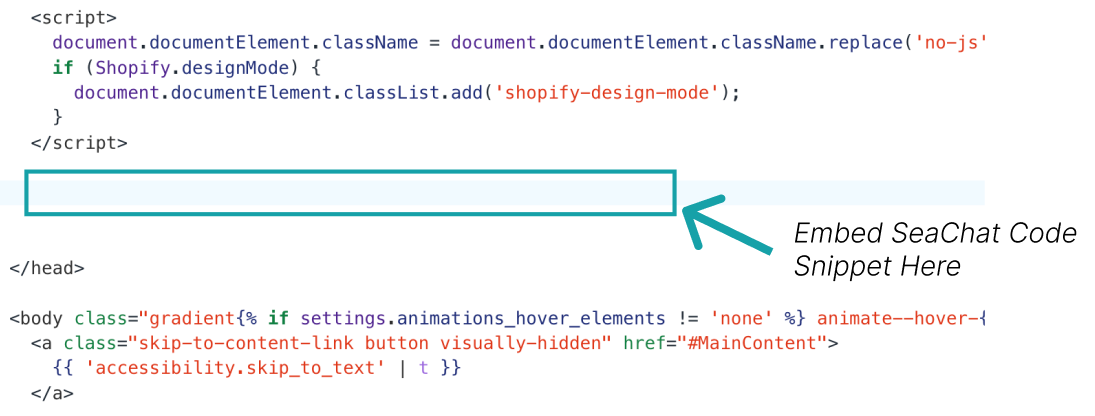
步驟6:儲存並預覽
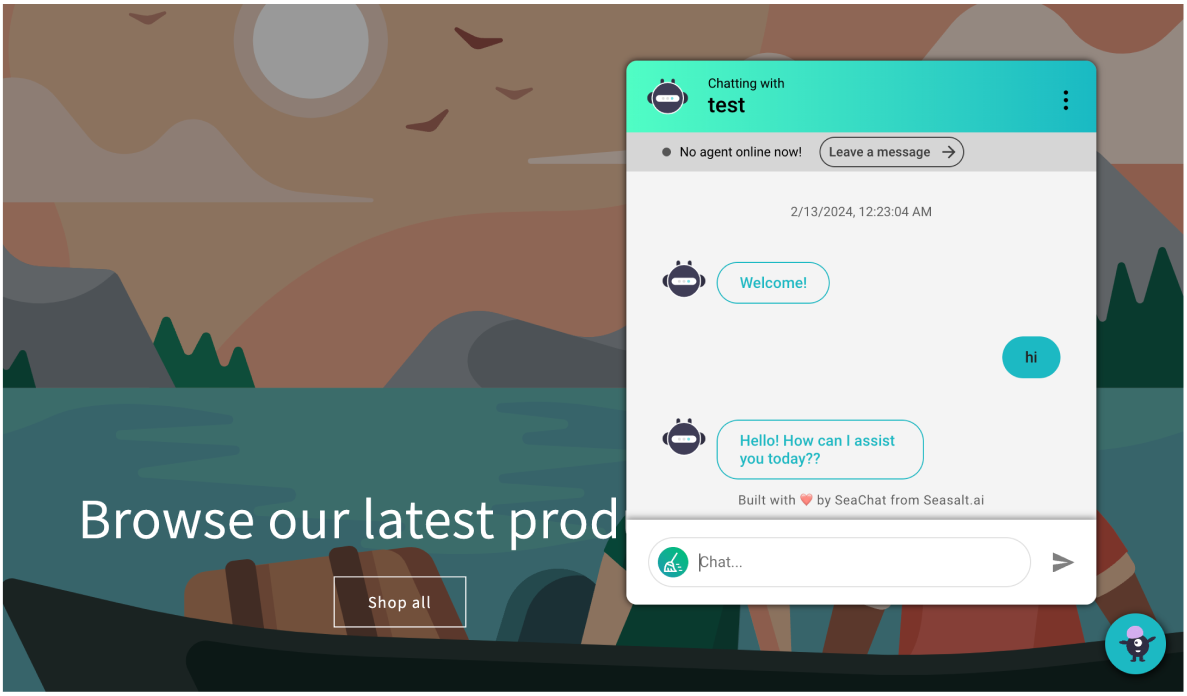
點擊右上方的「Save」按鈕。接著點擊「Preview Store」來測試AI助理。當您準備好時,記得再次啟動商店!
非常重要: 如果你想要設定網頁助理的外觀和樣式,請前往「頻道」->「網頁AI助理」->「基本設置」。在設定好外觀和樣式後,你的所有網頁將共享相同的設計。
步驟7:(Optional)移除其他聊天機器人
請移除任何其他的聊天機器人服務,如Shopify Inbox,以避免混淆。Shopify的用戶們,請將您網站的自定頁面切換成禁用「Apps embeds」。最後,如果您之前的聊天機器人服務是通過程式嵌入整合的,請小心移除。
協助支援
需要協助?歡迎聯絡我們 seachat@seasalt.ai.