Calls
Not only can SeaChat handle text-based conversations, but it can also handle phone calls. The SeaChat allows you to create a voice-based conversational agent to pick up all the inbound calls or to call out to customers. This voice agent can handle inbound calls, answer customer queries, and provide customer support. The SeaChat voice agent can also transfer calls to live agents when needed, providing a seamless experience for your customers.
In the following sections, we will show you how easy it is to set up the SeaChat voice agent and how you can test your agent with actual calls.
Setting up the SeaChat Voice Agent
First, we need a new agent that can handle voice calls. To create a new voice agent, click on the agent dropdown menu next to your avatar. You can see the list of agents that you have created. Click on the Add New Agent button to create a new agent.
In my agent description, I made sure to include that this agent is for voice calls. This way, I can easily identify which agent is for voice calls and which agent is for text-based conversations.
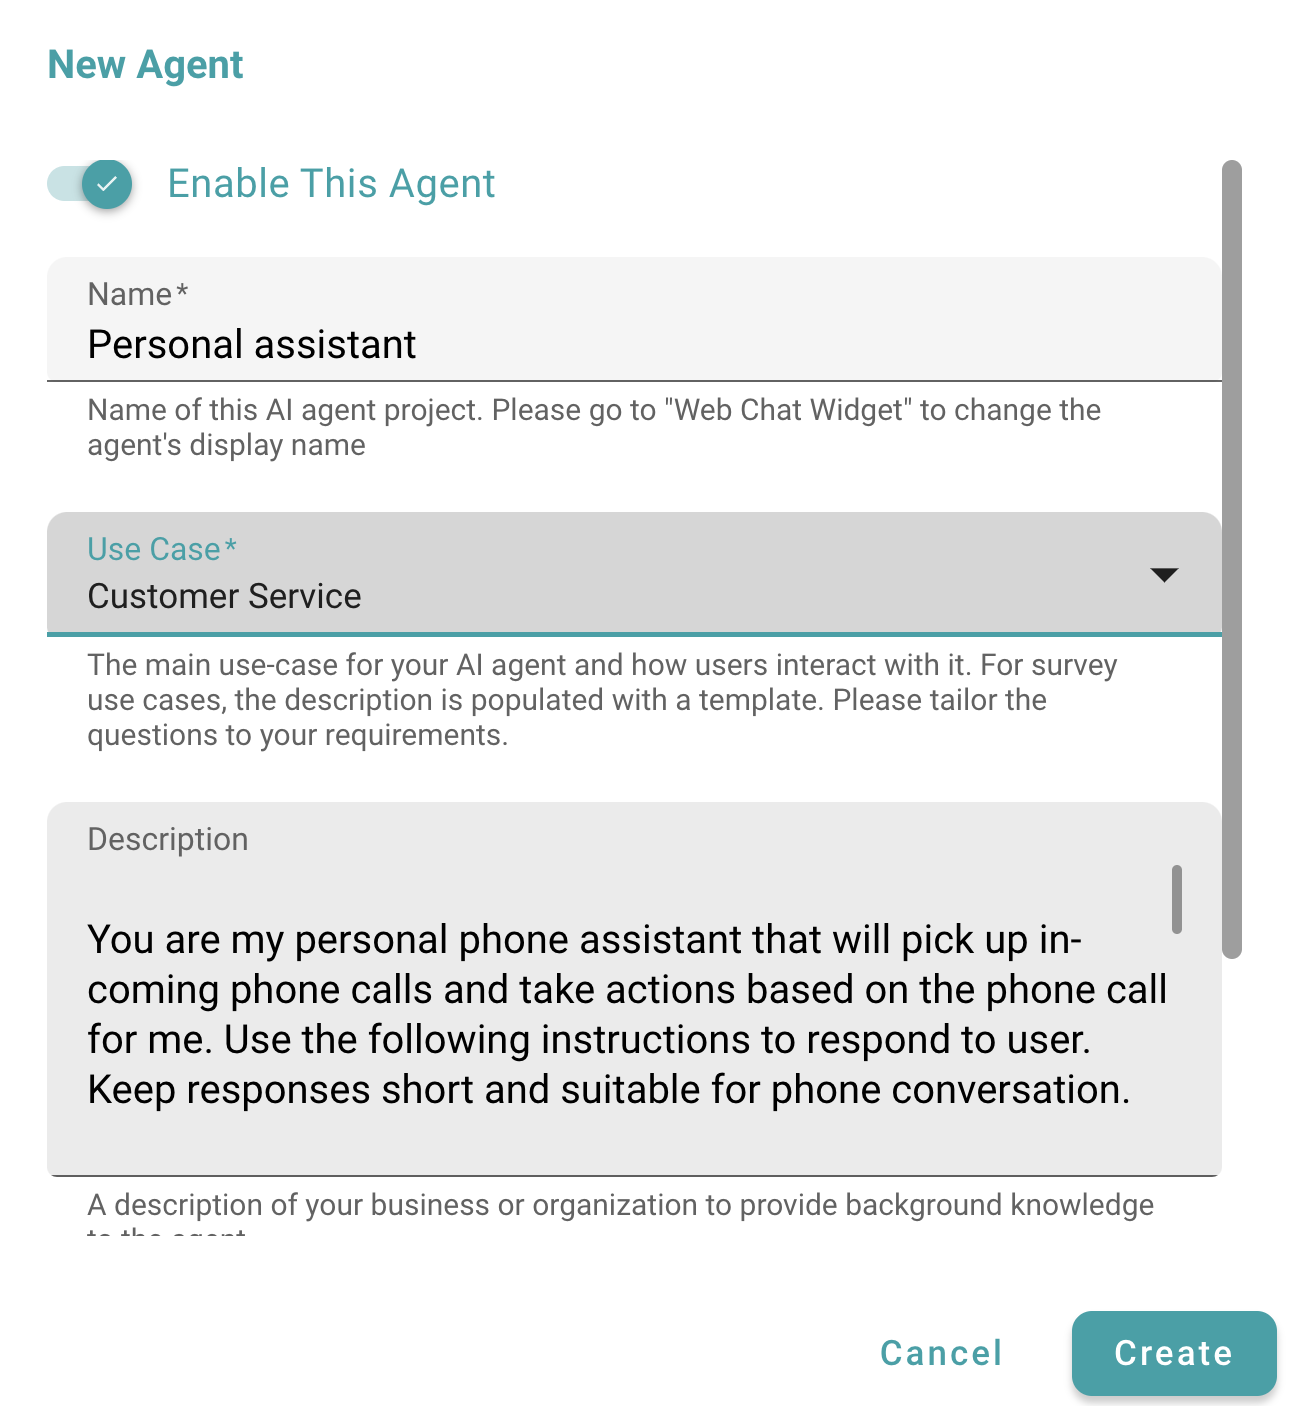
Add Agent Description
Once we have created our voice agent, let’s start setting up the voice agent to calls. Find Calls in Channel under Agent Configuration.

Setting up Calls Channel
Toll-Free Number
In the Calls channel, we need to first purchase a toll-free phone number. Choose the country where you want to purchase the toll-free number and phone number. Once you have chosen the desirable configuration, click on the Confirm Purchase button.
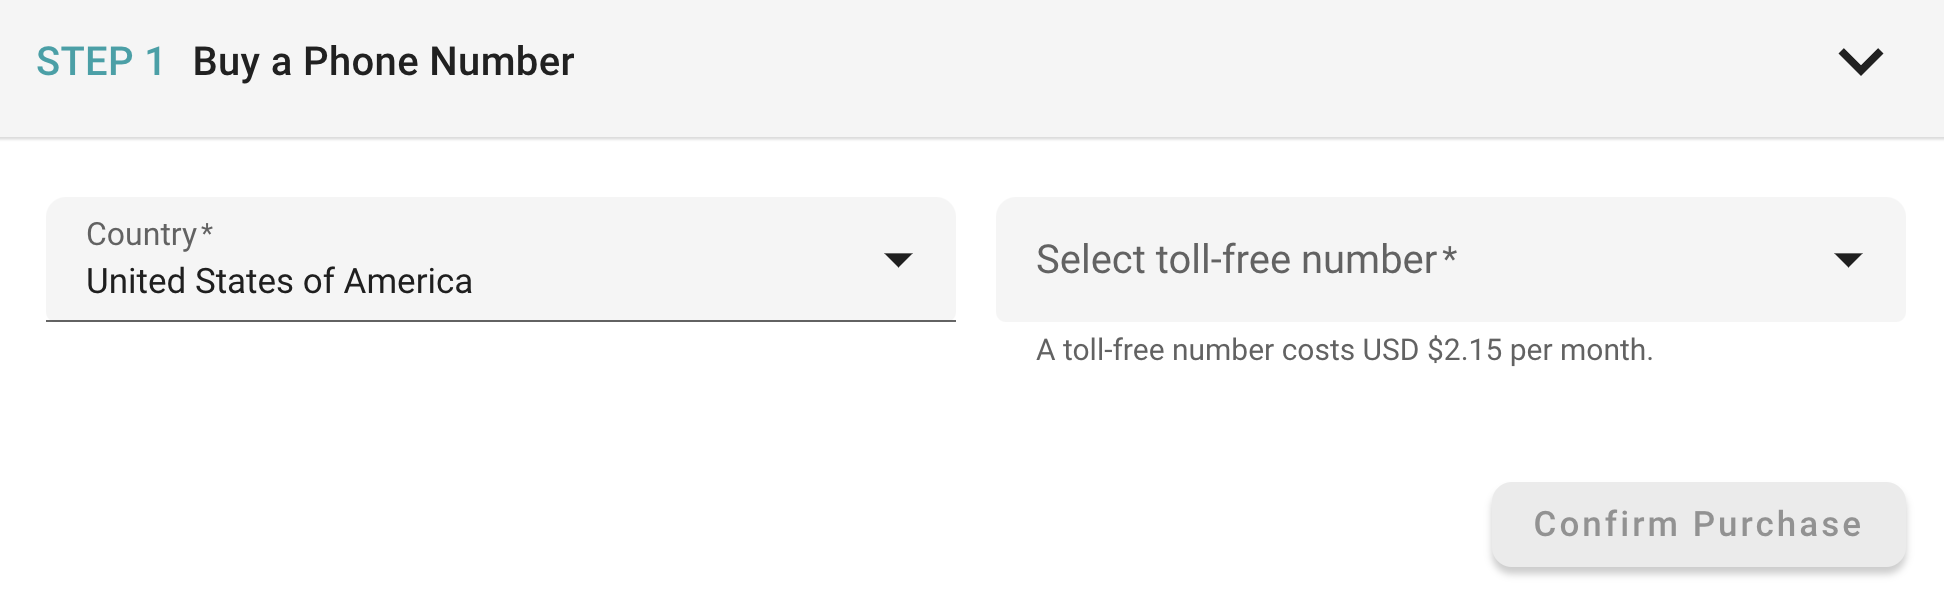
Purchase a toll-free number
Once purchased, you can see the toll-free number of your choice. You can always release the number and purchase a new one if you are not satisfied with the number.

Toll-free number details
Agent Configuration
After purchasing the toll-free number, we need to configure the agent to handle the calls. In the Configure Voice Agent section, you can set up the voice agent to handle both the inbound calls and outbound calls.
You are welcome to enable the live agent feature for your voice agent just like any other SeaChat agent. Please make sure you have a real-human agent that will monitor and respond to the user when the live agent feature is enabled.
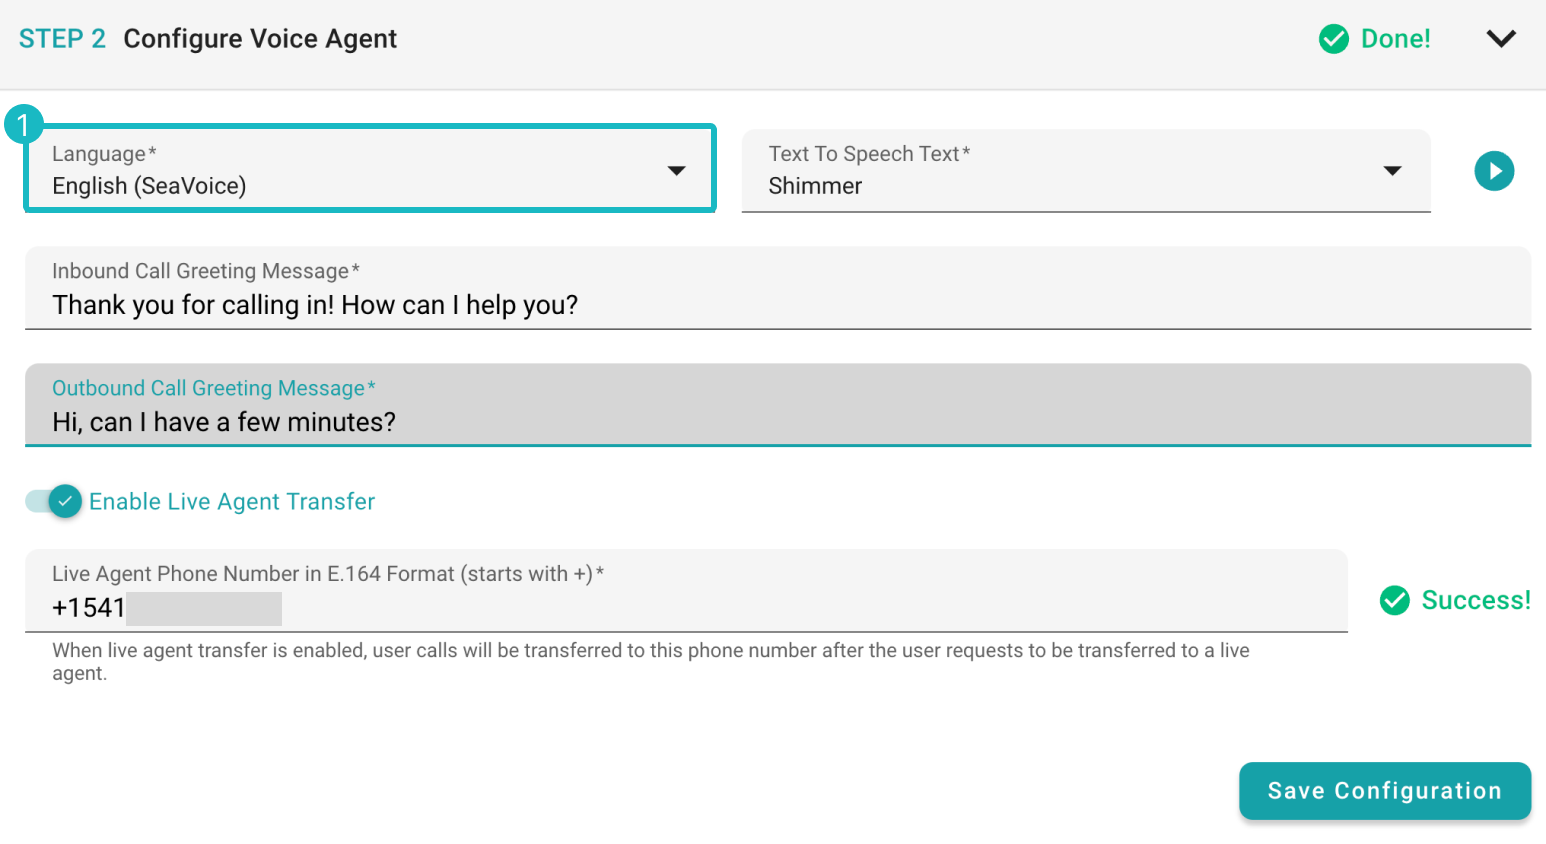
Voice agent configuration
As you can see in the image above, there are some parameters that need to be set up to fully configure the voice agent. If you are not sure about the configuration, you can start from choosing the language and SeaChat will automatically set up the rest of the configuration for you.
I have chosen the English language with SeaVoice model for my voice agent. Now click on Save Configuration to consolidate your settings.
🔎 Agent Language Model: SeaVoice
SeaChat currently provides SeaVoice and SeaVoice-2 as the language model for the voice agent. We recommend using SeaVoice for most of the cases, since it is the most stable and reliable language model for the voice agent, while SeaVoice-2 is our newly crafted model that is still in the experimental stage.
Testing the Voice Agent
Now that we have set up the voice agent, we can start testing our agent to see if it can handle the inbound/outbound calls.
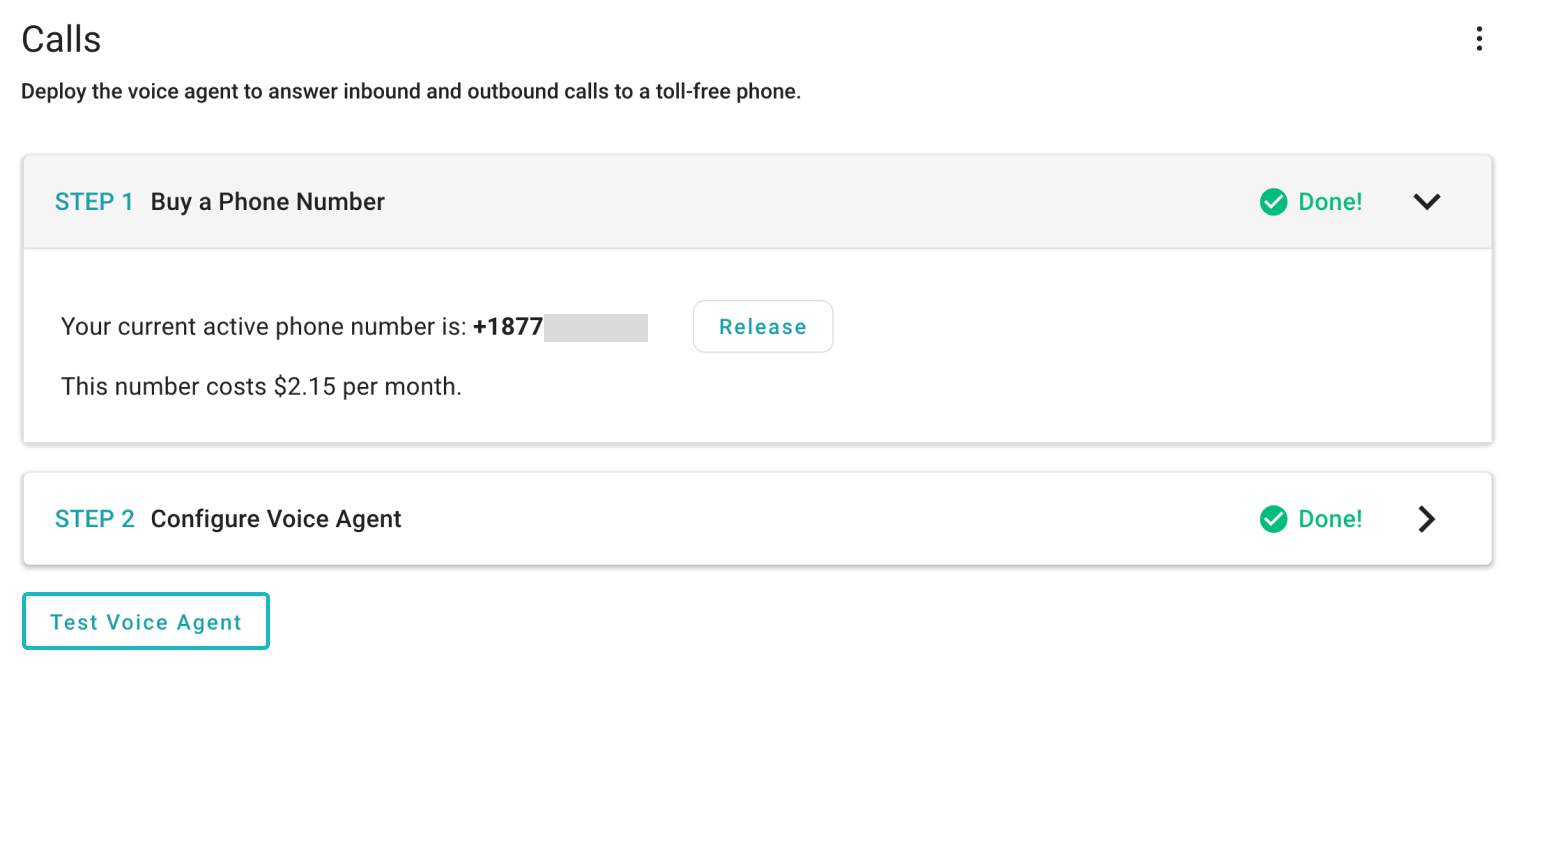
Configuration set up
Inbound and Outbound Calls
There are two ways to test the voice agent. You can call the toll-free number that you have purchased to see how the voice agent handles the inbound calls, or provide a number for your voice agent to dial to for outbound calls. Since the two methods might require different configuration in agent setting, choose the method that suits you the best.
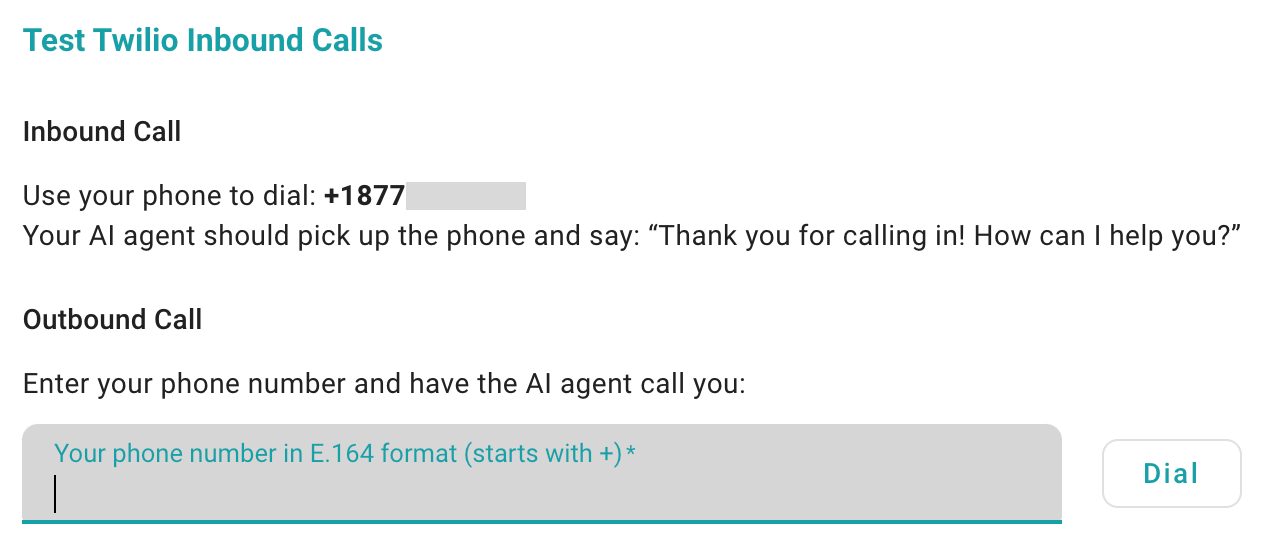
Test you agent
That’s it. Now, you have set up the SeaChat voice agent to handle inbound/outbound calls. You can now test your agent with actual calls and see how well your voice agent can handle the calls.
Support
Need assistance? Contact us at seachat@seasalt.ai.