Manual Entry
Overview
SeaChat provides several methods to upload files to your agent. We will focus on the Manual Entry method in this tutorial. Let’s use a blog post as an example to show you how to manually enter data to your agent.
Create a SeaChat Agent
If you don’t have a SeaChat account yet, you can sign up for free at SeaChat website! You can find all the information you need to create a knowledge-based AI agent in Create an Agent.
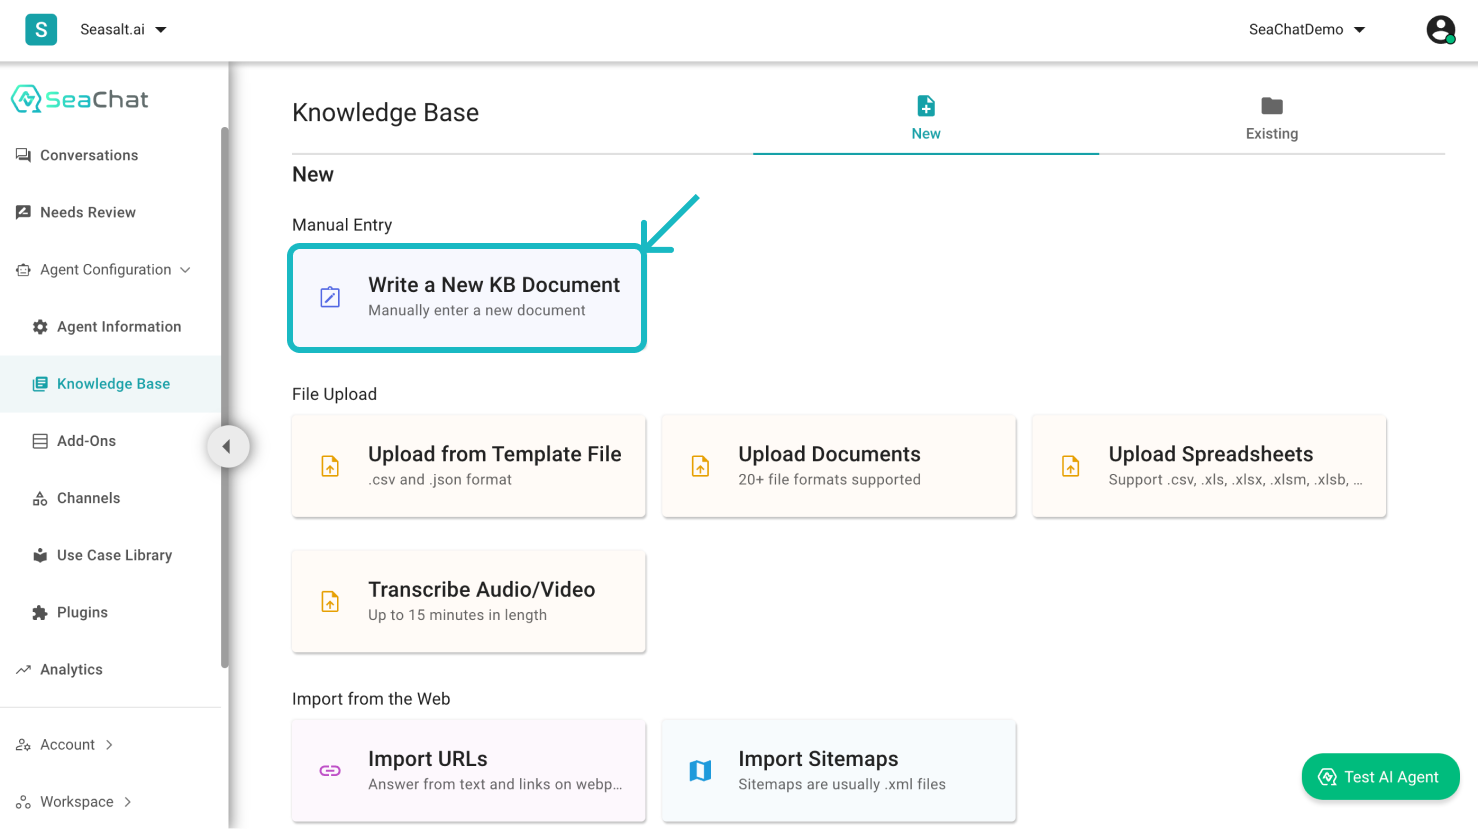
Open Knowledge Base
Find your agent’s knowledge base by navigating to the Knowledge Base dashboard under Agent Configuration in the sidebar menu. Choose Write a new KB Document under Manual Entry and start entering data to be uploaded to your agent.
Knowledge Base Dashboard
When should I use Manual Entry?
You should choose Manual Entry when you have a piece of important information that you’d like to include in knowledge base. This can be a short product description, or a frequently asked questions. Manual Entries are also a great way to quickly troubleshoot and teach your AI agent some quick gotchas.
Enter the Data
There are a lot of fields to fill in. We will not go through all of them in detail, but if you are interested in learning more about them, you can check out our Advanced Section of the manual. For now, let’s try to fill in the fields one by one, and add the data to our agent.
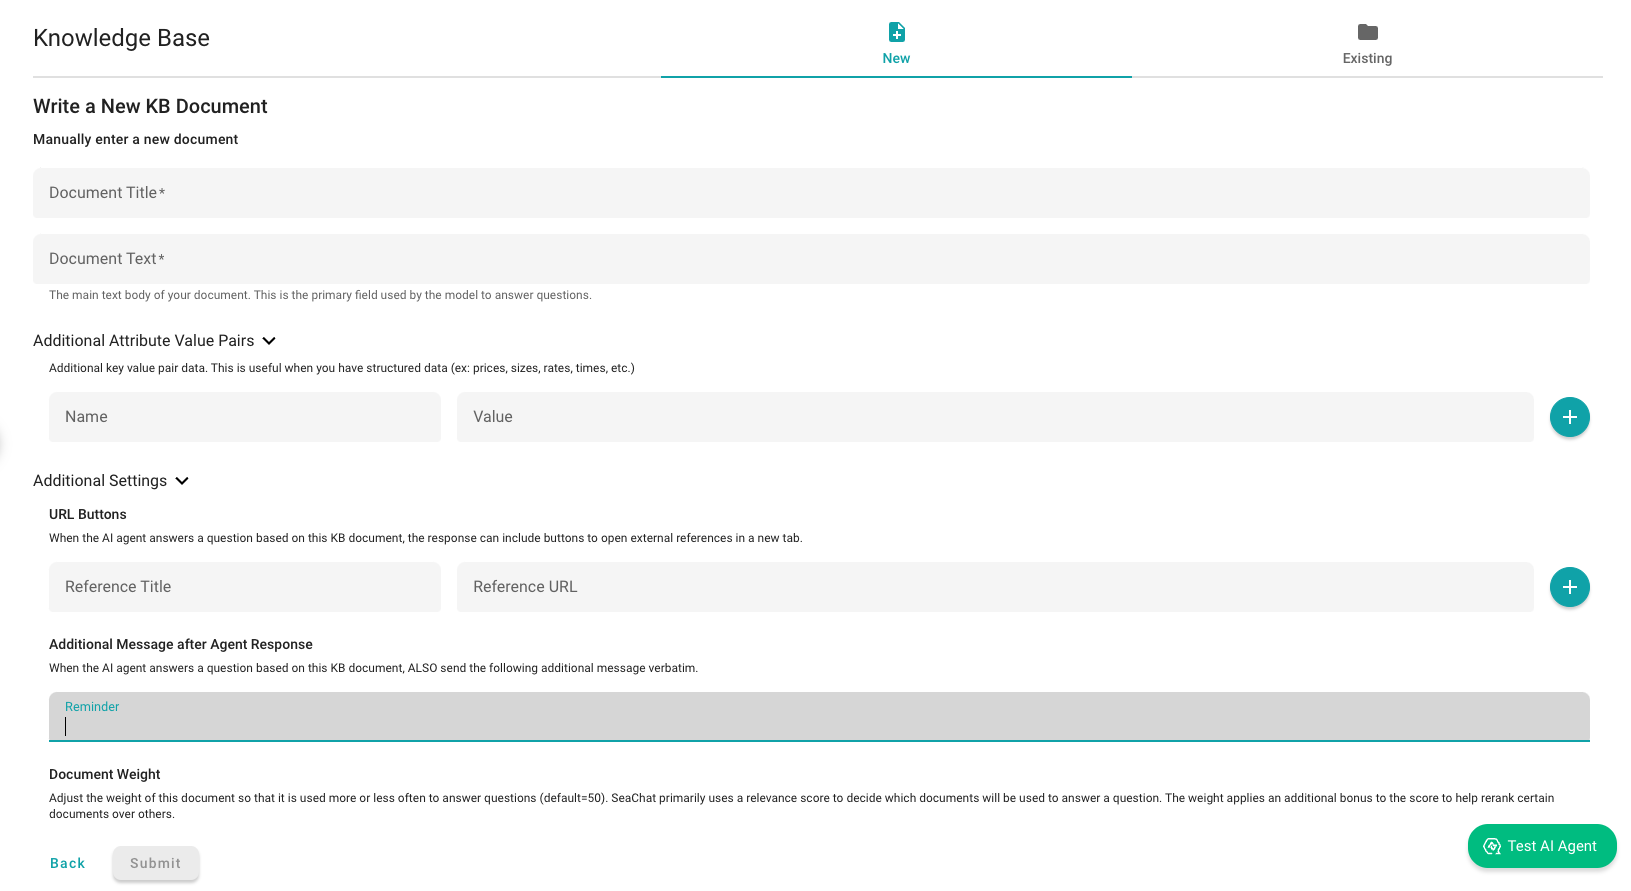
*Fill in the empty fields in Manual Entry
Document Title and Document Text
Choose a title for your document and write the texts of the document in the text area. Be descriptive on the text description, as it will show up on your knowledge library as the title of the knowledge entry. You can enter the detailed contents in the Document Text field. Both document title and texts will be available for AI agent during knowledge extraction.

Document title and text
Additional Attribute Value Pairs
If you have anything that is in the form of key-value pairs, you can add them here. For example, if you have a document that is related to a specific product and its price, you can add the product name(key) and the price(value) as key-value pairs.

Enter Name(Attribute) and Value
(Optional) Additional Settings
You can also set the document to be a reminder, and provide users with urls.
- URL Buttons: You can add buttons that will redirect the user to a specific URL. Input the reference title and the URL in the respective fields.
- Additional Message after Agent Response: In Reminder, input additional information that you want to show to the end user whenever the agent uses this document to respond.
- Document Weight: Use Document Weight to control how important the document is. The higher the weight, the more important the document is, and therefore, the more likely the agent will use this document to respond to the user.
Once you are done, click on the Submit button to upload the content to your agent’s knowledge base. SeaChat will start importing the information you provided.
Submit to Existing Knowledge Base
You will see a success message once the files are uploaded successfully. You have customized your AI agent with new knowledge. To view the files uploaded, you can navigate to the Existing section in the top-right corner of the page, where you can find the uploaded data waiting for you in the Manual KB section.
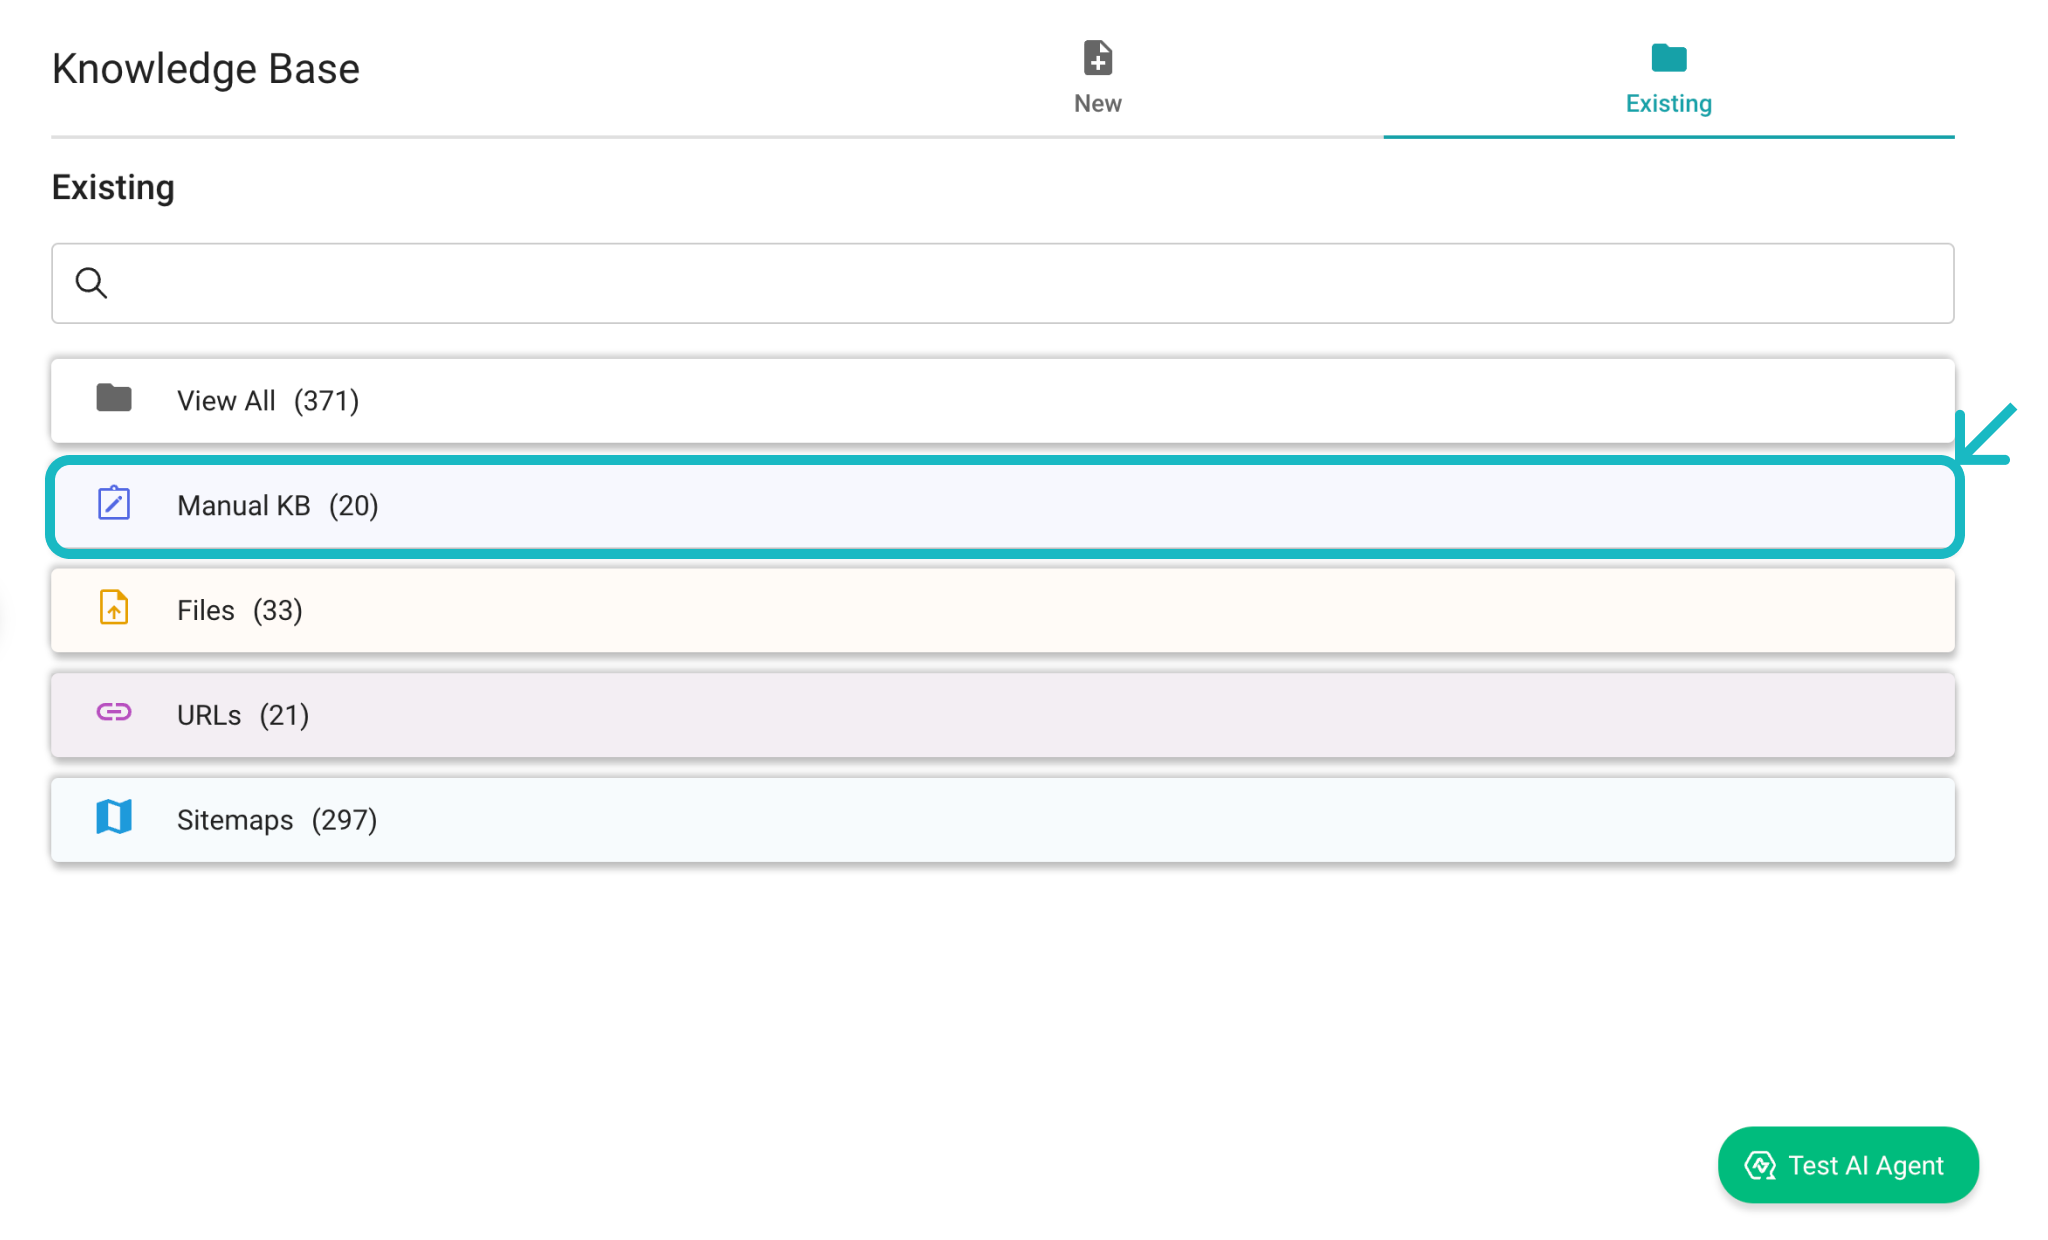
Look for Manual KB in Existing
Review your Knowledge Base
Click on the file you just uploaded to review the content. That’s all. You can now use the knowledge base to test your agent. SeaChat provides additional settings to customize your knowledge base, we will continue to explore these features in the next part of the tutorial.
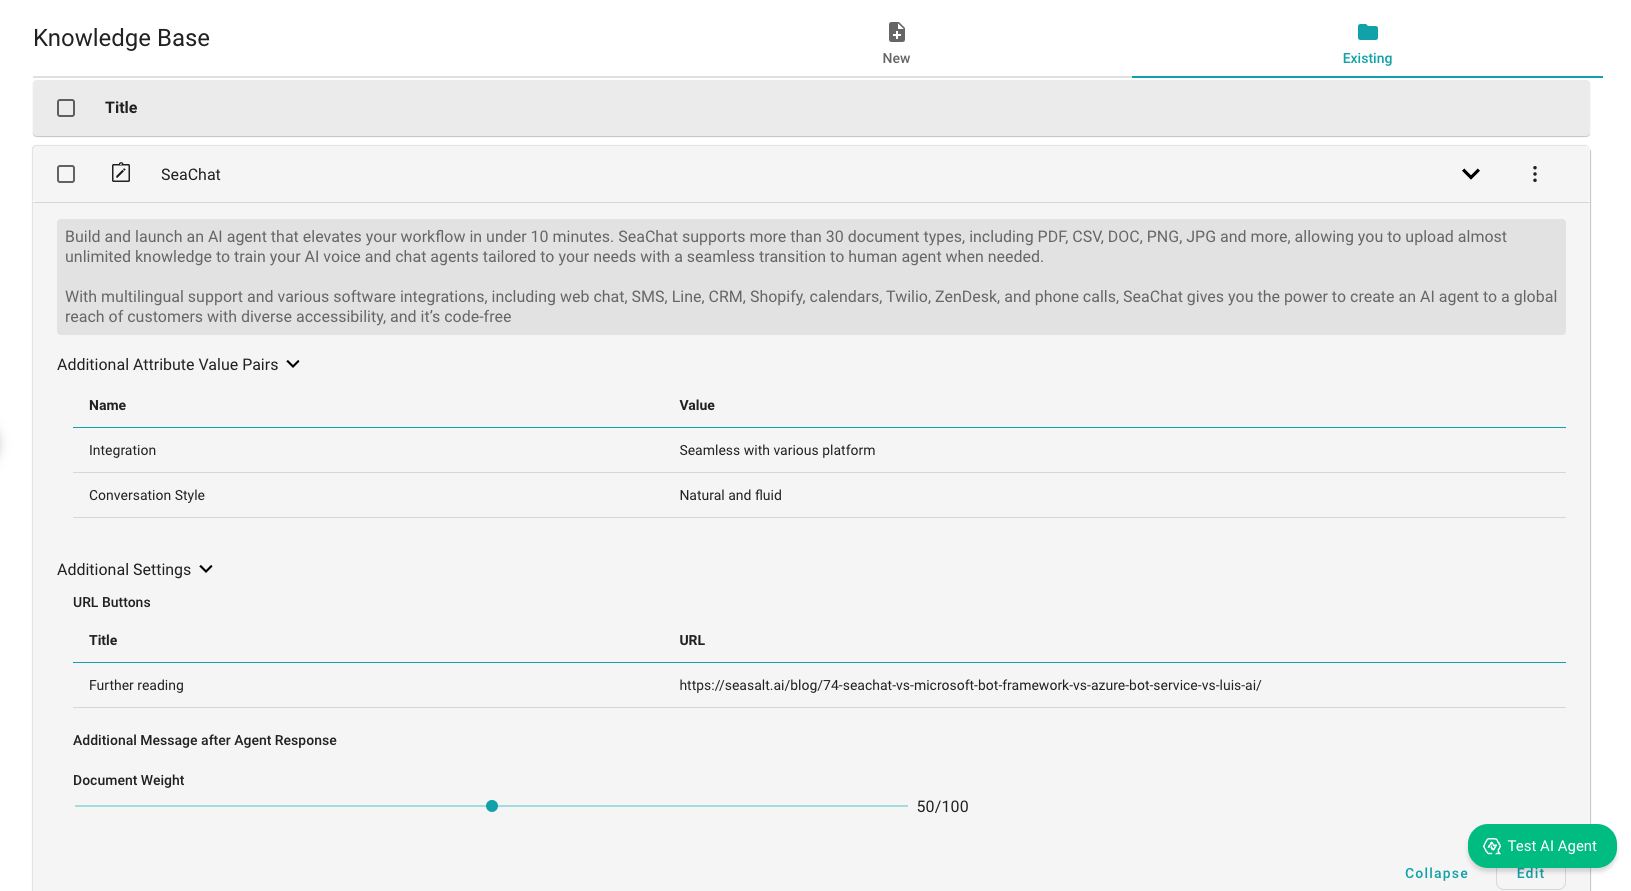
Review the uploaded content
Support
Need assistance? Contact us at seachat@seasalt.ai.