Agent Information
Overview
Agent information is the core of your AI agent. It contains all the necessary information about your agent, including its name, description, and other advanced settings like memory fields. In this tutorial, we will walk you through each of the attribute that you will find in Agent Information under Agent Configuration.
Basic Setting in Agent Information
SeaChat allows you to configure your AI agent’s information such as names, use case, and description. Inside Basic Setting, users can set the following fields:
Name
The name of your AI agent. This name will be displayed in the conversation window.
📄 NOTE
This will be the name of your agent for the purpose of agent management. If you wish to change the displayed name in your agent integration. Please refer to Webpage Integration.
Use Case
The use case of your AI agent. This will help you to categorize your AI agent. SeaChat provides a list of use cases to choose from. Depending on your needs, you can choose a use case that best fits your AI agent. Different use cases might require different description settings, but you can simply follow the instructions in the description section when incorporating a use case.
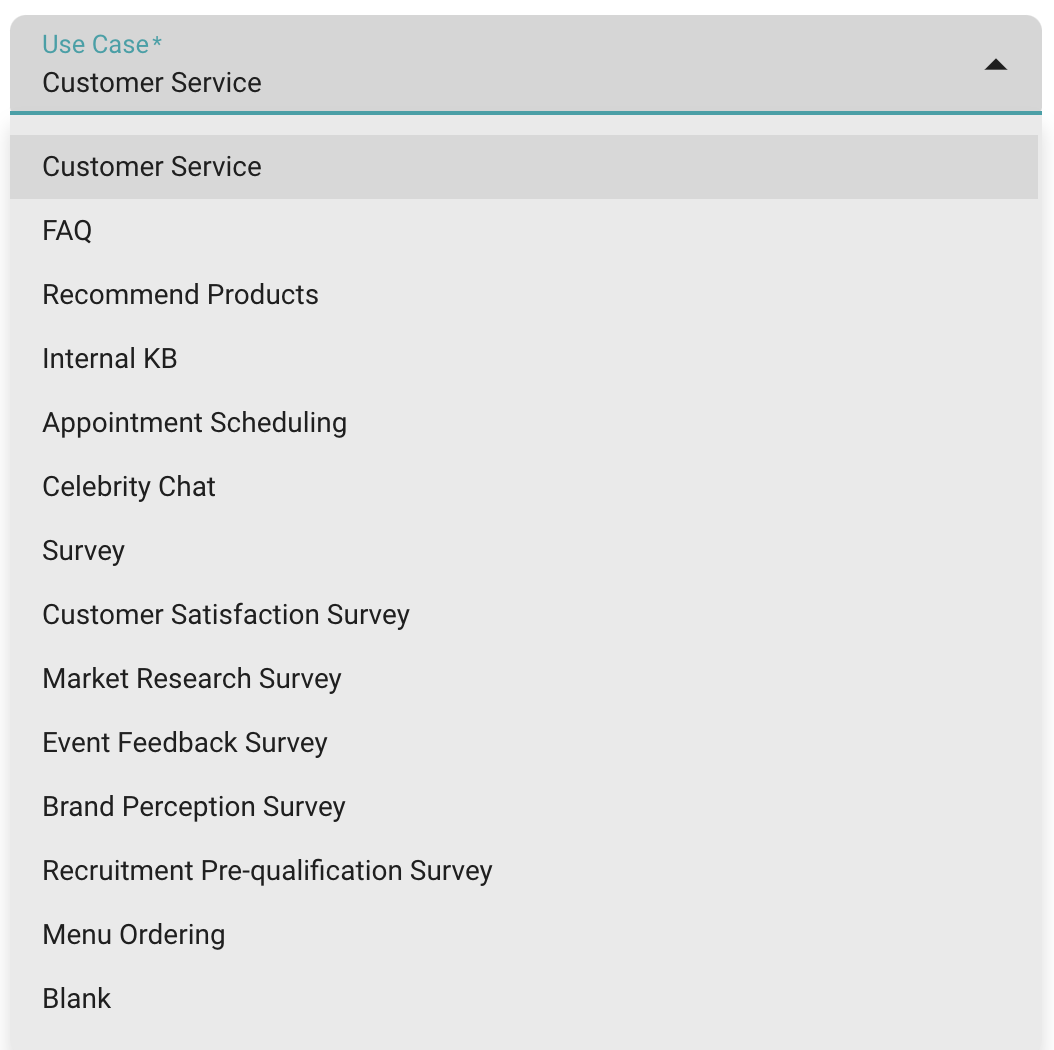
Choose a use case for your AI agent
Description
A brief description of your AI agent that details your agent’s behavior and its reference. Whatever you put inside the description field will show up in agent instructions on the right-hand side of the page. This description will then be used to prompt a language model to generate responses.
The use case comes with a basic prompt. Description is where you can customize the bot even more by appending/inserting a description about your agent into the prompt. To view full prompt, you can check the right-hand side of the page.
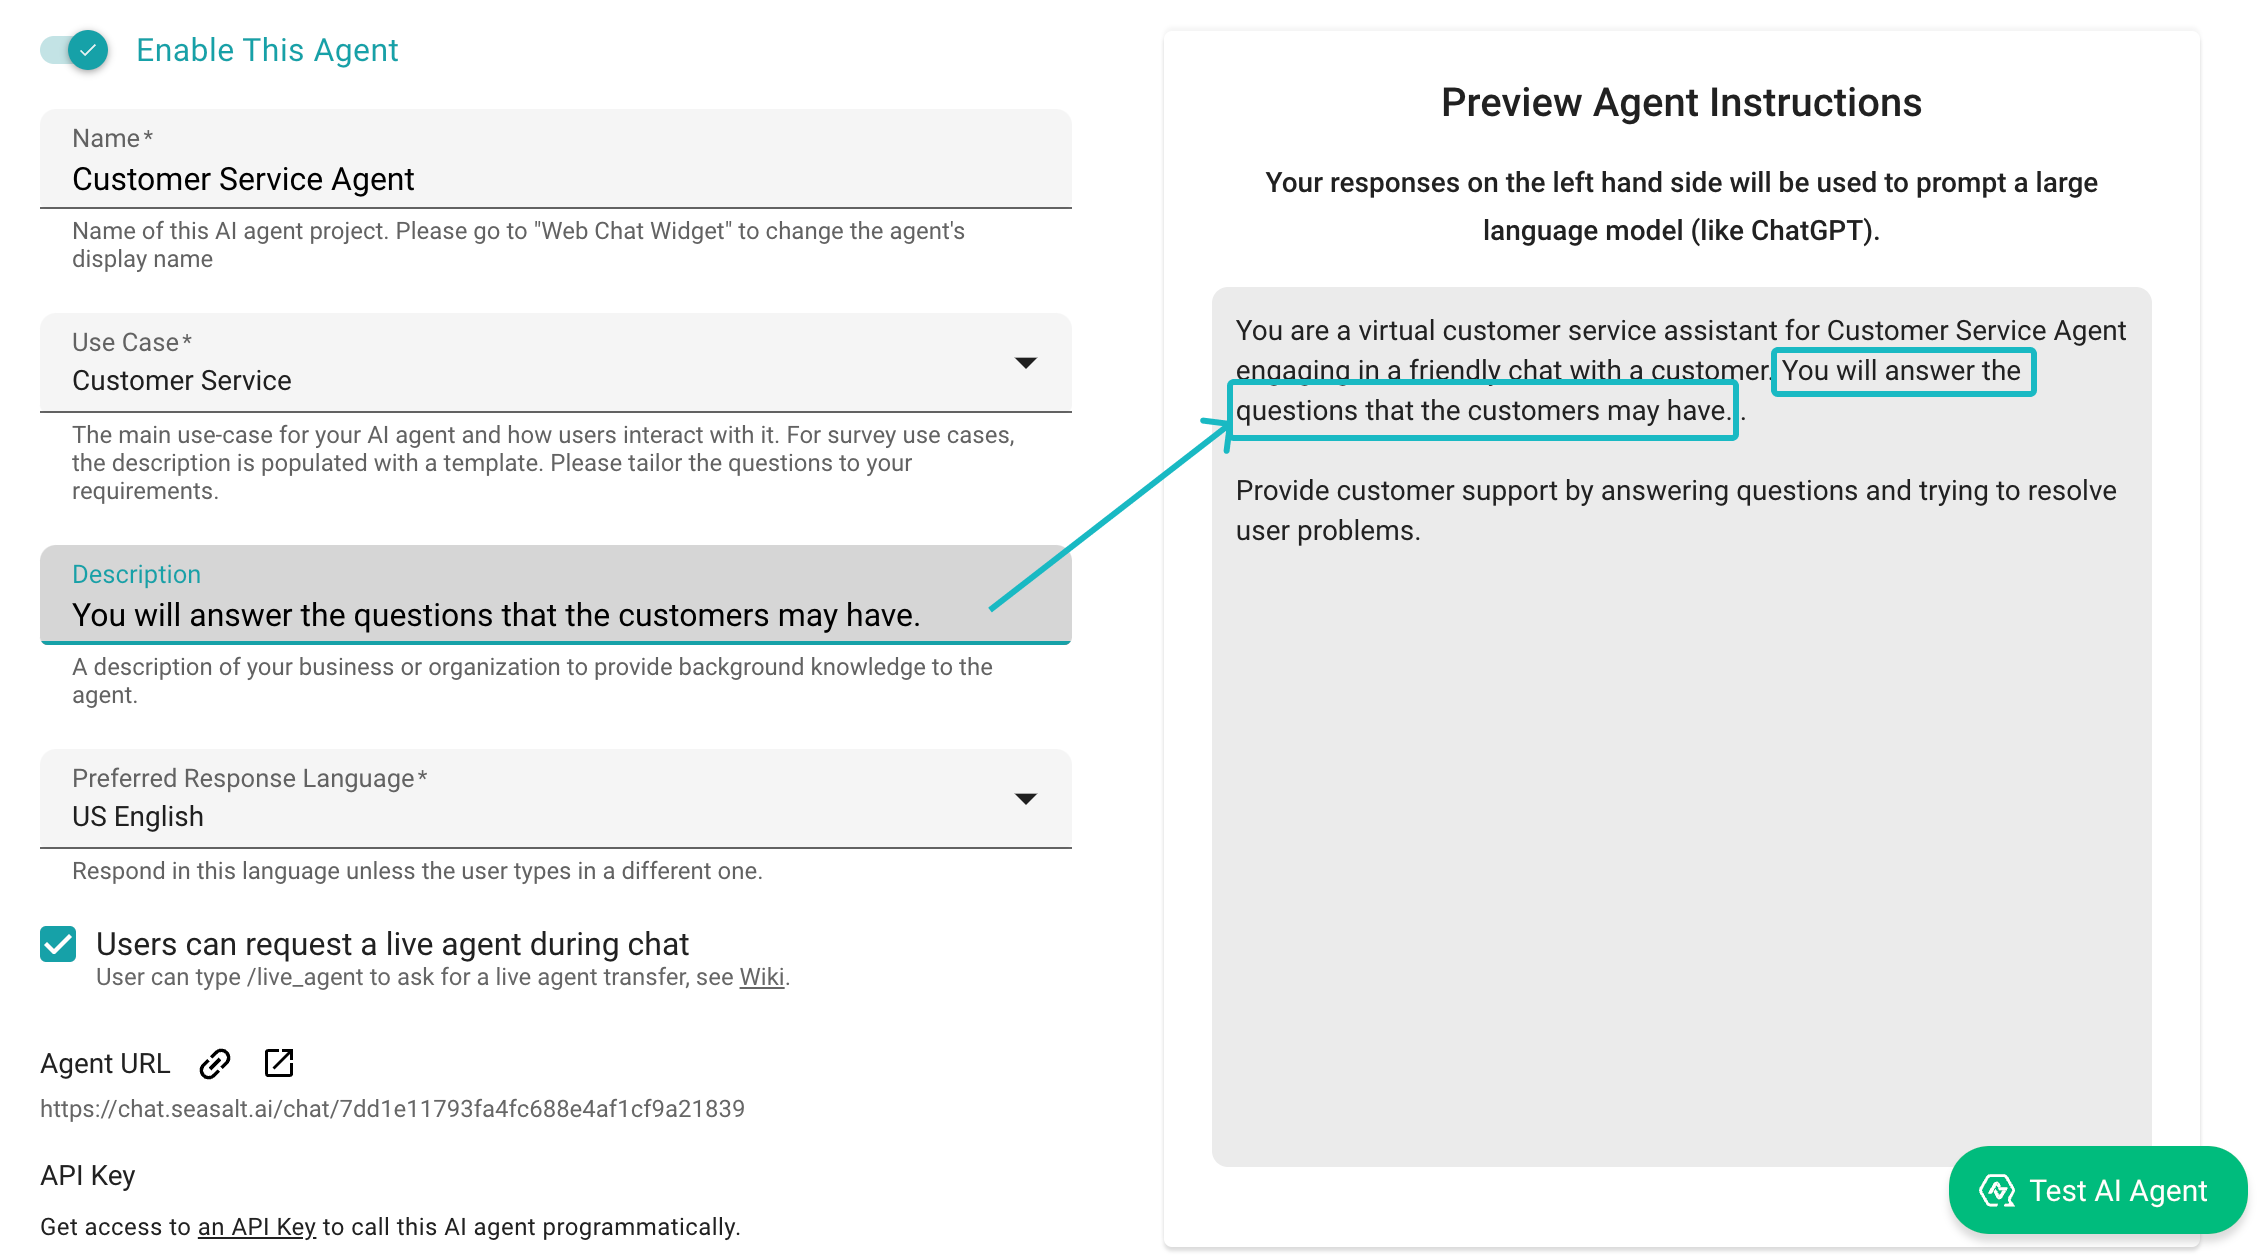
Agent Description
Response Language
The language the AI agent will use to respond to the user. If you want the AI agent to be multilingual and respond based on customer query language, you can choose, you can choose Always match user input language.
By choosing a response language, you can help frame the conversation and ensure that the AI agent responds in the correct language. This is especially useful when you have a multilingual audience. Take English language as an example, standard US English and UK English nuance in many ways. By setting the response language to US English, the AI agent will optimize the response to match the US English.
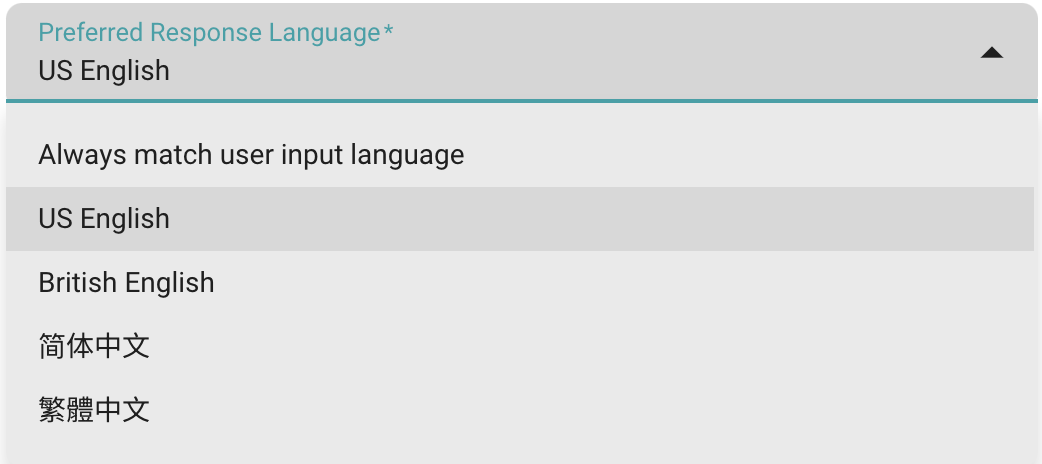
Agent's Response Language
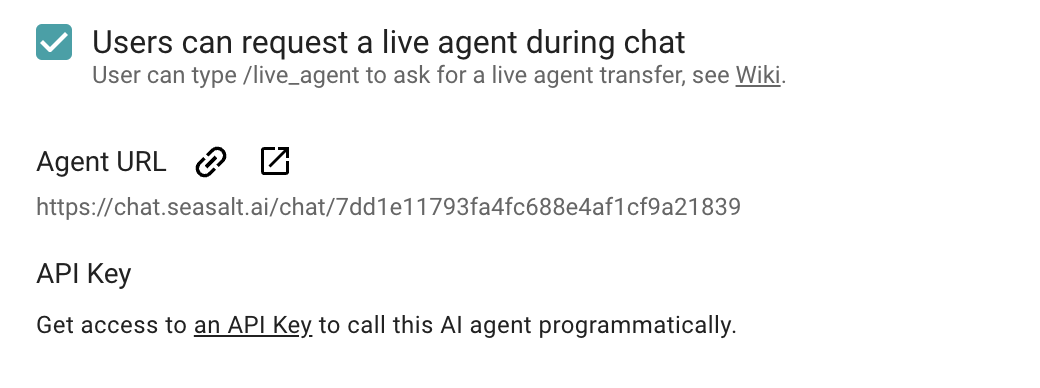
Live Agent
The live agent feature allows a human agent to intervene in the conversation when needed. If you enable this feature, your customer will have the option to request a live agent or leave a message during the chat conversation. This requires you to provide a real-human agent that will monitor and respond to the user.
You can disable this feature by unchecking the box such that your user cannot request a human agent during the conversation. However, SeaChat admins and agents can intervene in the conversation from the SeaChat Conversation section.
📄 NOTE
If no agent is online, the customer can leave a message. The human agent can review the conversation summary and respond during work hour.
Test your AI Agent
You can immediately test the AI agent that you have just built. In Agent URL, you can click the URL to interact with your AI agent in a standalone window.
Or if you wish to integrate your AI agent into your website, you can also access your API key in the API Key section. Please check out the Webpage Integration for more information on how to programmatically integrate your AI agent into your website.
Additional Options in Basic Settings
Chat Design Style
Style Settings
SeaChat allows you to design your own web chat widget. You can customize the chat widget to match your brand’s color scheme and style. You can choose from a variety of colors and styles to create a chat widget that fits your brand’s aesthetic. Everytime you make a change, you can preview the chat widget in real-time to see how it will look on your website by clicking on the Preview button.
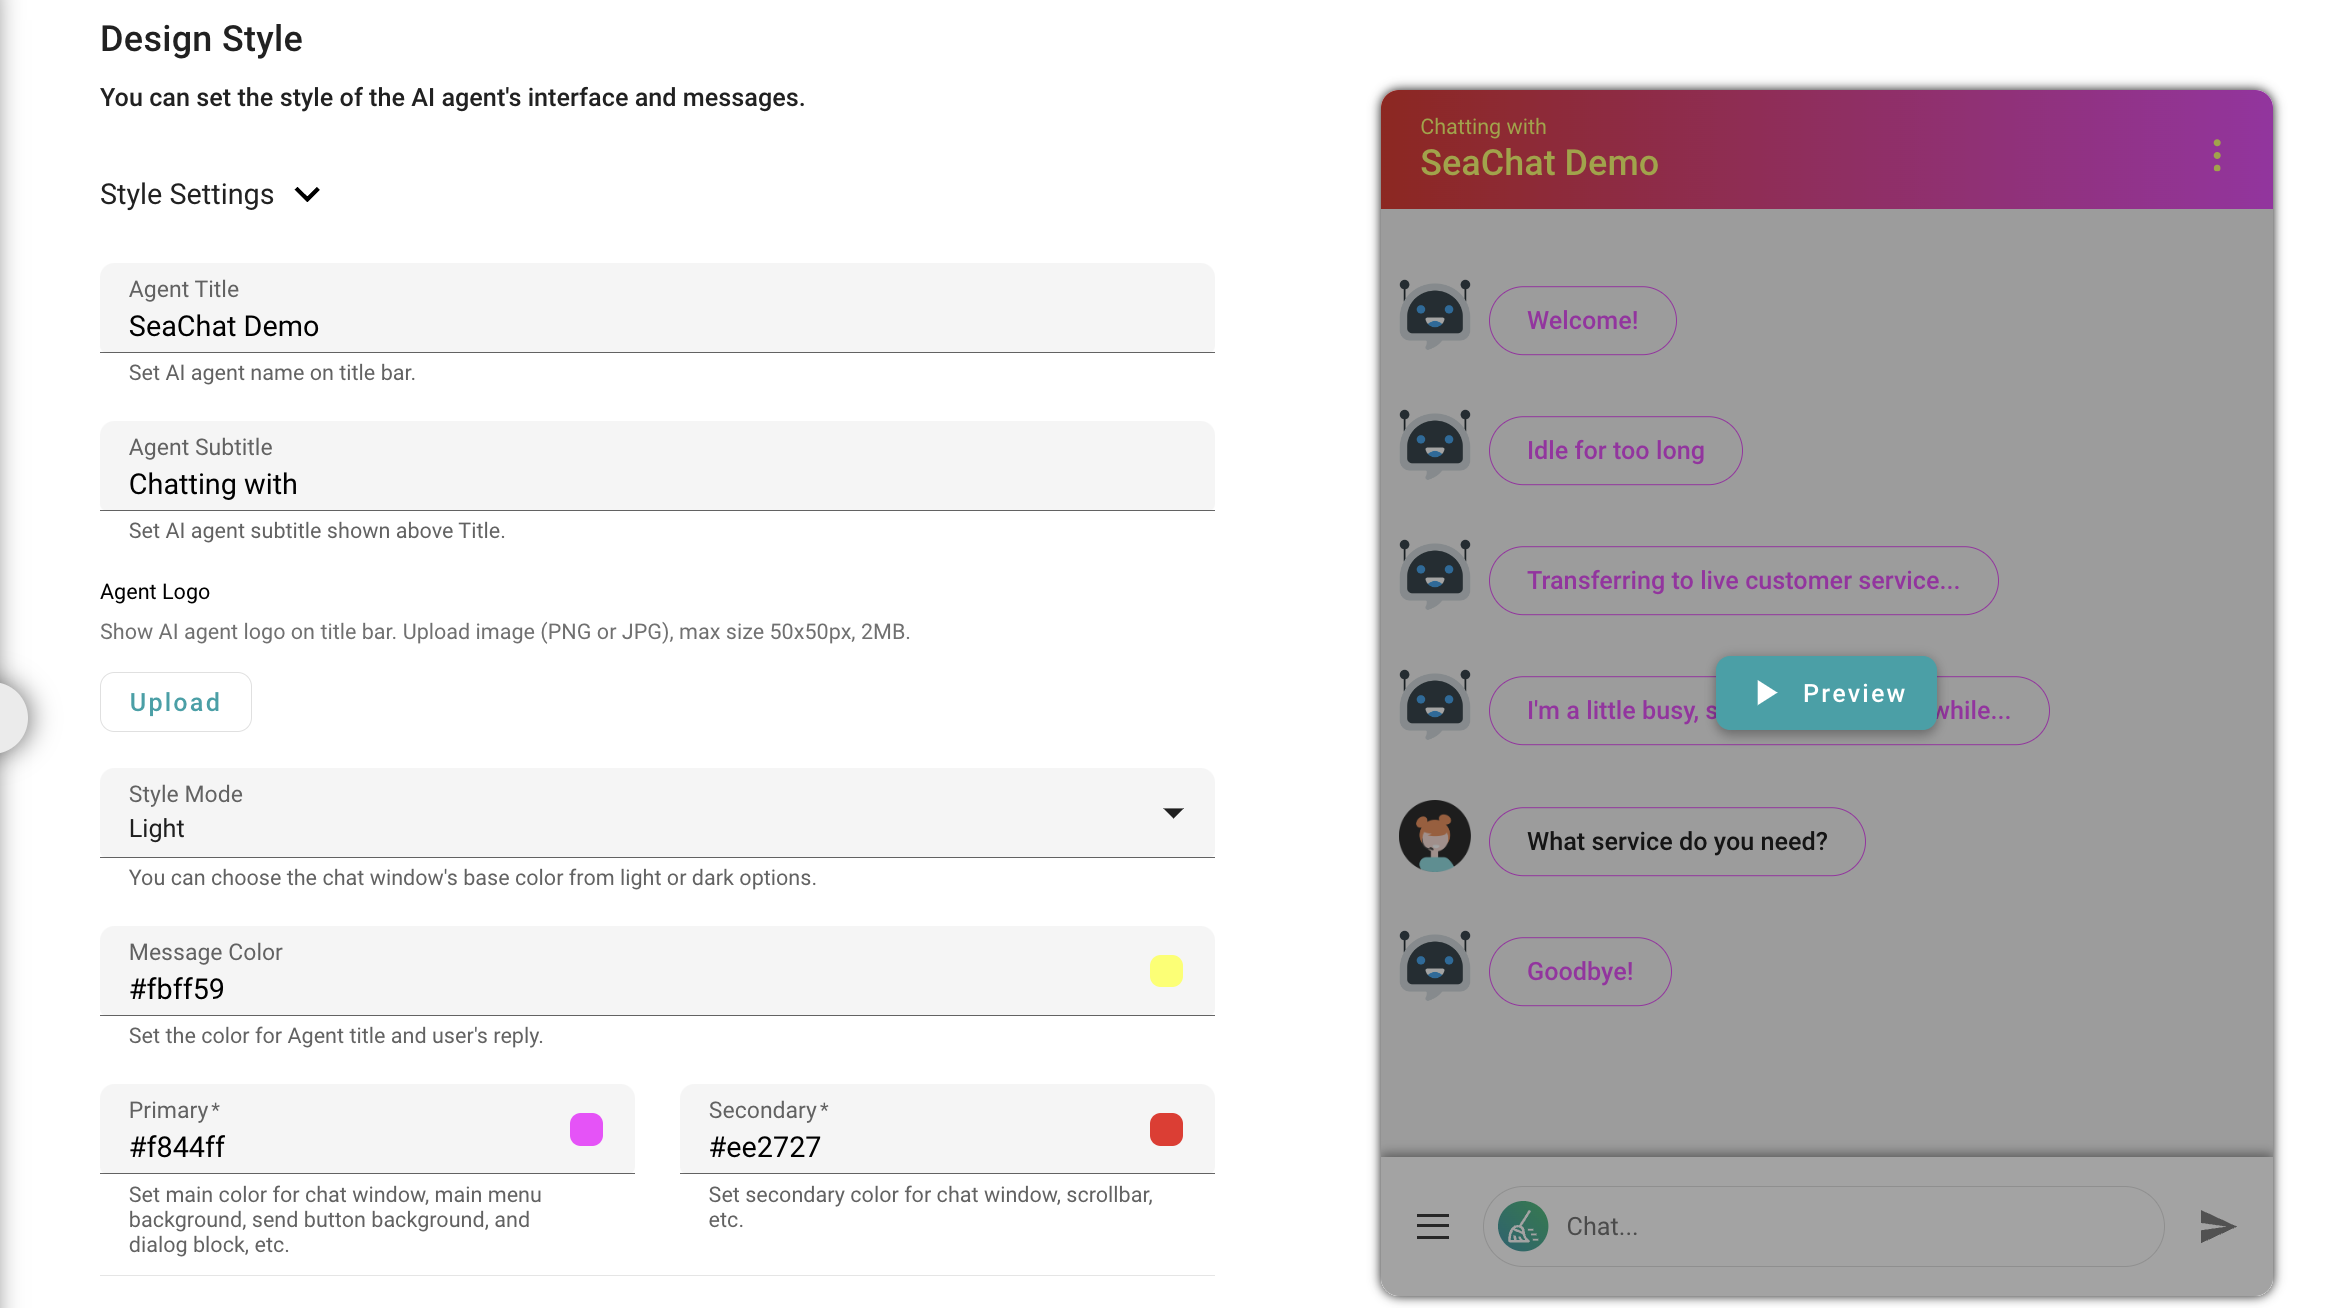
Customizable WebChat
Chat Settings
In addition to the style settings, you can also customize the chat settings. This feature can reduce the amount of time that your AI agent editor spends on basic conversational trainings. You can set the chat settings to automatically set-up the conversation flow, such as greeting messages, conversation start messages, and conversation end messages.
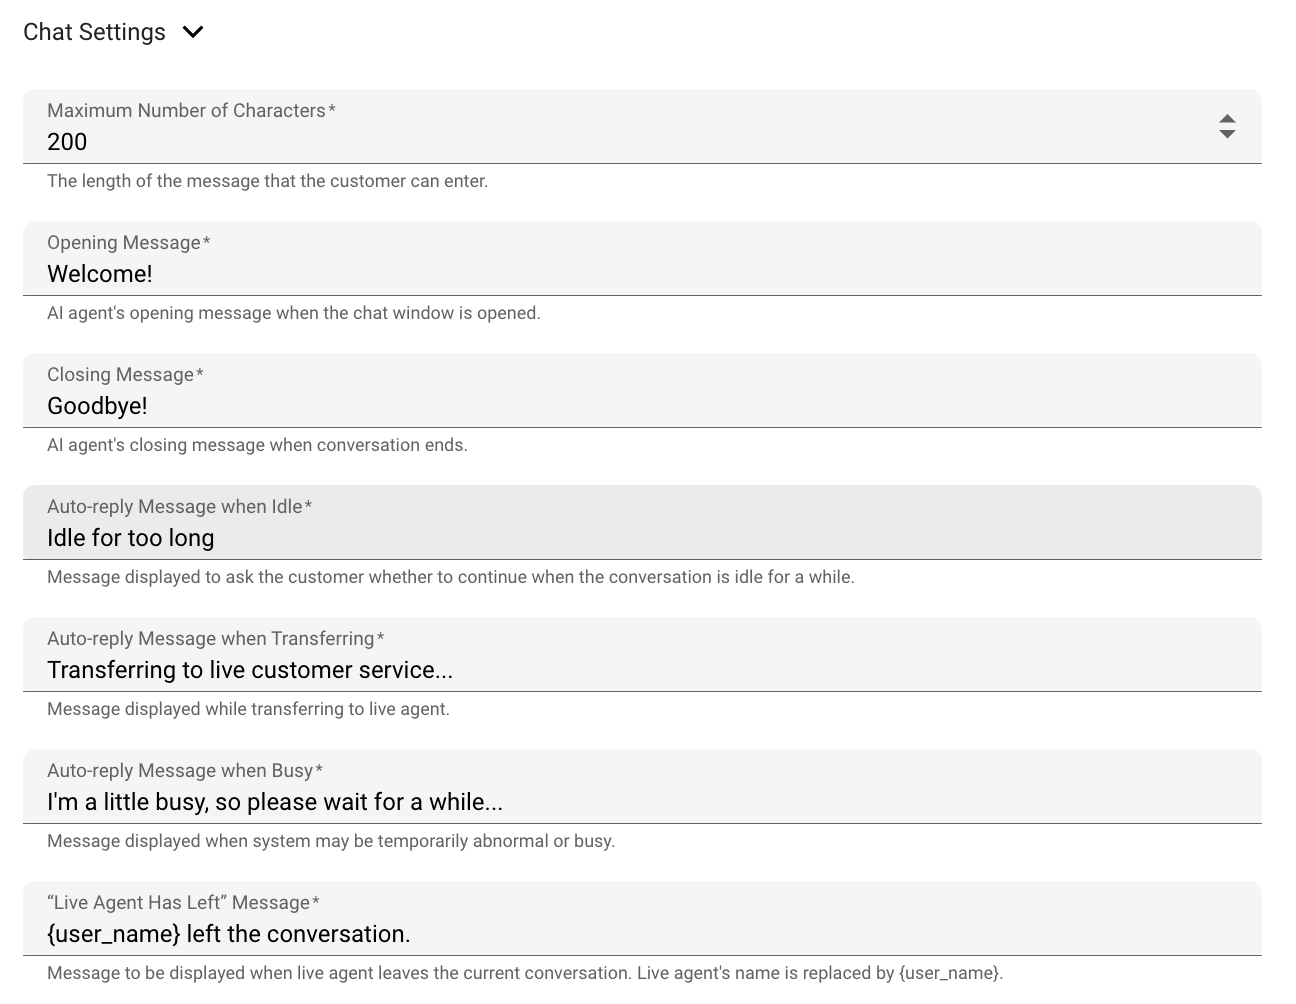
Personalized Chat Settings
Advanced Settings
We suggest you to refer to the Advanced Settings tutorial to learn more about the advanced features available in SeaChat. For feature such as Agent Memory and Retrieval Augmented Generation (RAG), you can find them in the Advanced Settings section under Agent Information.